This post may contain affiliate links. Please read our disclosure policy.
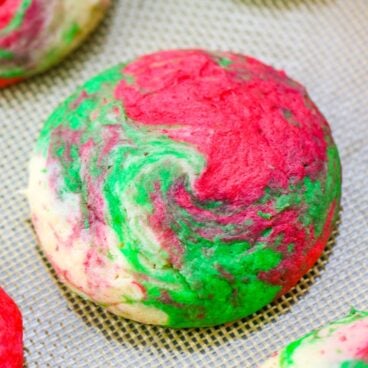
These Christmas Cheesecake Cookies are creamy and tender, with just a hint of peppermint. The red, white and green swirls are sure to make them Santa’s favorite cookie and the star of your Christmas cookie exchange!
You’ll definitely find these cookies on our round-up of deliciously quick and easy Christmas treats.

Hey guys! Sam back from The Culinary Compass! I love a festive cookie and couldn’t resist to recreate these Patriotic Cheesecake Cookies with Christmas colors! It was a no-brainer to create these Christmas Cheesecake Cookies with red, white, and green! The best part is the hint of peppermint that really brings in the holiday season.
How to Make Christmas Cheesecake Cookies
The recipe is based off of the viral Cheesecake Cookies that Kristin made, and they’re SO easy to throw together and incredibly delicious. The cream cheese makes them light and fluffy. I’m always excited to make a batch of these yummy Christmas cookies, but never want to share!
The dough comes together quite easy, using just a few ingredients:
- cream cheese
- butter
- sugar
- eggs
- vanilla extract
- flour
- baking powder
Once combined, I recommend refrigerating the dough for 30 minutes or so because it can get a bit sticky. Then comes the fun part – adding color to the Christmas cookies!

Tips for Making Cheesecake Christmas Cookies
- The key to getting the dough to swirl easily without muddying the colors is to chill the dough. I can’t stress that enough! The dough will be sticky and turn brown as soon as you mix colors together if you allow it to come to room temperature. So if you find yourself getting frustrated with how sticky the dough is, throw the dough into the freezer for 5-10 minutes and it’ll be a lot easier to work with!
- I also didn’t want to overwhelm the cookies with too much peppermint so I only included peppermint extract in the green dough. It’s enough to give a hint of peppermint while still allowing the cheesecake flavor to shine through.
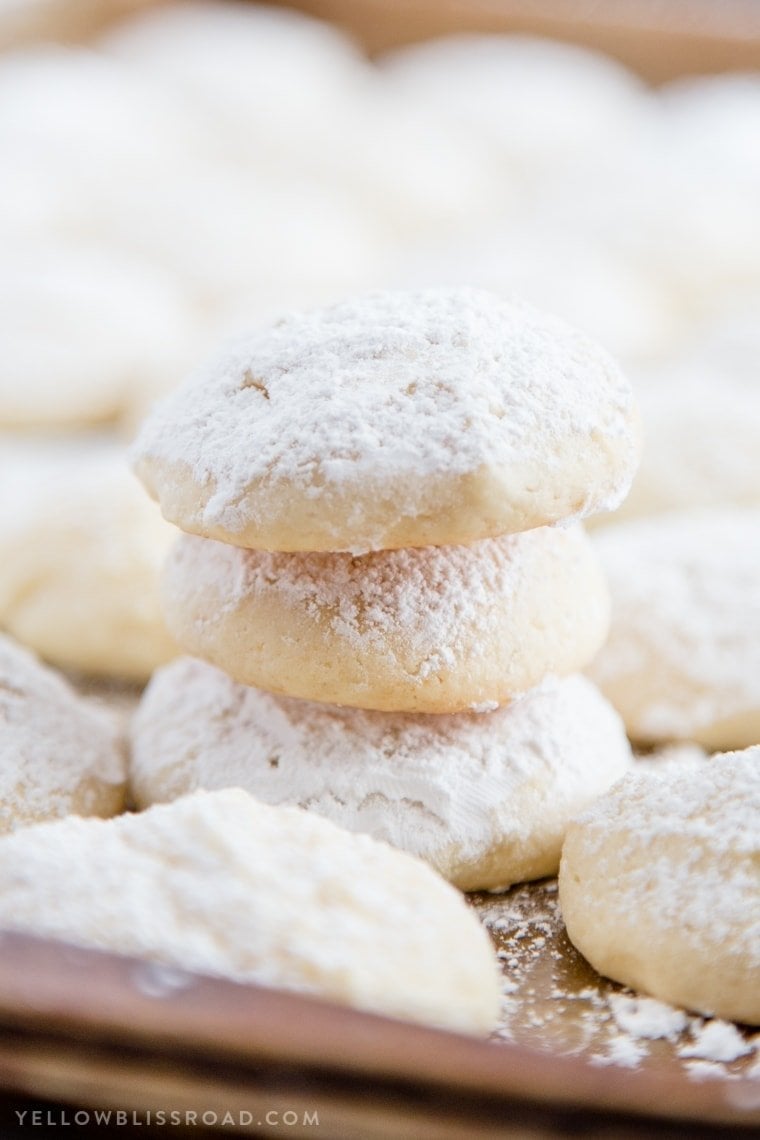
- They would probably be delicious dipped in chocolate too if you like that combination! I wanted to leave the swirls showing so I didn’t powder them with powdered sugar, though, that is definitely an option too!


More Festive Christmas Cookies
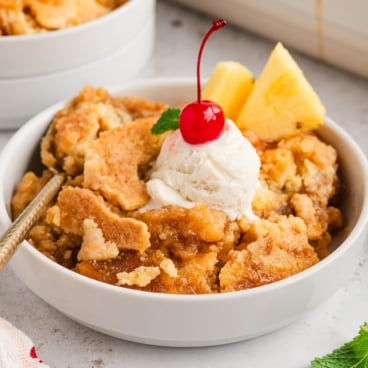
- Fruit Pizza
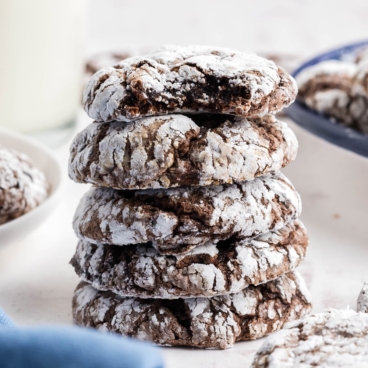
- Chocolate Cheesecake Cookies
- Christmas Cookie Pinwheels
- 50+ Festive Christmas Cookies
- Easy Snowball Cookies Recipe (no nuts)
- Red Velvet Cookies
- Chocolate Peppermint Slice and Bake Cookies
- Peppermint Fudge
- Peppermint Cheesecake Brownie Parfaits
- Sugar Cookie Dough Dip
Tools used to make these Christmas cookies:
Silicone Spatula – Perfect for scraping the sides of the bowl.
AirBake Cookie Sheets – Air insulation prevents top sheet from overheating which prevents burning.
Silicone Baking Mat – Your cookies will slide right off of this perfect baking mat, no sticking!
Christmas Cheesecake Cookies
Ingredients
- 8 oz cream cheese room temperature
- 1/2 cup butter room temperature
- 1 1/4 cup granulated sugar
- 2 eggs
- 1 teaspoon vanilla extract
- 2 1/2 cups flour
- 2 teaspoons baking powder
- 1/2 teaspoon salt
- Red and green food coloring
- 1/2 teaspoon peppermint extract
- Optional: powdered sugar
Instructions
- Preheat oven to 350 degrees F. Line 2 baking sheets with parchment paper or silicone mats.
- Beat cream cheese and butter together at high speed until fluffy and smooth; 1-2 minutes. Add sugar to the butter mixture and beat until fully incorporated and fluffy; 1-2 minutes. Beat in the eggs and vanilla; 1 minute.
- In a separate, medium-sized bowl, whisk together the flour, baking powder and salt. Gradually add the dry ingredients to the butter mixture and stir just until incorporated. Do not over-mix.
- Separate the dough into three small bowls. Refrigerate for 15 minutes.
- Once chilled, add in food coloring and incorporate into the dough until your desired color is reached. Add the peppermint extract to the dough you’ll be adding the green food coloring to. Dough will still be sticky, but easier to work with! If you find it’s hard to work with, put back in the refrigerator for a few minutes.
- To create a cookie, take ½ tbsp of each color dough into your hands and roll together between the palms of your hands to create the marbling effect of your choice. Be careful to not over incorporate to avoid mixing the colors too much. Repeat for the rest of the dough and place on prepared baking sheets.
- Bake at 350 degrees for 10-11 minutes. Cookies should be light in color, not browned, and just starting to brown on the bottom. *Length of baking time may vary from oven to oven.
- Cool cookies on the baking sheet for a few minutes before transferring to a wire rack to cool completely.
- Optional: Dust with powdered sugar!
Notes
- Store in a tightly sealed container for up to a week, or in the freezer for up to 3 months.
- The vanilla smooths out the flavor, but for a more tart, cheesey flavor, add a teaspoon of lemon juice or no extracts at all. The peppermint can also be left out or replaced.
- Do not overbake. This can cause the cookies to come out more dry and biscuit like.
Nutrition
Be sure to try our original Cheesecake Cookie recipe! They are light and fluffy, creamy and tender! Be sure to read through all the tips and tricks to make the perfect Cheesecake Cookie!

The dough was a huge pain to work with. Kept in fridge 20+ mins then after still being sticky I put in freezer about 10 mins. This was after I put in food coloring. When combining dough colors the food coloring bled everywhere and I felt like I was rinsing my hands after every cookie. How can I prevent this next time? Also the consistency seems okay, a little soft in middle, but tastes nothing like cheesecake.
I would love to dip these in chocolate but I don’t know how to make the chocolate dip..could you please tell me how?
Try using the Wilton Candy Melts. The instructions on right on the package. Melt, dip, and place the cookies on wax paper so the chocolate can harden. Comes out delish!
I’m just finishing up my last batch of these cookies. Based on some of the prior reviews, I decided to make a few adjustments to avoid potentially bland cookies. I chopped about 1/4 to 1/2 cup of white chocolate chips and added these to the white dough. I tend to like peppermint, and divided the 1/2 tsp between the red and green to make sure the flavor went throughout. I’m really glad that I did this because the dough was very sticky (especially the green for some reason), so I couldn’t get a swirl effect, and it’s more like the 3 colors are mashed together. The cookies still look good, and I think they would have been muddy if I tried making them more swirly. I kept the green dough in the freezer and put the white and red in the fridge when I didn’t have them out. I rolled 6 cookies at a time to keep the dough from getting warm. My family likes how they taste, and I’m going to freeze most of them to mix with other cookies as needed. I’m not sure if I’d make them again because I could only get about 30 cookies despite trying to make small portions of each color. With them so sticky, it was hard, and this is a little more time intensive than I had hoped.
Yes, they can be a little more time intensive, but I’m glad you stuck it out.
Keep em coming hun. I’ll keep trying your receipts out..
These were a huge hit cant wait to do again but will double as I couldn’t keep them every1 loved
Yay! So glad you enjoyed them!
Agree with those that say these cookies are too bland. No real cheesecake taste. Won’t be making again!
Sorry Carol the recipe didn’t work out for you, but thanks for sharing your feedback.
I’m going to do ASAP
I usually make a few different cookies so I can give out a variety of cookies at Christmas, how do these hold up? Do you refrigerate them after baking? Or store in container?
I would wrap them in wax paper or parchment before adding them to a cookie box, and make sure they are completely cooled.
I have a question. Do you still use the tspn of Vanilla Extract if you use a tspn. of lemon juice?
No, the lemon would replace the vanilla flavoring.
Overall these cookies were pretty good. I taste-tested them with my nephew and brother-in-law, and both liked them. To me, the cookies didn’t flatten and remained overall lumpy. I probably should have left the dough in the fridge longer than the recommended 15 minutes because it was very hard to swirl the three colors together. Perhaps I should have tried to shape and flatten the cookies before putting them in the oven. As for taste, I didn’t find the mint overpowering at all, but I did find the cookies to not be very sweet. They also have a “not quite baked” texture to them, and I kind of worry that my relatives will fear I’m giving them semi-raw cookie dough!
If I make these again, I will try to flatten and shape the cookies and perhaps leave them in the oven longer than 11 minutes. They are SO soft and doughy.
I made them and they were VERY sticky, so i couldn’t form a ball to mix them together. Tasted good, though.
I had high hopes for these cookies. Refrigerated the dough overnight, but it was still extremely hard to work with. I cooked them for a few extra minutes because they appeared doughy. They are slightly burned on the bottom, but did cook nicely through the middle. They look festive, but don’t have much taste at all. They taste like slightly minty biscuits.
Do I bake the cookie dough on the parchment paper covered cookie sheet?
I was so excited to try these cookies but although they look pretty, they definitely disappoint in flavor. Not worth the effort folks!
I just make these for my work today for our Christmas party they don’t taste sweet so I don’t know what I did wrong they do taste doughy I had a sprinkle powdered sugar to give it a little sweetness And my colors were in that vibrant.
I I am looking forward to trying these cookies. I have read the comments and think these maybe a challenge. I created a cheesecake recipe that everyone is nuts about. At work someone asks me when I am making it at least a 3-4 times a week. Gave my recipe out and the one person who made it didn’t follow the recipe correctly and no one likes it. Really made her mad. I don’t know where she went wrong and it made me feel bad.
Barbara, you are so right! No two kitchens are alike and interpretations can vary. I wish you good luck!
This recipe didn’t work out for me at all. I followed the recipe to the letter. They turned out dense, tasted like flour even with the mint and they puffed right up and they were supposed to be much flatter. We cooked them for 21 minutes before they seemed cooked enough. They’re just terrible. In the garbage they they went!
21 minutes is way too long to have baked these cookies, and would be the reason they came out dense. Always follow the recipe exactly, even the bake time, at least once before trying to switch anything up.
These are so good. I am thinking of making chocolate mint next time!
Just finished baking these. They were a lot of work (due to the rolling 3 tiny balls, then rolling one big ball), but I would definitely make them again. They are super cute. Not a strong flavor to it, but it’s a good cookie if you have several other flavorful cookies on your cookie tray. I did not use peppermint extract, I used almond. Next year, I’m going to plan to bake this cookie when I have little helpers around to help me form the cookies. The baking time was right on…be sure to read that the cookies are to stay light, they will brown on the bottom. Overall, I’m very happy with this cookie. They are also great because you can always adjust the colors and the extract. Thank you!
Thanks for your feedback Beth!
I guess there are a lot of terrible bakers here or just a lot of complainers because these cookies have become household name. I am actually getting request to get paid to make these cookie. I don’t use the peppermint or the granulated sugar. I have no problems. I have read that they come out sticky NEVER HAPPENED TO ME, I used my hands to mix the color and NEVER STAINED MY HANDS, I have never had the problems above. Preheated oven, used parchment paper, I have tried with both sugar on top and without. I’ve tried with him without food coloring and they come out great. The only thing I have never used as the peppermint. I’ve made them gluten free and regular and both are perfect. Of course, I have had trouble baking things that others bake well and I’m a good baker. I’m terrible at making pancakes. I’ve tried to make coconut cakes before and they come out terrible. I am currently making two batches of them for tomorrow’s WREATHS ACROSS AMERICA after party. Our American Legion Post has an attached cemetery. Every year this event grows larger. We place Christmas Wreaths on the headstone of our Sons of the American Legion veterans cemetery. Usually I bring cream cheese brownies, but since our even has grown, I’m having to step up on my game. I will be sizing down the cookies and doubling the recipe. I’m confident that they will turn out perfect again. I think the key to this is having patience. Maybe you don’t want to be stressed out and rushing to make these last minute. Also I’ve been stressed out and rushing making these last minute and they still turn out perfectly.
Hi Tiffy! Thank you so much for your comments and for sharing your suggestions. And thank you for what you do for our service men and women.