This post may contain affiliate links. Please read our disclosure policy.
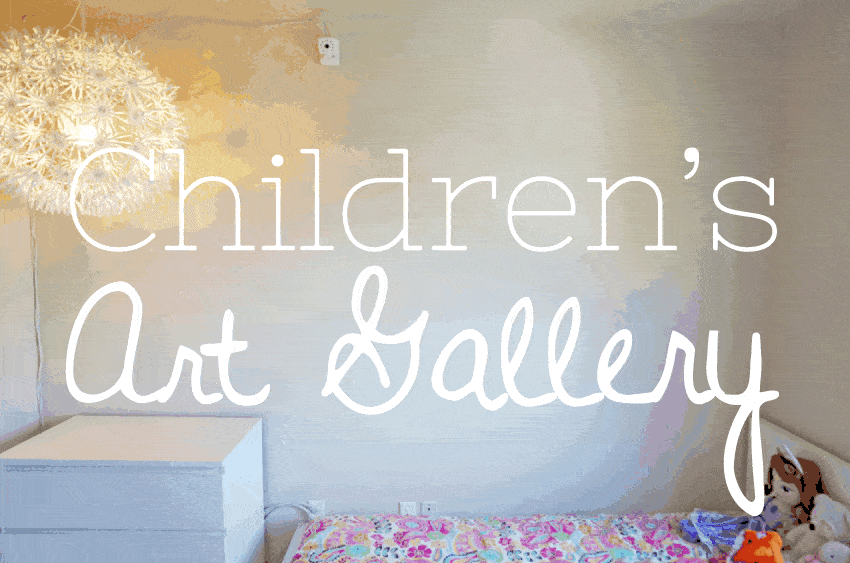
Hi everyone! Heather here, from The Caterpillar Years, and this month I’m sharing a practical and beautiful solution for showcasing all that artwork your kids create! I’d love to hear what you think!

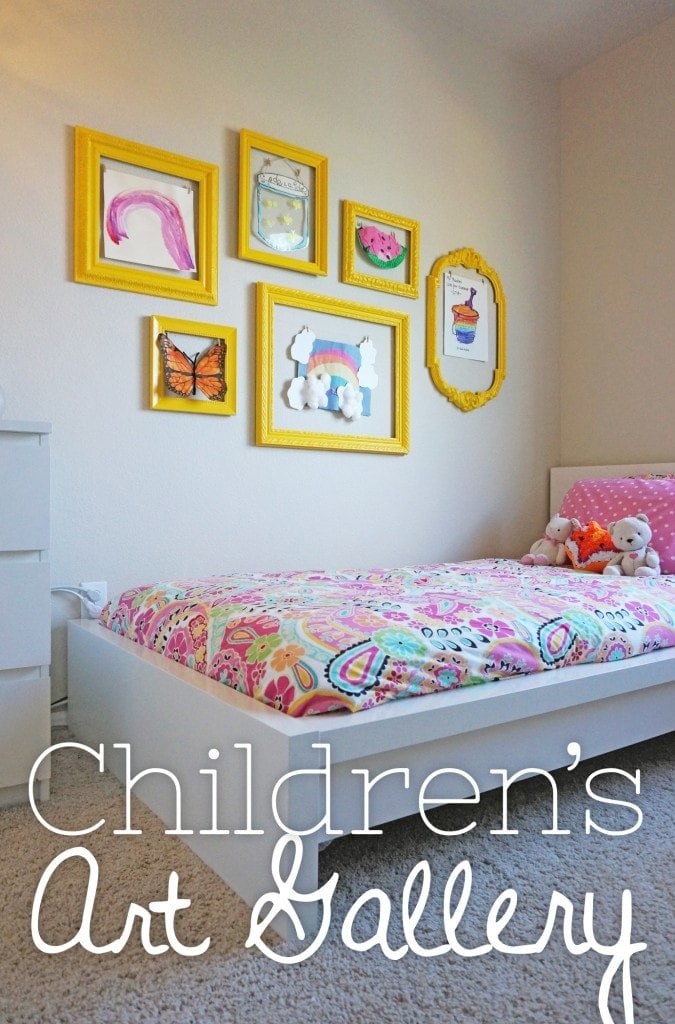
Like so many five-year-olds, my daughter Adelaide is a prolific artist. We ran out of fridge space a long time ago and since then, I’ve been looking for new ways to showcase her favorite masterpieces.
I love seeing her artwork in frames, but at the rate she creates artwork, putting everything in traditional picture frames would mean framing and un-framing art at least once a week. Not to mention the cost of frames…yikes!
She recently resorted to using tape to hang her favorite pictures on the big blank wall in her room, but now I’m going through rolls of tape faster than an elementary school! Something had to be done…
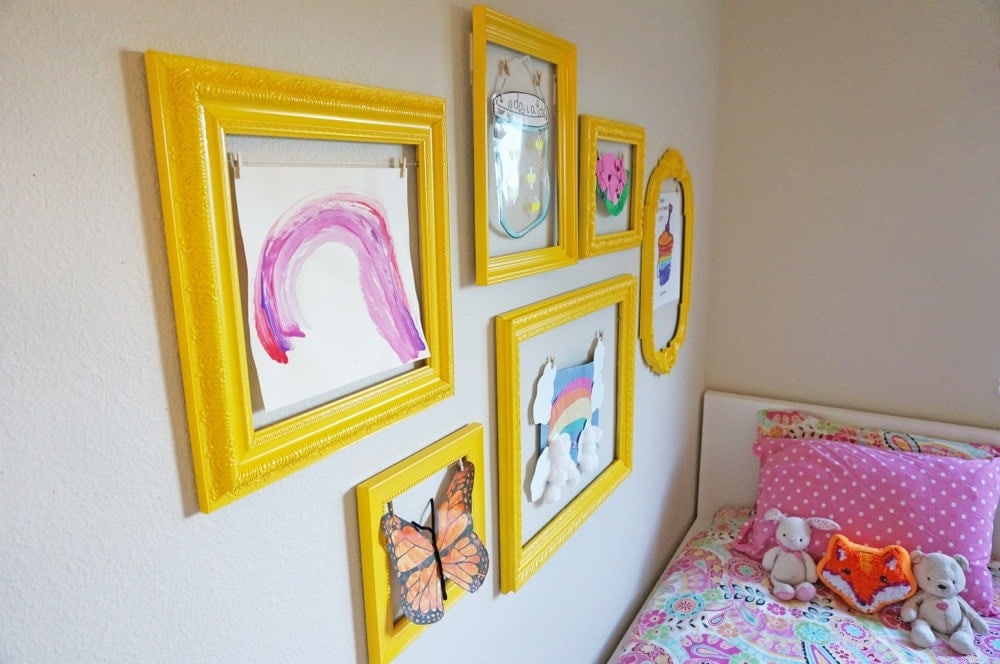
So this is my solution—a DIY art gallery, using empty frames, monofilament (fishing line) and clothespins. Her artwork is framed AND she can change it out whenever she likes, without needing additional supplies or my help! Now that’s what I call a winning solution!
Here’s how to make a children’s art gallery of your very own!

- Frames – quantity and size depend on your wall space
- Spray Paint Primer – I used Rust-Oleum Painter’s Touch 2X Ultra Cover Flat White Primer
- Spray Paint – color of your choice—I used Rust-Oleum Stops Rust Glass Protective Enamel in Sunburst Yellow
- ⅝ inch Screw Eyes (aka eye hooks, two per frame)
- Monofilament
- Clothes Pins – I used tiny 1″ clothes pins by Woodsies
- Picture hanging nails or Command Picture Hanging Velcro pack
- Tools that may come in handy:
- Utility Knife
- Flathead Screwdriver
- Needle Nose Pliers
- Hammer
- Wooden Skewer or Chopstick
- Scissors

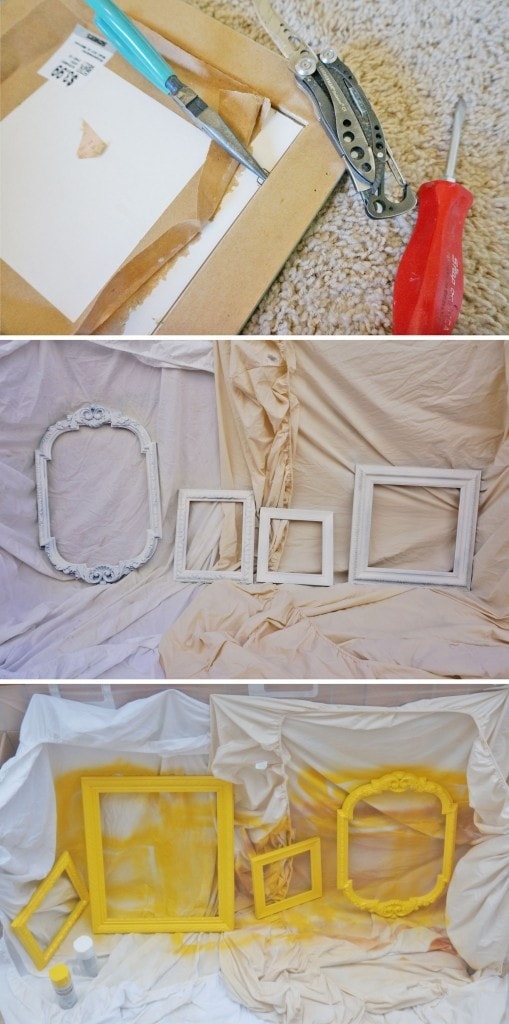
I had one frame in my garage, waiting for a purpose, but the rest were sourced from my local Savers (Goodwill, Salvation Army or other second-hand stores are good sources for cheap frames as well). Don’t shy away from frames with finished art inside—these are often higher quality frames and are just as easy to disassemble—just use a sharp knife to cut the paper backing, then pliers and a flat-head screw driver to remove the nails and/or staples keeping the artwork in place. Finally, remove the glass and voila! An empty frame!
Wherever you get your frames, make sure they’re made of wood, or you’ll have difficulty getting the eye hooks to screw in.
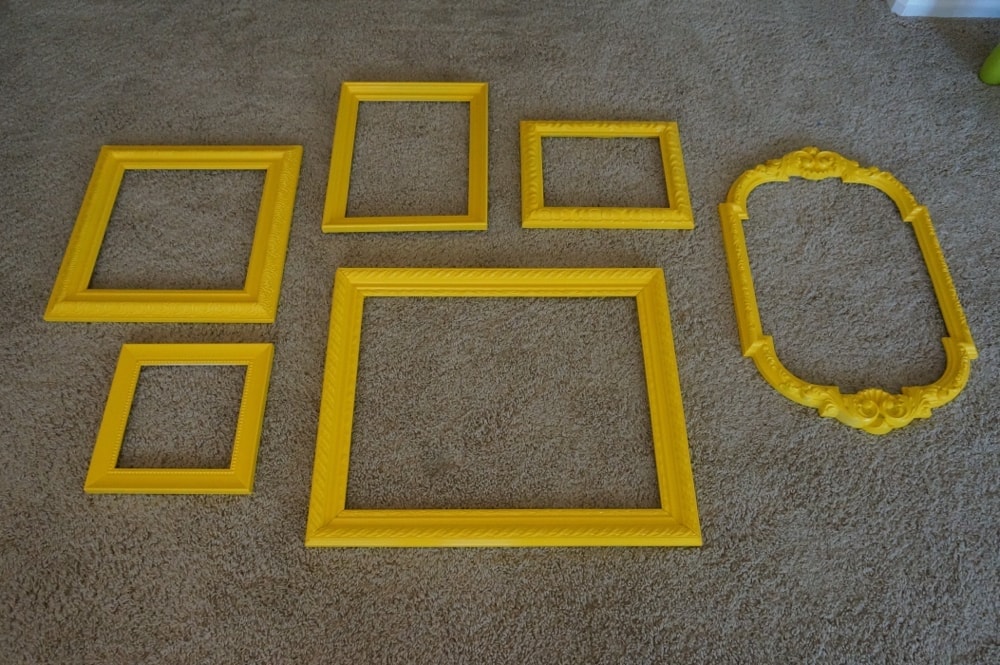
Once your frames are prepped, it’s time for paint! Add two coats of primer, and several light coats of spray paint in the color of your choice.

Once your frames are dry, the real fun can begin! It’s important that you figure out your frame layout, so you know which orientation you’ll be using for each frame (portrait or landscape).

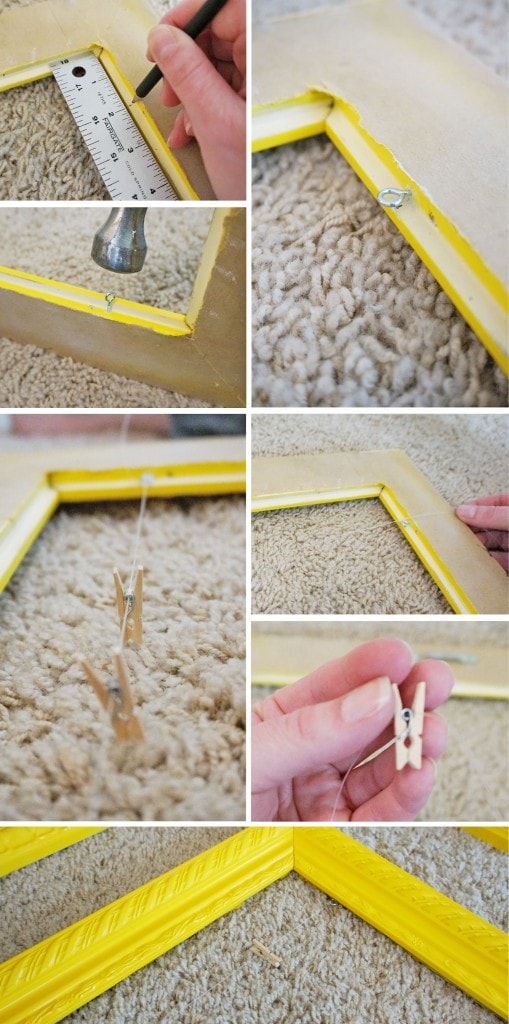
Measure and mark the place on each side of the frame where you want to screw in the eye hooks. Since the eye hooks are so small, I found it helpful to use a hammer to gently tap them into place. Once the hammer started the process, it was easy to screw the eye hooks in the rest of the way. Depending on the hardness of the wood, you may want to employ a wooden skewer or small screwdriver to help you with this part.
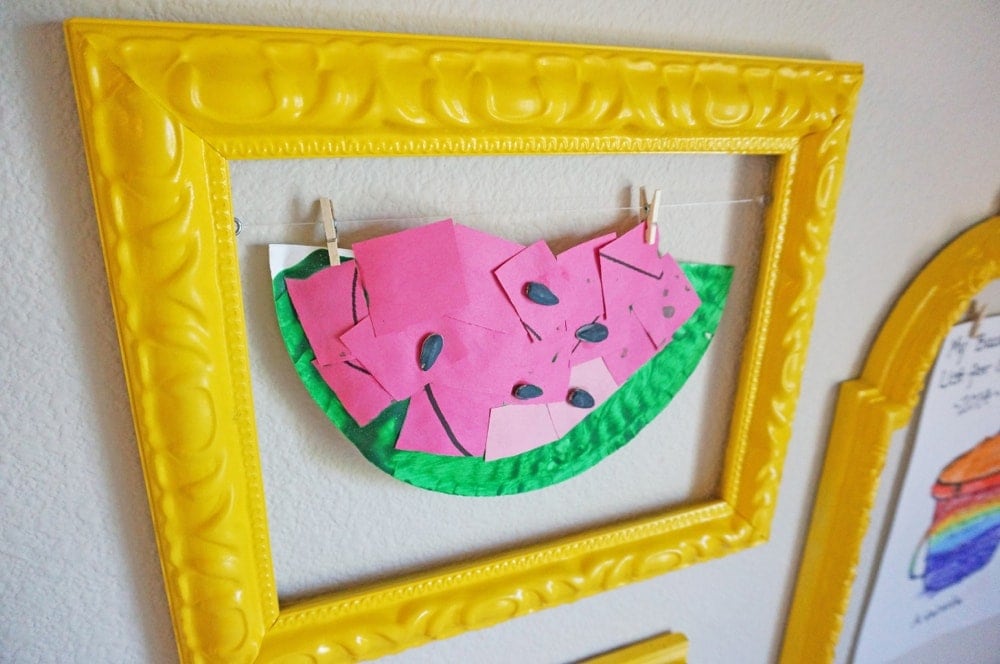
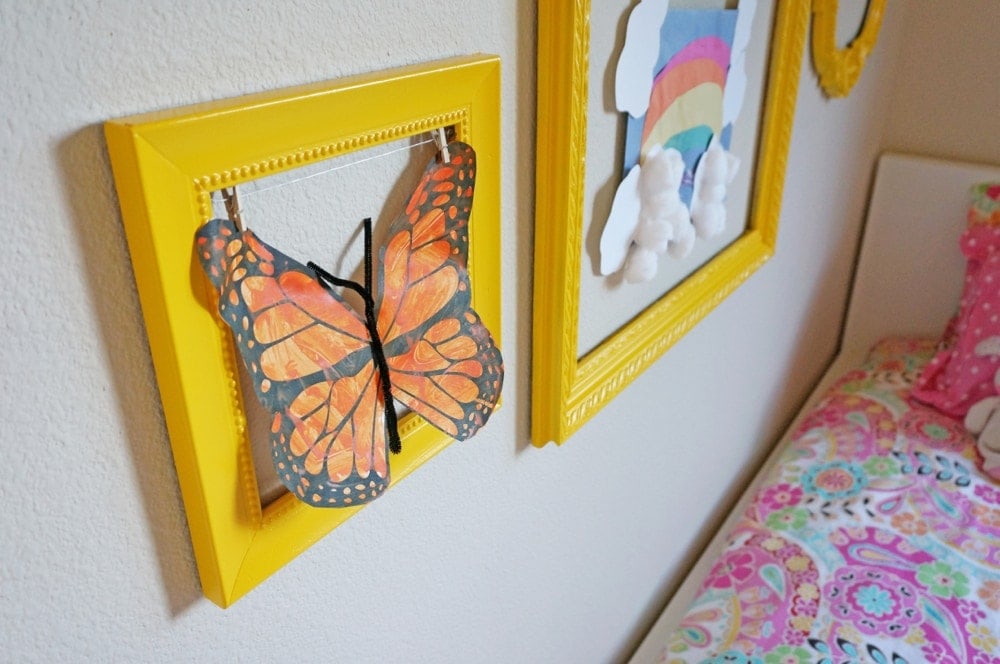
Once both of your eye hooks are in place, thread two tiny clothespins onto your monofilament, through the hole in the spring of each clothespin. Then attach the monofilament to one of the eye hooks by tying a knot (square knots work best).
Stretch the monofilament across the frame to the other eye hook, and secure it with another knot, making sure to keep the monofilament tight across the frame.
Cut off any excess monofilament and admire your handiwork!

Using picture-hanging-nails or Command picture hanging velcro, attach your frames to the wall in your design from step 2.

And finally, add your child’s favorite artwork to the frames! Then step back, and enjoy 😀
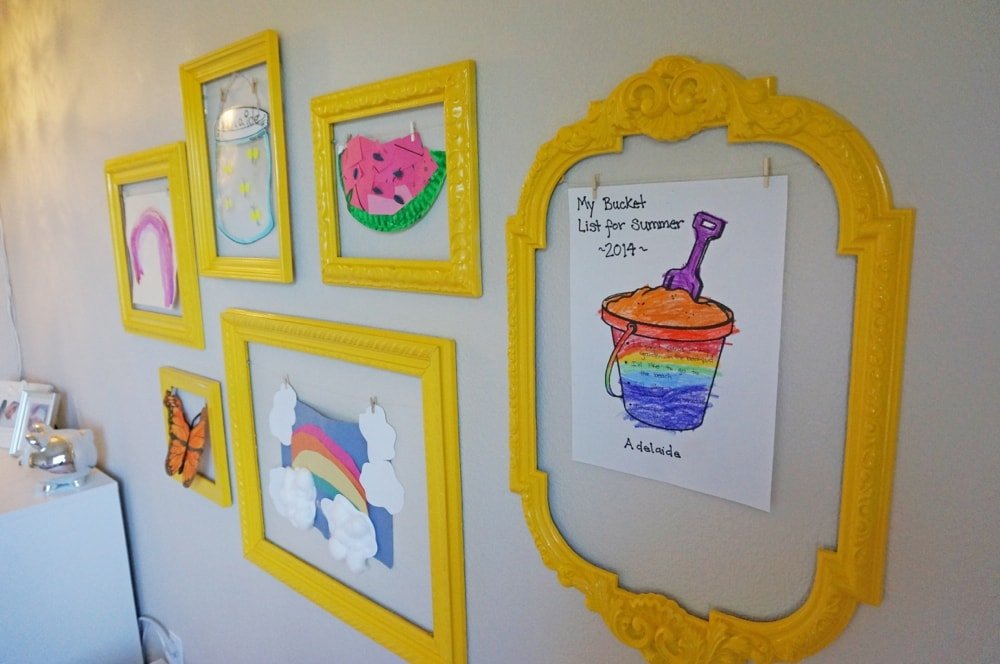
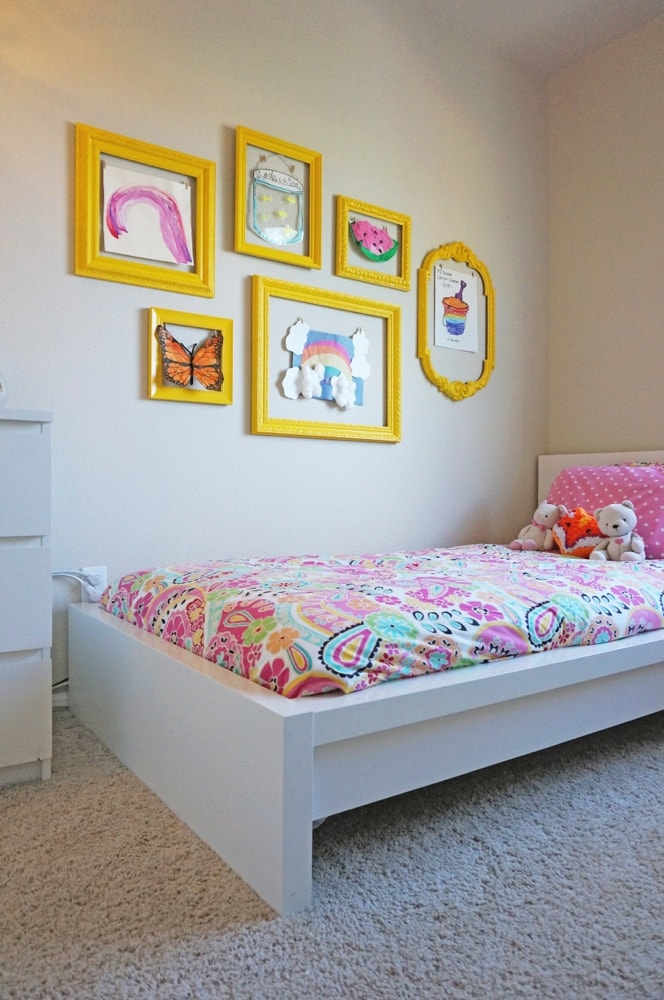
Adelaide is IN LOVE with her new gallery wall and has already taken it upon herself to change out two pictures since I took these photos!
I hope this inspires you to rescue your kids artwork from that giant storage bin in the garage, and display it proudly on your very own gallery wall!
Be sure to visit The Caterpillar Years where Heather shares all kinds of kid friendly activities and printables:
Make Your Own Coloring Books & Crayon Boxes (with free printable)


Hi – what size frames did you use? Thanks!
Hi Shelly, they are all different sizes.
this is such fun- I’m pinning for inspiration
I also have a question not related to the project- where did you get the fun paisley bedding?
Thanks!
Hi Peggy,
The bedding came from Pottery Barn Teen 🙂 Thanks!
So bright and cheery….I love the fact that you can change out the artwork as they grow. Love it.
YES! The ease with which the artwork can be changed and the fact that my five-year-old can do it all by herself, are my two favorite aspects of this project! Thanks Samantha!
This is so fun and cheerful! And practical! Love it.
It’s always fun to meet another Heather! Thanks so much for your comment!
A fabulous idea, thanks, Alice! Loved your selection of frames.
I’m sorry, meant to thank you, Heather!
Haha! No worries Kathy! Thanks so much for your comment!! I had fun “hunting” for frames with character 🙂
Hi! Love this idea! Also may I ask where you got the bedroom furniture from? I love it!
I love this Heather! So creative…think I might just have to try it with my own little ones’ artwork!
Thank you so much Alice!! I’m already looking for more frames to add to this wall…. 😀