This post may contain affiliate links. Please read our disclosure policy.
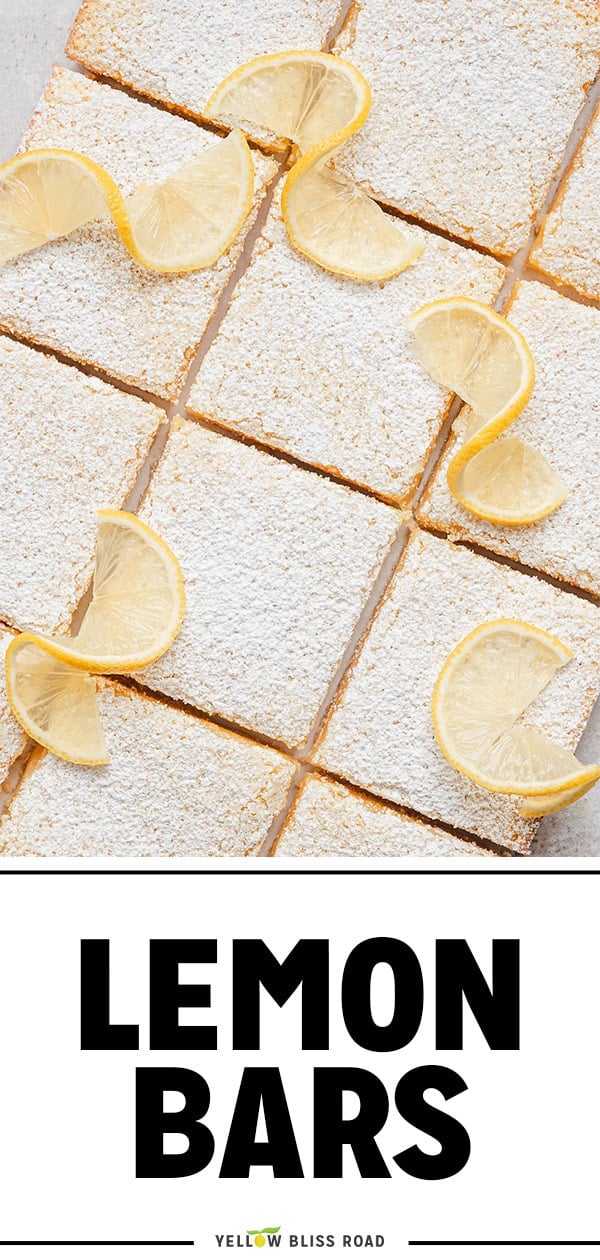
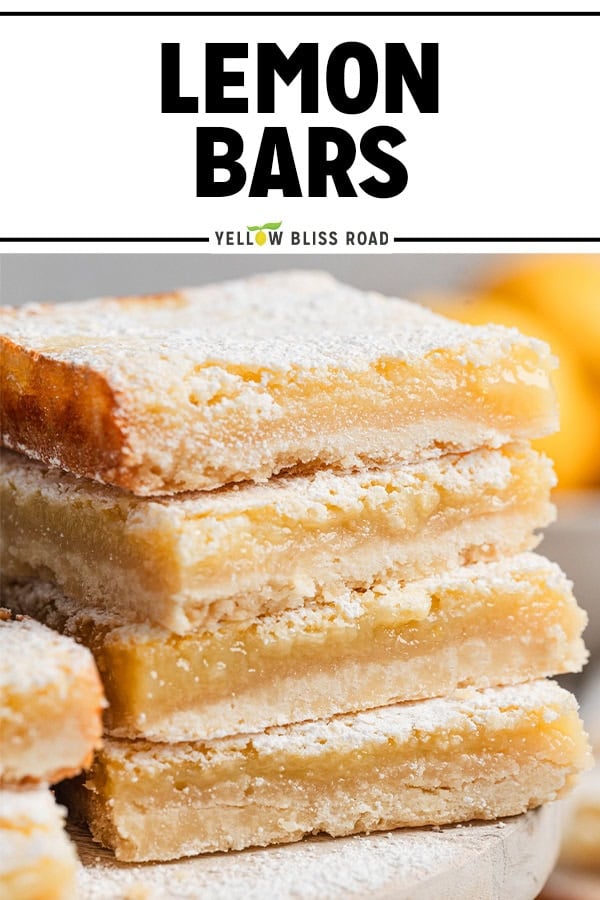
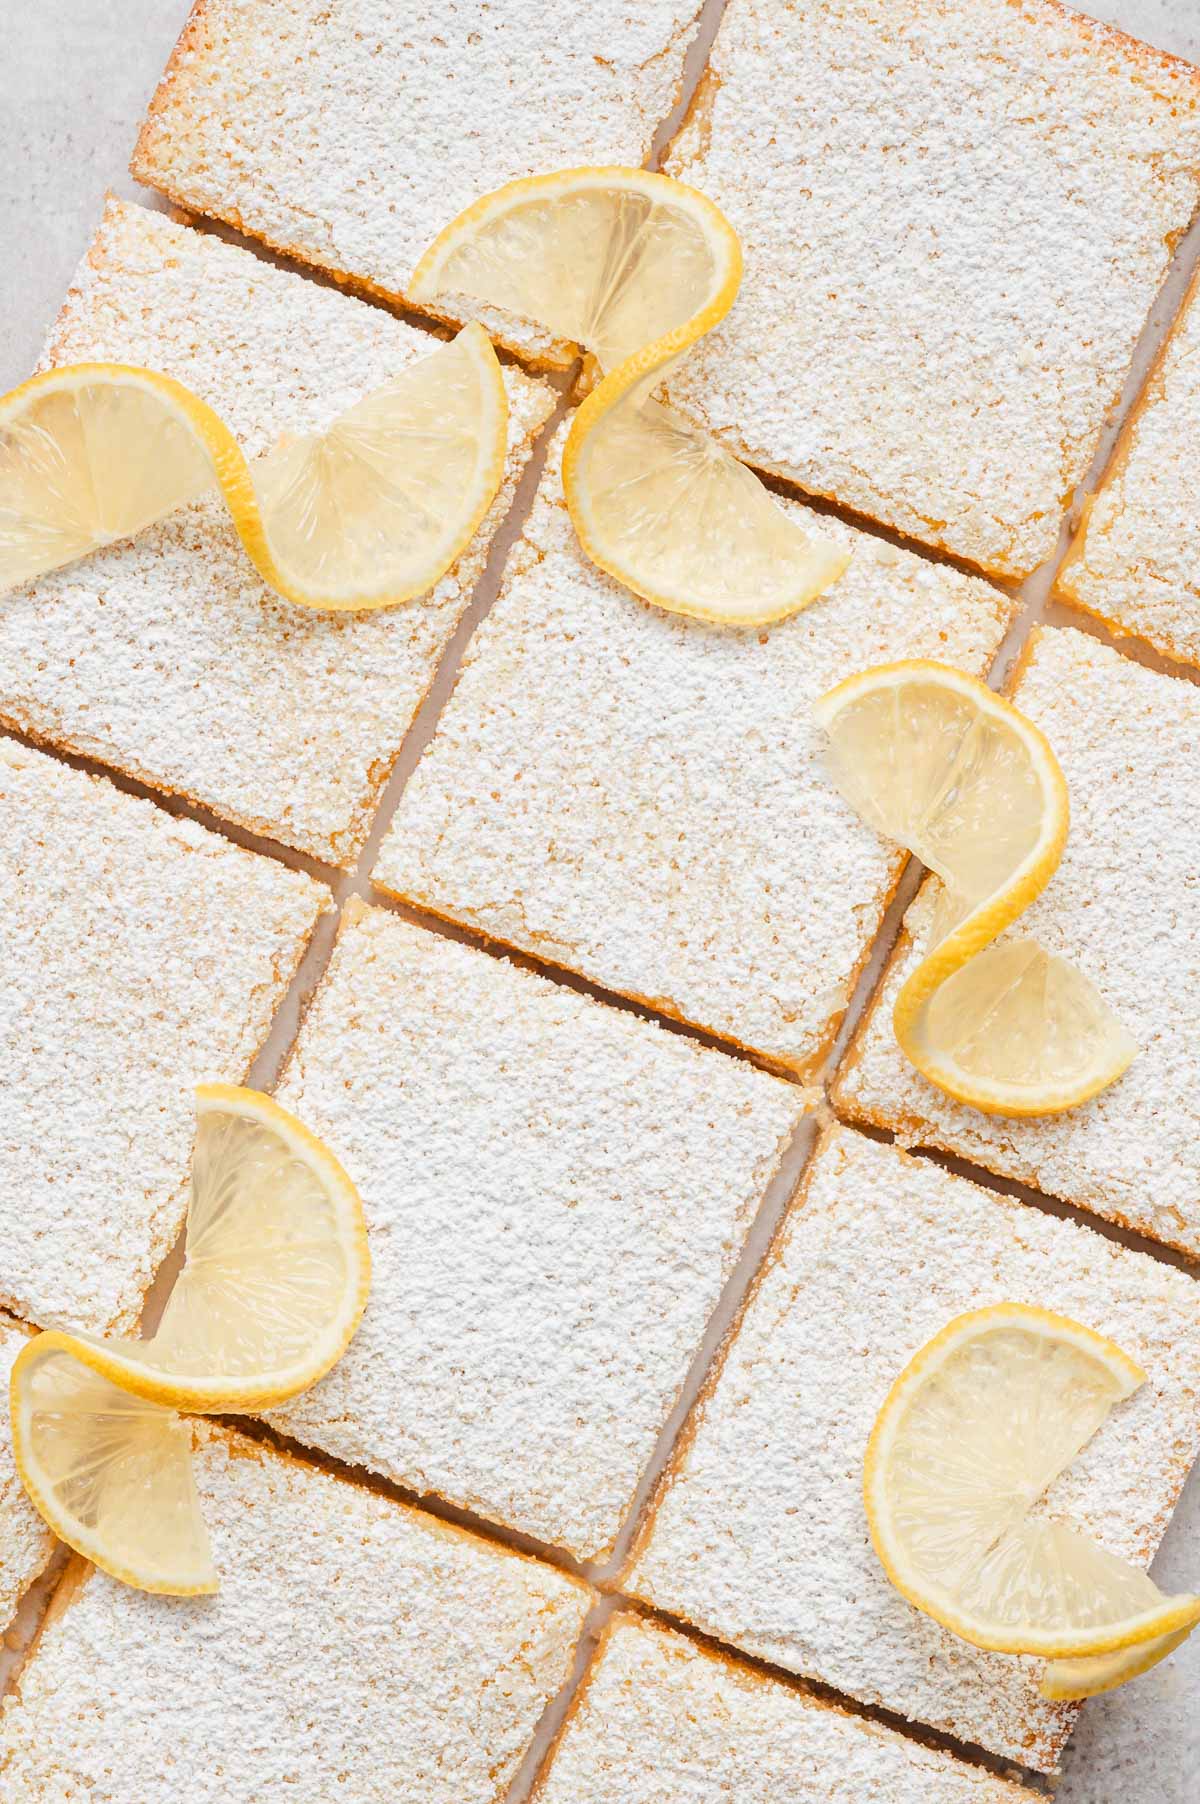
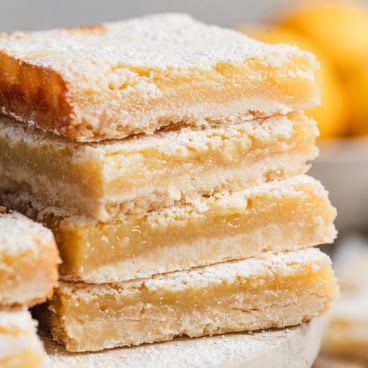
These Classic Lemon Bars have a buttery shortbread crust and a bright, tangy lemon filling that sets up perfectly every time. Simple ingredients, easy to make ahead, and even better the next day.
If you love lemon desserts, my Starbucks Lemon Loaf and No Bake Lemon Cheesecake are both worth a look.
3 Things That Make or Break This Lemon Bar Recipe
- Press the crust firmly and evenly. Use your fingers or the flat bottom of a measuring cup to pack it into a solid, even layer. A loose crust won’t hold together when you slice.
- Line the pan with parchment paper. Leave an overhang on the sides so you can lift the whole slab out cleanly before slicing. This makes cutting and serving much easier.
- Plan for chill time. These bars need at least an hour in the fridge after cooling before they’re ready to slice. Make them the day before if you can. They genuinely taste better after an overnight chill.
RECIPE WALK-THROUGH
How To Make Classic Lemon Bars
See the recipe card below for full, detailed instructions
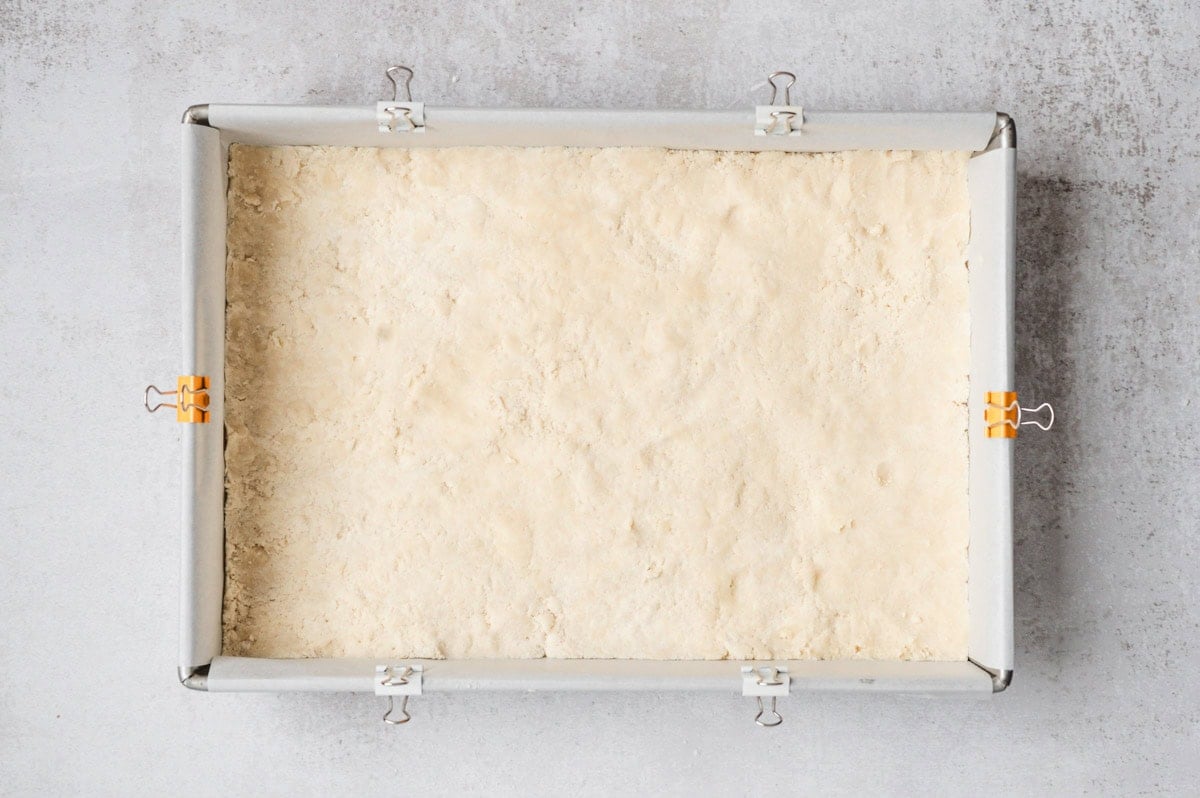
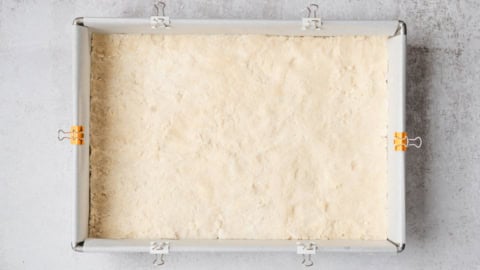
Step 1: Prep the Pan
Preheat the oven to 350°F. Spray a 9×13-inch metal baking pan with nonstick cooking spray, then line it with parchment paper, leaving some overhang on the sides for easy removal.
- Use binder clips to hold the parchment in place while you press in the crust. If you do not have parchment, just grease the pan well with nonstick spray.
Step 2: Make the Shortbread Crust
In a large bowl, combine the softened butter, powdered sugar, and flour. Mix with a pastry cutter, a large fork, or a hand mixer on low speed until the mixture is combined. It will look crumbly at first, but should hold together when pressed in your hand.
Press firmly and evenly into the pan, bringing it slightly up the sides to form a well for the filling.
- Note: The surface should feel compact and smooth, not loose or uneven. Loose crust leads to bars that crumble when cut.
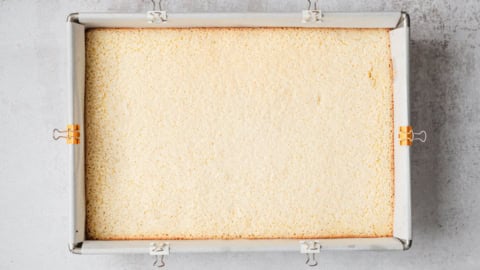
Step 3: Bake the Crust
Bake for 20 minutes, until lightly golden around the edges. Remove from the oven and let it cool slightly before adding the filling.
- Don’t skip the partial bake. It sets the crust so the filling doesn’t soak in and make it soggy.
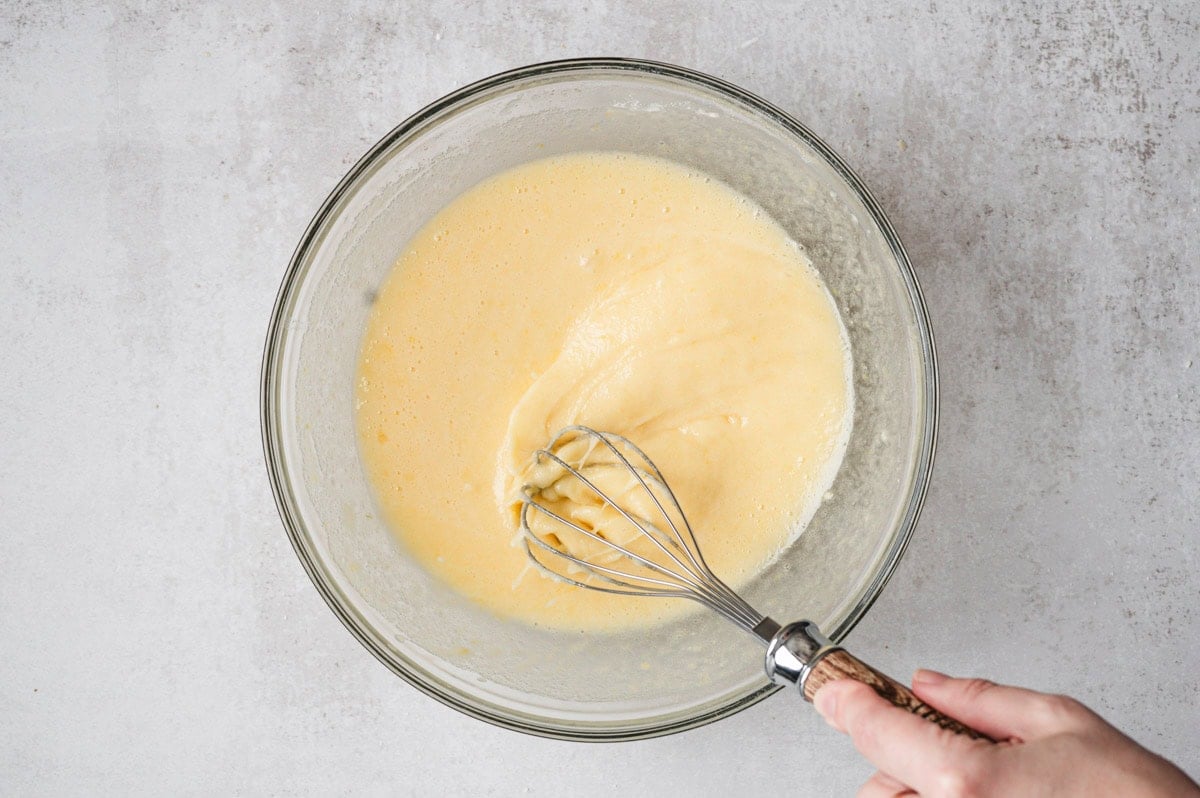
Step 4: Make the Lemon Filling
While the crust cools, whisk together the eggs, sugar, lemon zest, fresh lemon juice, baking powder, and flour until the mixture is smooth and fully combined with no lumps.
- Lemon zest is essential for depth of flavor; lemon juice alone won’t give the same brightness. Remember to zest the lemon before you cut and juice it.
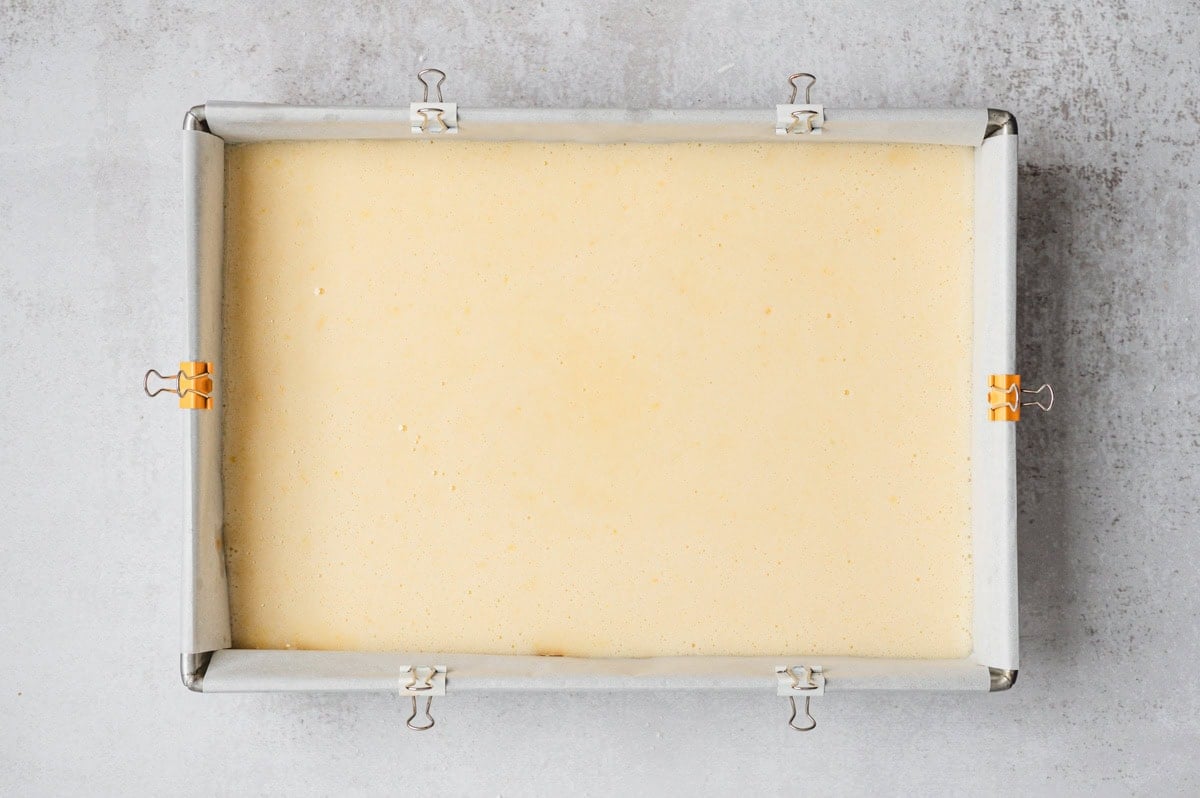
Step 5: Bake and Cool
Pour the filling over the slightly cooled crust and return the pan to the oven.
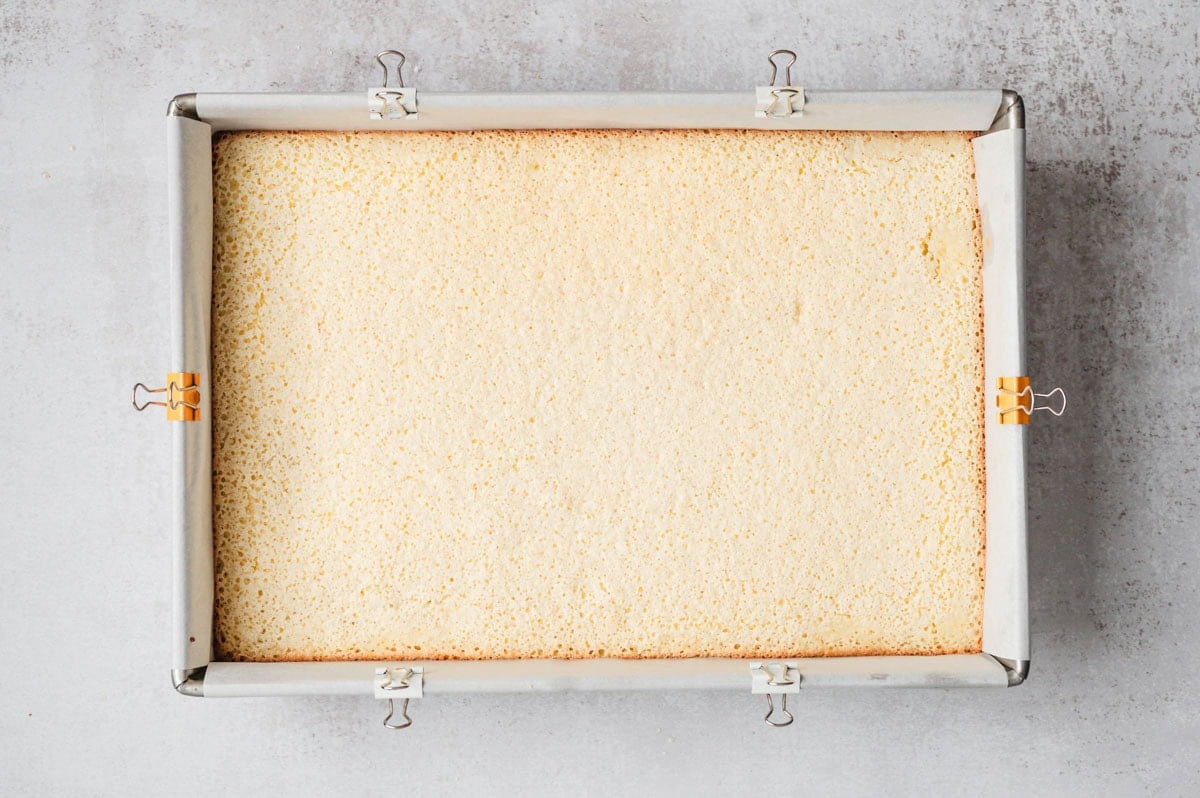
Bake for 25 to 30 minutes, or until the center is set and no longer jiggles when gently shaken. Edges will be light golden brown; the surface should look matte rather than glossy or wet.
- How to check for doneness: the jiggle test is the most reliable. A gentle shake of the pan should show no movement in the center. If the edges are browning but the center still moves, give it another 3-5 minutes and check again.
Step 6: Chill and Slice
Let the bars cool to room temperature, then chill them for at least 1 hour before lifting them out of the pan using the parchment overhand.
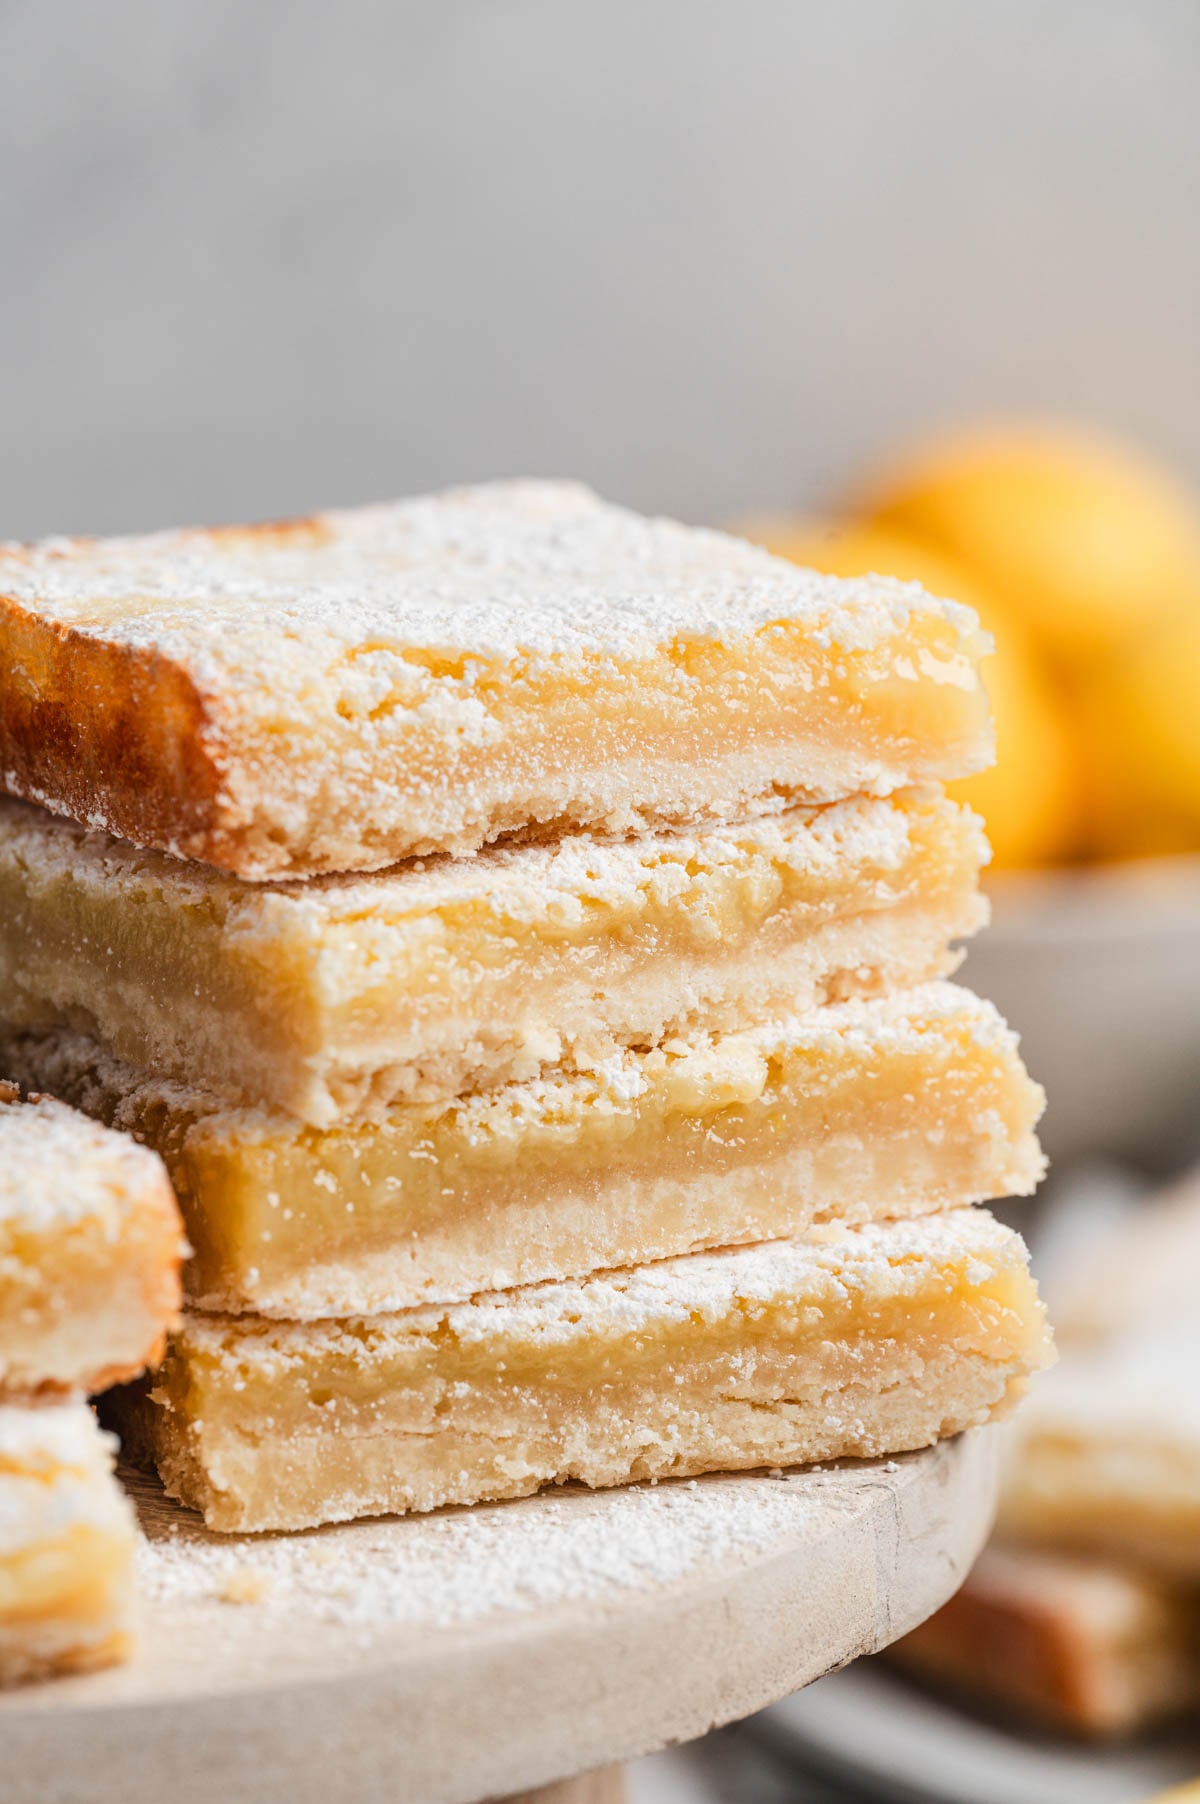
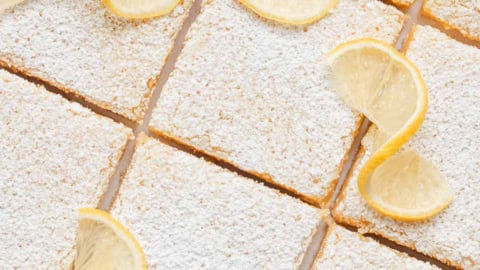
Place on a cutting board. Slice into 12 squares, or cut each square diagonally to make 24 triangles.
Dust with powdered sugar just before serving.
- Tip: Spray a large knife with cooking spray and wipe it clean between cuts to get neat slices.
- For the neatest presentation, dust with powdered sugar after slicing rather than before. That helps cover any rough edges and keeps them looking clean and pretty on the plate.
Storage Tips
Storage, Freezing, Make Ahead Tips
Storage: Store leftover lemon bars tightly covered in the refrigerator for 3 to 4 days. If you need to stack them, place parchment or waxed paper between the layers to help prevent sticking.
Freezing: It is best not to freeze these bars. The filling’s texture can change after thawing, so they are best enjoyed fresh from the fridge.
Make Ahead: Lemon bars are a great make-ahead dessert because they taste even better the next day. Chilling them overnight lets the filling set and makes them easier to slice.
Frequently Asked Questions
Can I bake lemon bars in a glass pan?
You can, but metal is strongly recommended. Metal pans conduct heat more evenly, which helps the crust bake through cleanly and the filling set without cracking. If you use glass, reduce the oven temperature by 25°F and check for doneness a few minutes earlier than the recipe states.
Why didn’t my lemon bars set?
The most likely causes are underbaking (the center should be completely still when the pan is shaken), pulling them from the fridge too soon (they need at least an hour, ideally overnight), and cutting them while still warm. Try to chill them longer before concluding that something went wrong.
Can I use bottled lemon juice instead of fresh?
Technically, yes, but fresh is strongly preferred. Bottled lemon juice can have a slightly off, more acidic taste that’s noticeable in a simple filling like this. If fresh lemons aren’t an option, it’ll still work, but won’t taste the same.
More Bar Cookies To Try
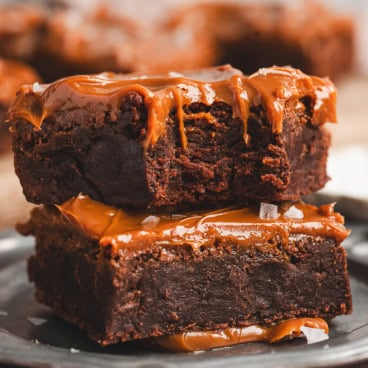
- Lemon Brownies
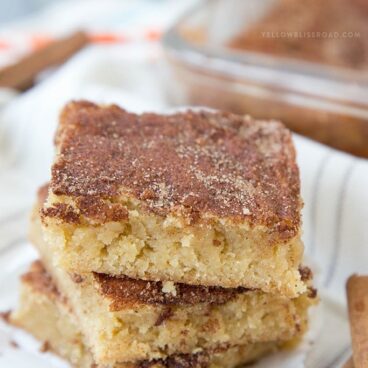
- Snickerdoodle Bars
- Magic Layer Brownie Bars
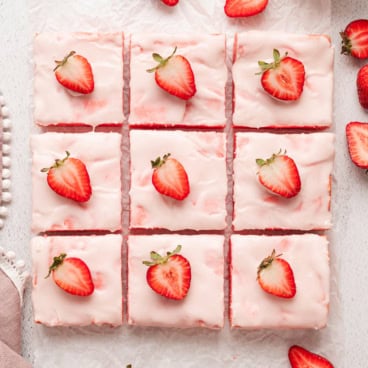
- Strawberry Lemon Blondies
- Carrot Cake Bars with Cream Cheese Frosting
Classic Lemon Bars
Ingredients
Shortbread Crust
- 1/2 pound (2 sticks / 16 tablespoons) salted butter, softened
- 1/2 cup powdered sugar
- 2 cups all-purpose flour spooned and leveled
Lemon Filling
- 4 large eggs
- 2 cups granulated sugar
- Zest of 1 lemon
- 1/3 cup freshly squeezed lemon juice zest the lemon before juicing
- 1 teaspoon baking powder
- 1/3 cup all-purpose flour spooned and leveled
- Additional powder sugar for dusting
Instructions
- Preheat oven to 350°F. Spray a 9×13-inch baking pan with non-stick cooking spray and line with parchment paper, leaving an overhang on the long sides for easy removal.
- Make the crust. In a large bowl, mix softened butter, powdered sugar, and flour together using a pastry cutter, large fork, or hand mixer on low. The mixture will look crumbly but should hold together when squeezed. Press firmly and evenly into the bottom of the prepared pan, bringing it slightly up the sides.

- Bake for 20 minutes, until the edges are lightly golden. Remove from oven and let cool slightly.
- Make the filling. While the crust cools, whisk together the eggs, sugar, lemon zest, lemon juice, baking powder, and flour until smooth and thoroughly combined.
- Pour the filling over the partially cooled crust. Bake for 25–30 minutes, until the center is completely set and no longer jiggles when the pan is gently shaken. The edges will be light golden brown.
- Cool to room temperature, then refrigerate for at least 1 hour before removing from the pan. Lift using the parchment overhang, place on a cutting board, and slice into 12 squares. Or cut each square diagonally for 24 triangles. Dust with powdered sugar just before serving.
Notes
- Storage: Store leftovers in the fridge, tightly covered, for up to 3–4 days. Layer with parchment or waxed paper if stacking.
- Make-ahead: These bars taste even better the next day as the filling sets more fully. Making them a day ahead is highly recommended.
- Freezing: Not recommended for this recipe.
- Pan tip: Use a metal 9×13 pan for best results. Metal conducts heat more evenly than glass, giving you a cleaner bake on both the crust and filling. If using glass, reduce oven temperature by 25°F and check a few minutes early.
- Clean cuts: Spray a large knife with cooking spray and wipe between each cut for cleaner slices. Dust with powdered sugar after slicing to tidy up any rough edges.
- Parchment only: Do not use foil (the sticky filling can tear it) or waxed paper (not oven-safe).
Nutrition
Nutritional Disclaimer Kristin Maxwell of “Yellow Bliss Road” is not a dietician or nutritionist, and any nutritional information shared is an estimate. For accurate calorie counts and other nutritional values, we recommend running the ingredients through your preferred online nutritional calculator. Calories and other nutritional values can vary depending on which brands were used.
