This post may contain affiliate links. Please read our disclosure policy.
Hi Everyone! Heather here, from The Caterpillar Years with another problem solving DIY project.
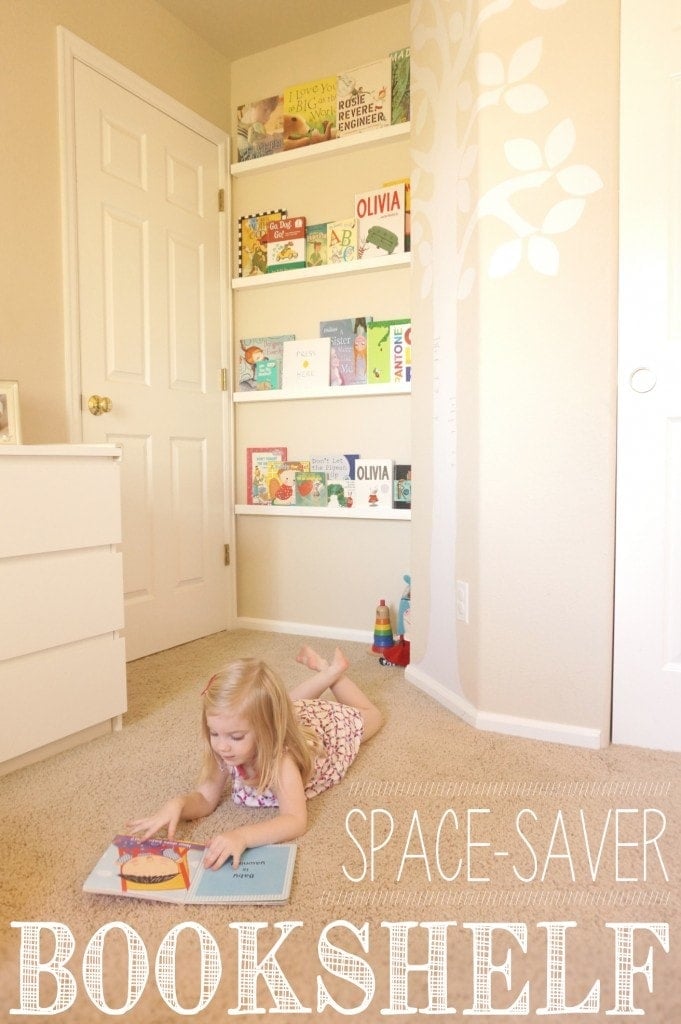
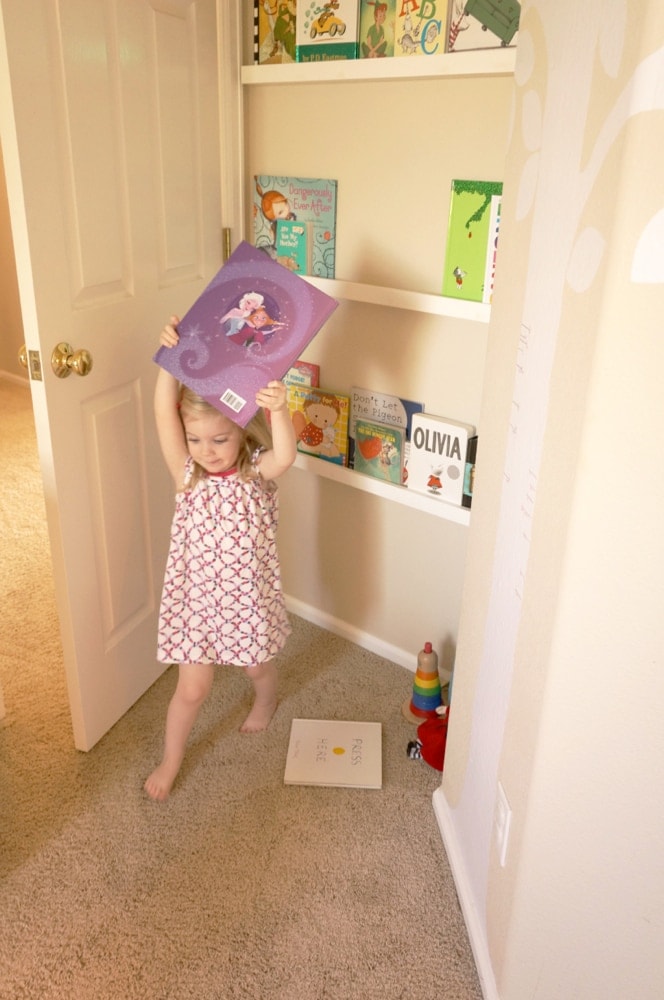
Now that Cadence, my almost-three-year-old, is out of her crib and sleeping in a twin size bed, the room she and Adelaide share feels cramped. We’ve relocated all toys and play-things downstairs to our playroom, but the books keep finding their way back upstairs.
I was desperate to give these books a designated space in the room, where they would be accessible by little hands for nap and bed time reading, but out of the way during the rest of the day.
There was only one wall in the room not currently occupied a bed, dresser, window or closet, so I came up with this clever solution that makes use of that tiny, often wasted, space behind the door.

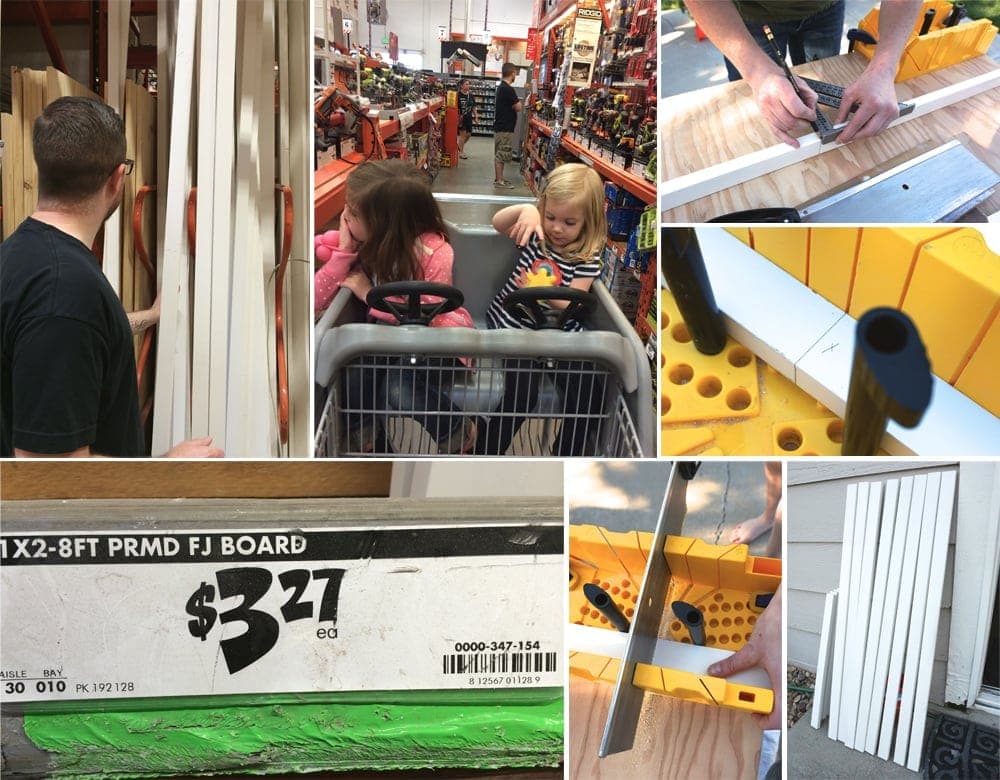
- Lengths of wall trim – I used 1″ x 2″ Primed Finger-Joint Board
- Paint – I used Behr Ultra Pure White, Eggshell, Low Odor, No VOC, Interior paint
- Wood screws – I used 3″ screws
- Finish nails
- Wall putty (to hide the finish nails)
- Useful tools:
- Tape measure, square, pencil
- Miter box and hand saw
- Level
- Drill with appropriately sized bits
- Stud finder

First things first—measure your space! The most important measurement is the depth measurement between the door when it’s fully open, and the wall—this dictates how much space you have for your bookshelf, which will dictate which pieces of trim you can use.
TIP: Don’t forget to take the door knob into account! The door knob will take up a lot of your available space, so make sure to avoid the door knob when you hang your shelves.
I had 3.5” of space between the door and the wall. Armed with this criteria, I took a trip to Home Depot and picked out my trim pieces. You’ll need a piece of trim to act as the ledge for the books to sit on, and a second piece to attach to the front of the ledge to keep the books from sliding off. The two pieces of trim will make an “L” shape.
I ended up selected identical pieces of trim for my ledge piece and my face piece, but you can mix and match!
TIP: Pre-primed trim can make the job easier!

Next the trim needs to be cut to the finished length. I suggest measuring your space again just to make sure you have the right dimensions 😉 Measure twice, cut once!
Use a tape measure and square to mark your length measurement, and a mitre box and hand saw to cut the trim square and to length.

Once your pieces are cut to size, it’s time to paint! Choose any color you like—I chose white to match the existing trim in the room.
TIP: I recommend not painting the side of the wood that will be in contact with the wall—to prevent the latex paint on the shelves sticking to the latex paint on your walls. If and/or when you remove these shelves, that would cause some issues!
Allow adequate time for the paint to cure, then you’re ready to install them!

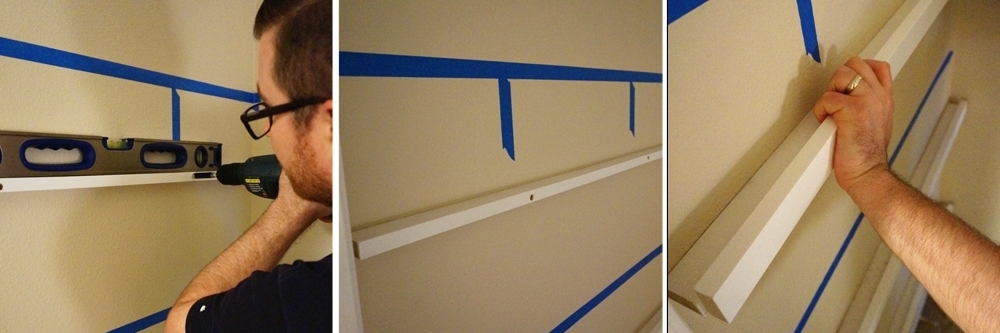
Identify the location of the studs in the wall, so you have secure points to attach the shelves. Then use your tape measure to determine the vertical location of the shelves. Next you need to drill holes through the ledge piece of trim and the wall. Then screw the ledge piece to the wall. A level is useful at this point to ensure straight, level shelves.
Once the ledge piece of trim is attached to the wall, use finish nails to attach the face piece of trim to the ledge. Cover the nail heads with putty and apply a finish coat of paint.
TIP: A nail setter is useful to countersink the nails, so the heads of the nails sit below flush with the face of the shelf. This helps them disappear once covered with putty and paint.
That’s it, you’re done! Add books and enjoy your new space-saver bookshelf!
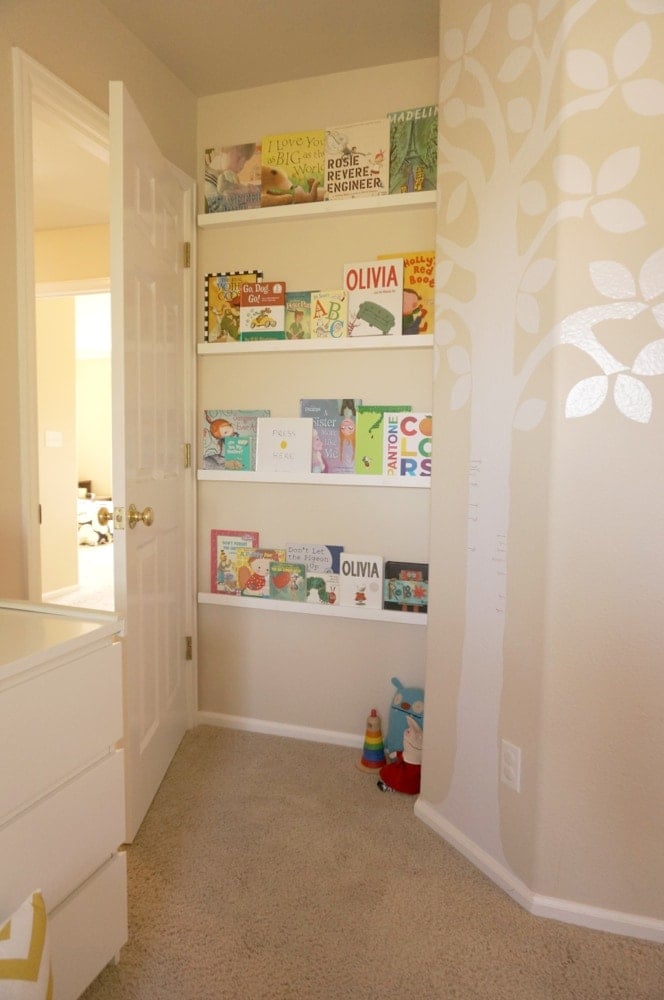
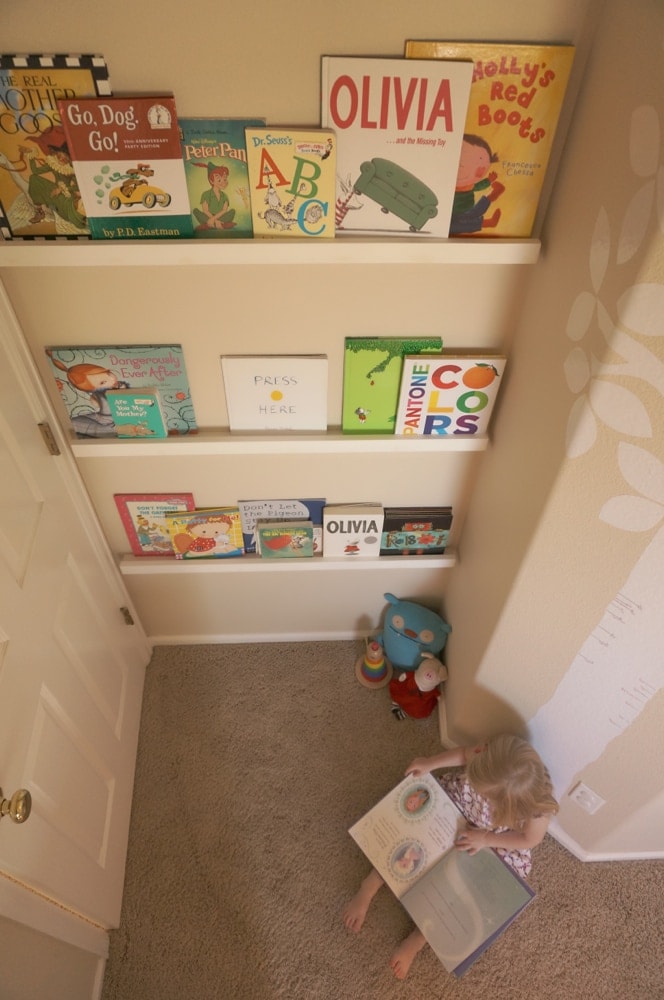

Hop on over to The Caterpillar Years to learn how to make a tree decal growth chart like the one in these pictures!
For more great DIY projects, be sure to go HERE.

I love this idea but can you tell me about the tree?
Thanks
What a great saving and optimizing space idea!!
My children are grown up, married, and in their own homes, but I was still able to use your space-saving idea. One of our bedrooms is now a sewing and crafting room where I make jewelry and quilt. On the little shelves behind the door, I have vials of beads and spools of quilting thread. I have my jewelry tools there, too. So that nothing would fall off the shelves, my husband attached thin dowel rods. The thread and bead vials sit between the dowel rods and the wall. Thanks for helping me get organized.
What a great idea. Thanks for your comment!
I love this idea! I was wondering how far you spaced them? I was thinking about spacing mine closer together. Any reason why this should be avoided?
Hi Kate! These shelves are 18″ apart. I wanted the bottom shelf to be far enough off the floor that it wouldn’t be viewed as a step 😉 and 18 inches seemed to accomplish that. So I continued that spacing up the wall. But you can use any measurement that works for your space!