This post may contain affiliate links. Please read our disclosure policy.
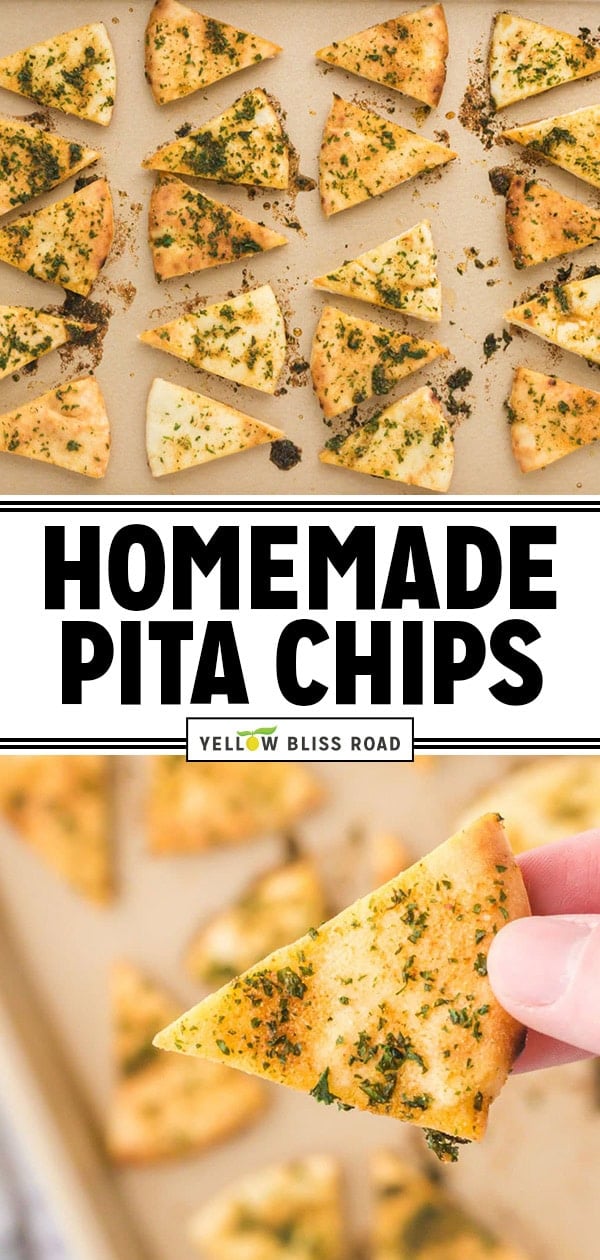
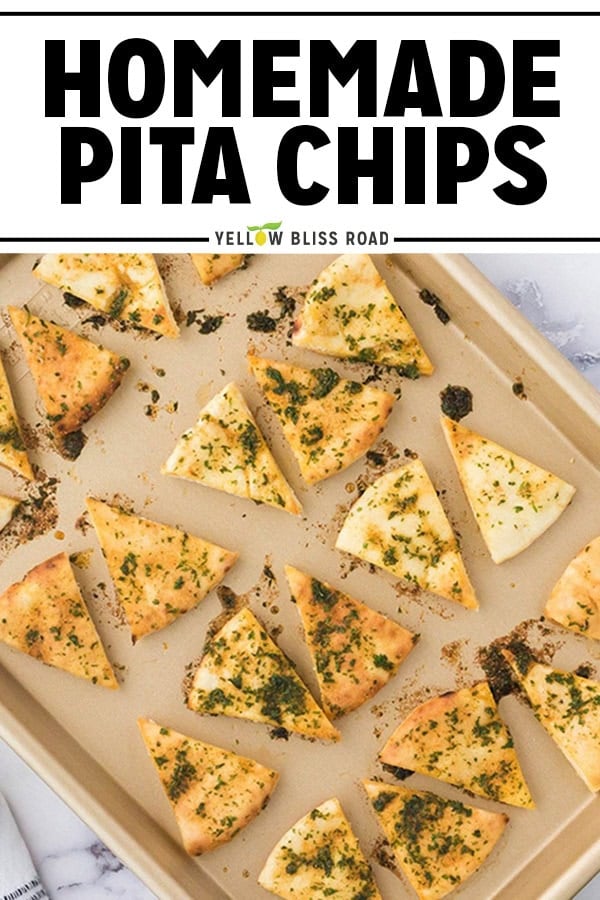
These homemade pita chips are crispy, golden, and loaded with flavor from a simple garlic-herb seasoning. They come together in about 15 minutes with ingredients you probably already have, and they’re perfect for scooping up your favorite dips.
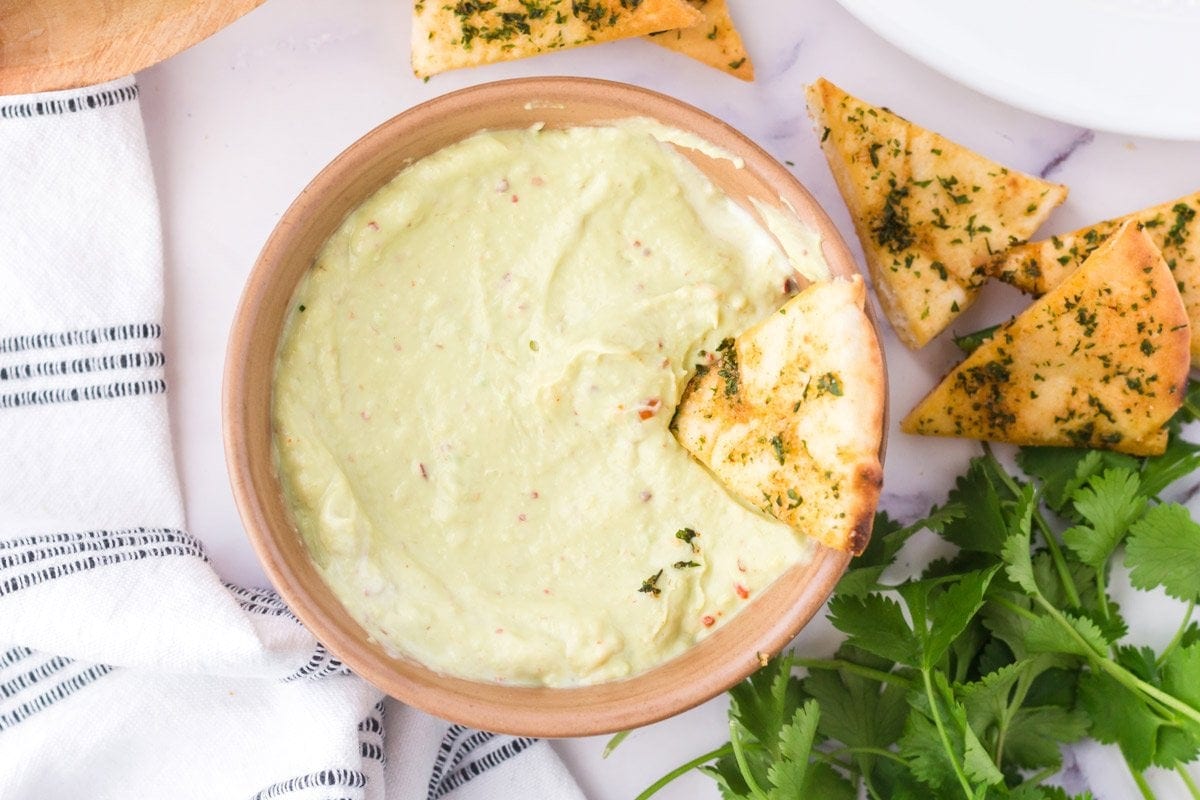
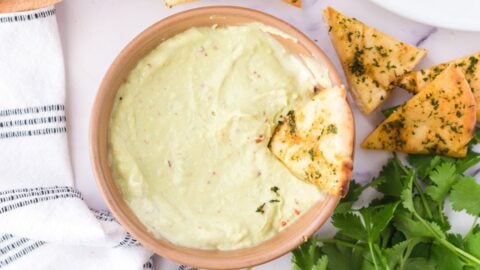
Serve them with Homemade Hummus or Spinach Artichoke Dip for an easy appetizer spread. For more homemade snack ideas, check out our Air Fryer Tortilla Chips.
3 Things That Make or Break This Recipe
- Choose the right pita. Pocketless pita (the thicker, sturdier kind) tends to crisp up more evenly and holds seasonings well. Regular pocket pita works too, but separate the layers first for thinner, crispier chips. Slightly stale pita actually works great here since it has less moisture to bake out.
- Use a light hand with the oil. You want just enough to help the seasonings stick and encourage browning, but too much will make the chips greasy instead of crispy. Brush lightly and evenly.
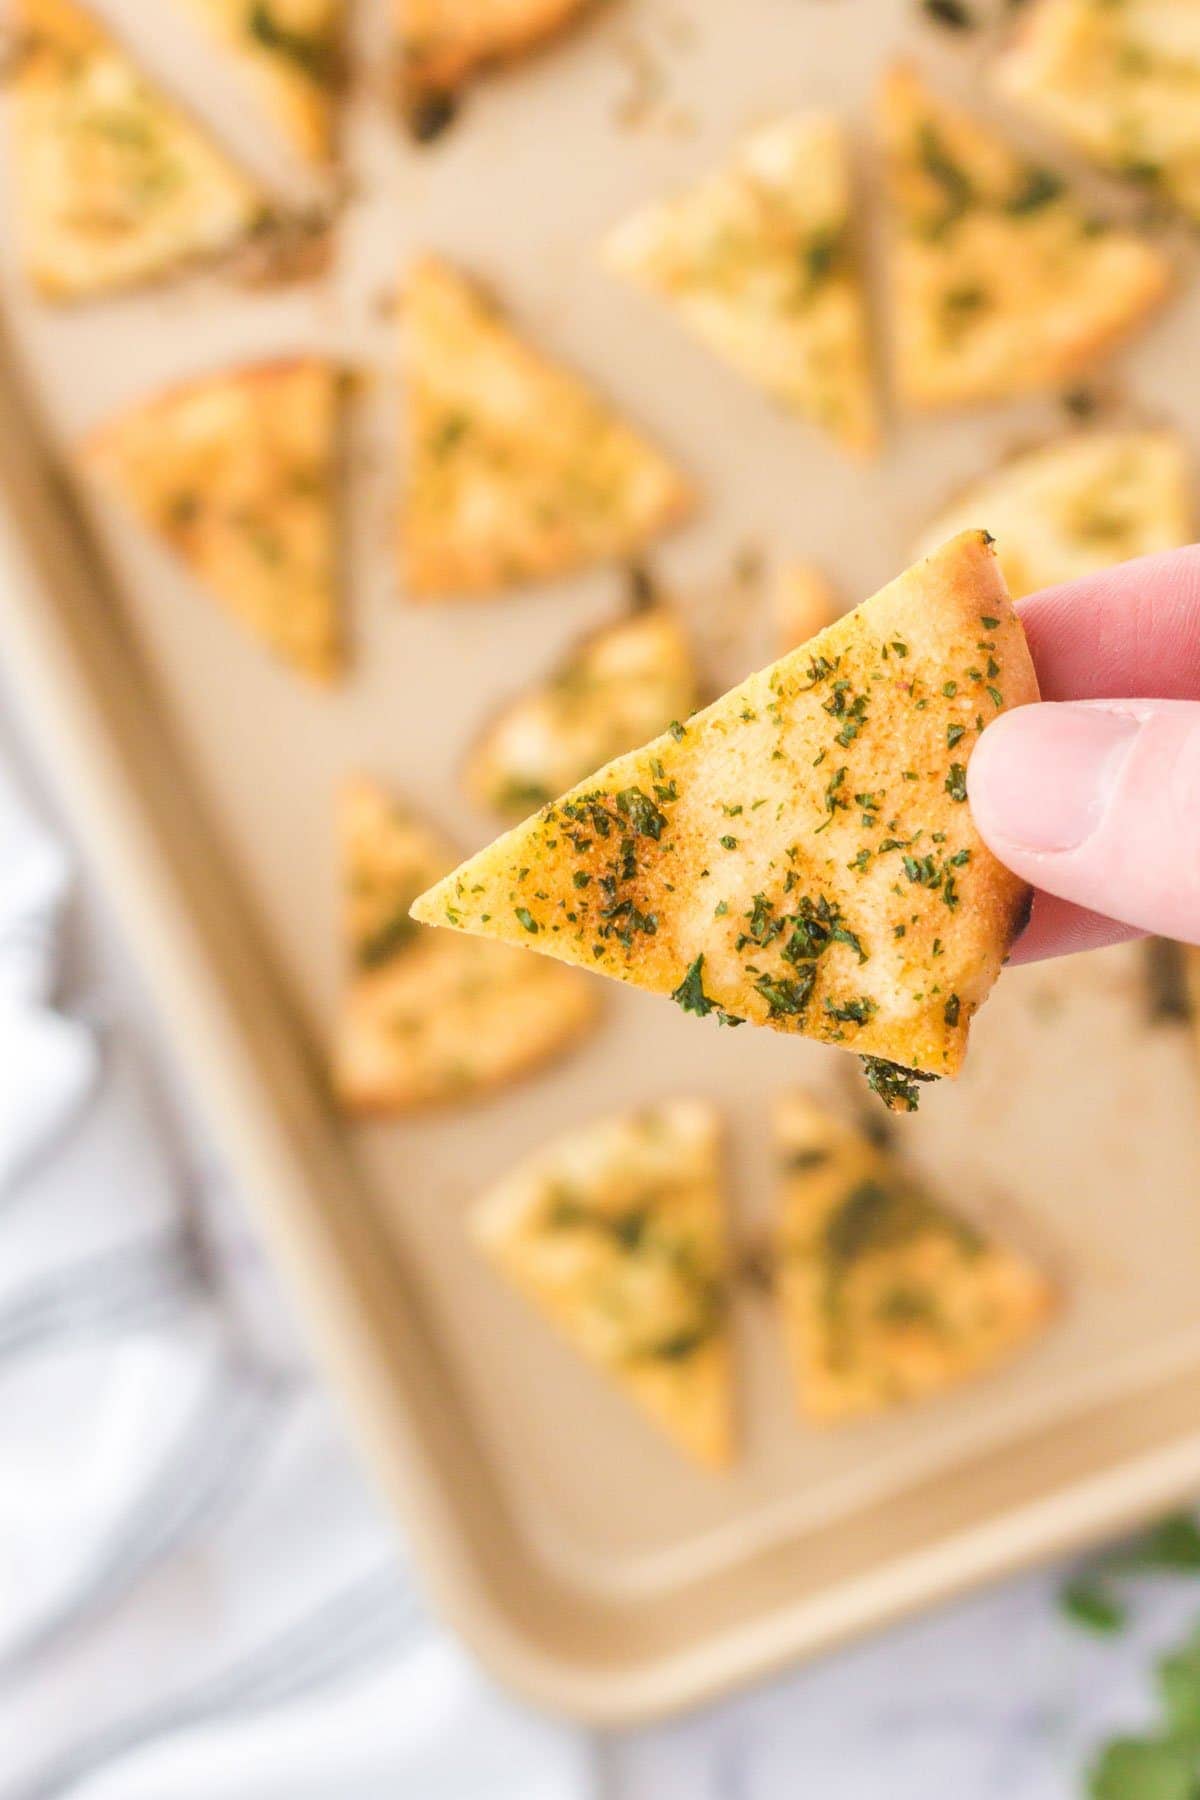
- Don’t judge doneness straight from the oven. The chips will feel slightly soft when they first come out but will crisp up significantly as they cool. If they look golden and the edges are just starting to brown, they’re ready.
RECIPE WALK-THROUGH
How To Make Homemade Pita Chips
See the recipe card below for full, detailed instructions
Making pita chips at home is almost embarrassingly easy. A quick brush of seasoned oil, a few minutes in the oven, and you’ve got warm, crispy chips that beat anything from a bag.
Step 1: Prep the Seasoned Oil
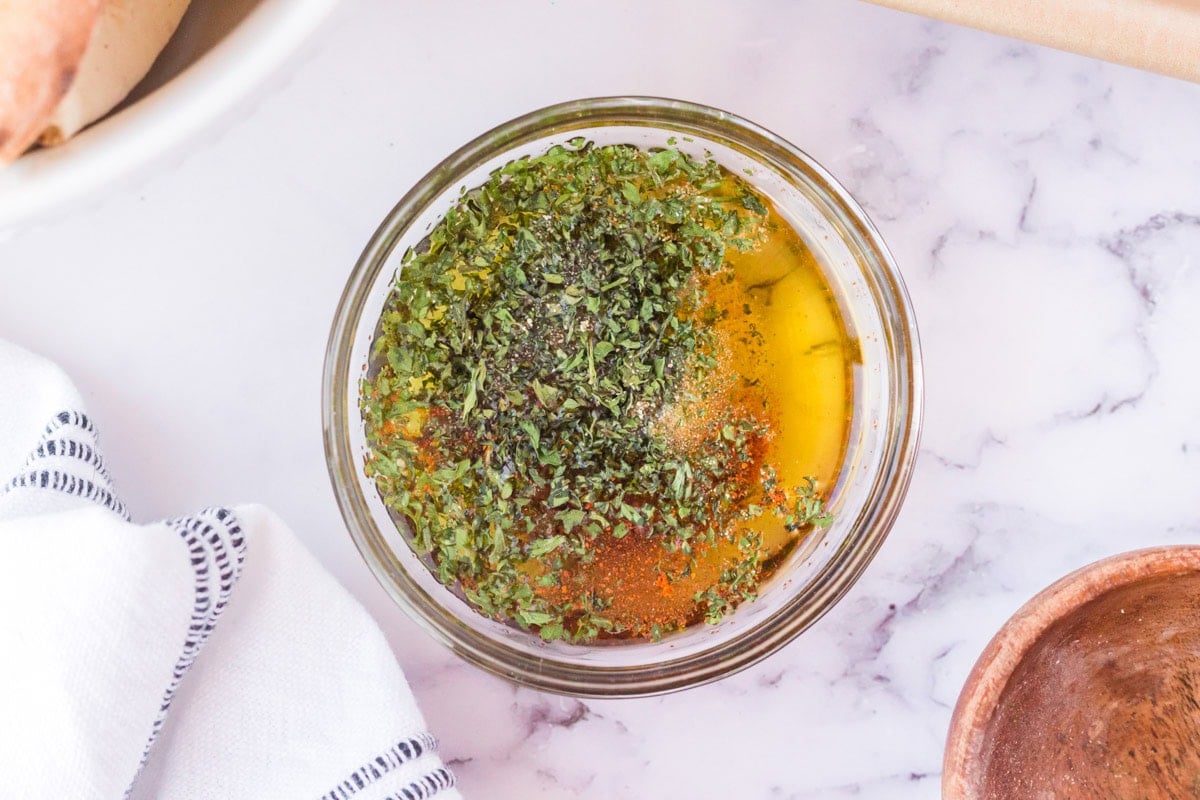
In a small bowl, stir together the olive oil, dried parsley, kosher salt, paprika, and garlic powder. Mix well so the seasonings are evenly distributed, since they tend to settle as they sit.
- Tip: If you’re using fine table salt instead of kosher salt, reduce the amount slightly to avoid over-salting.
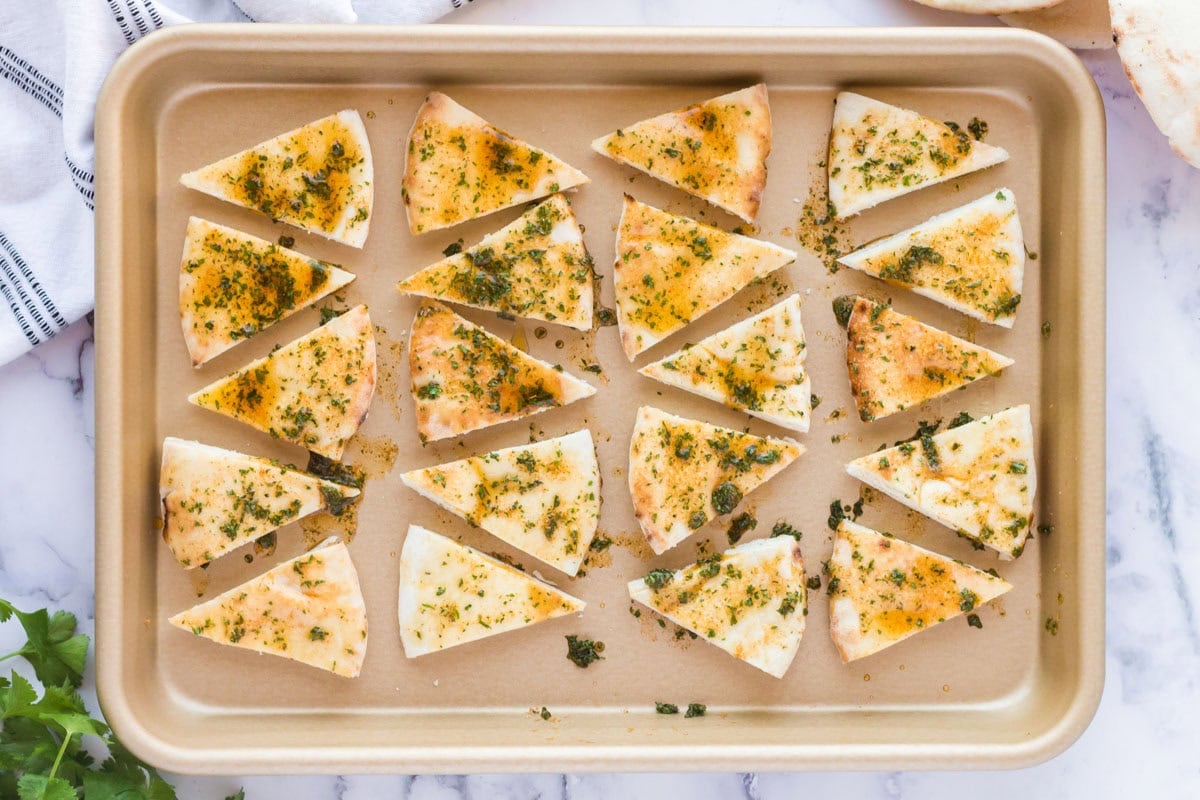
Step 2: Cut and Brush the Pita
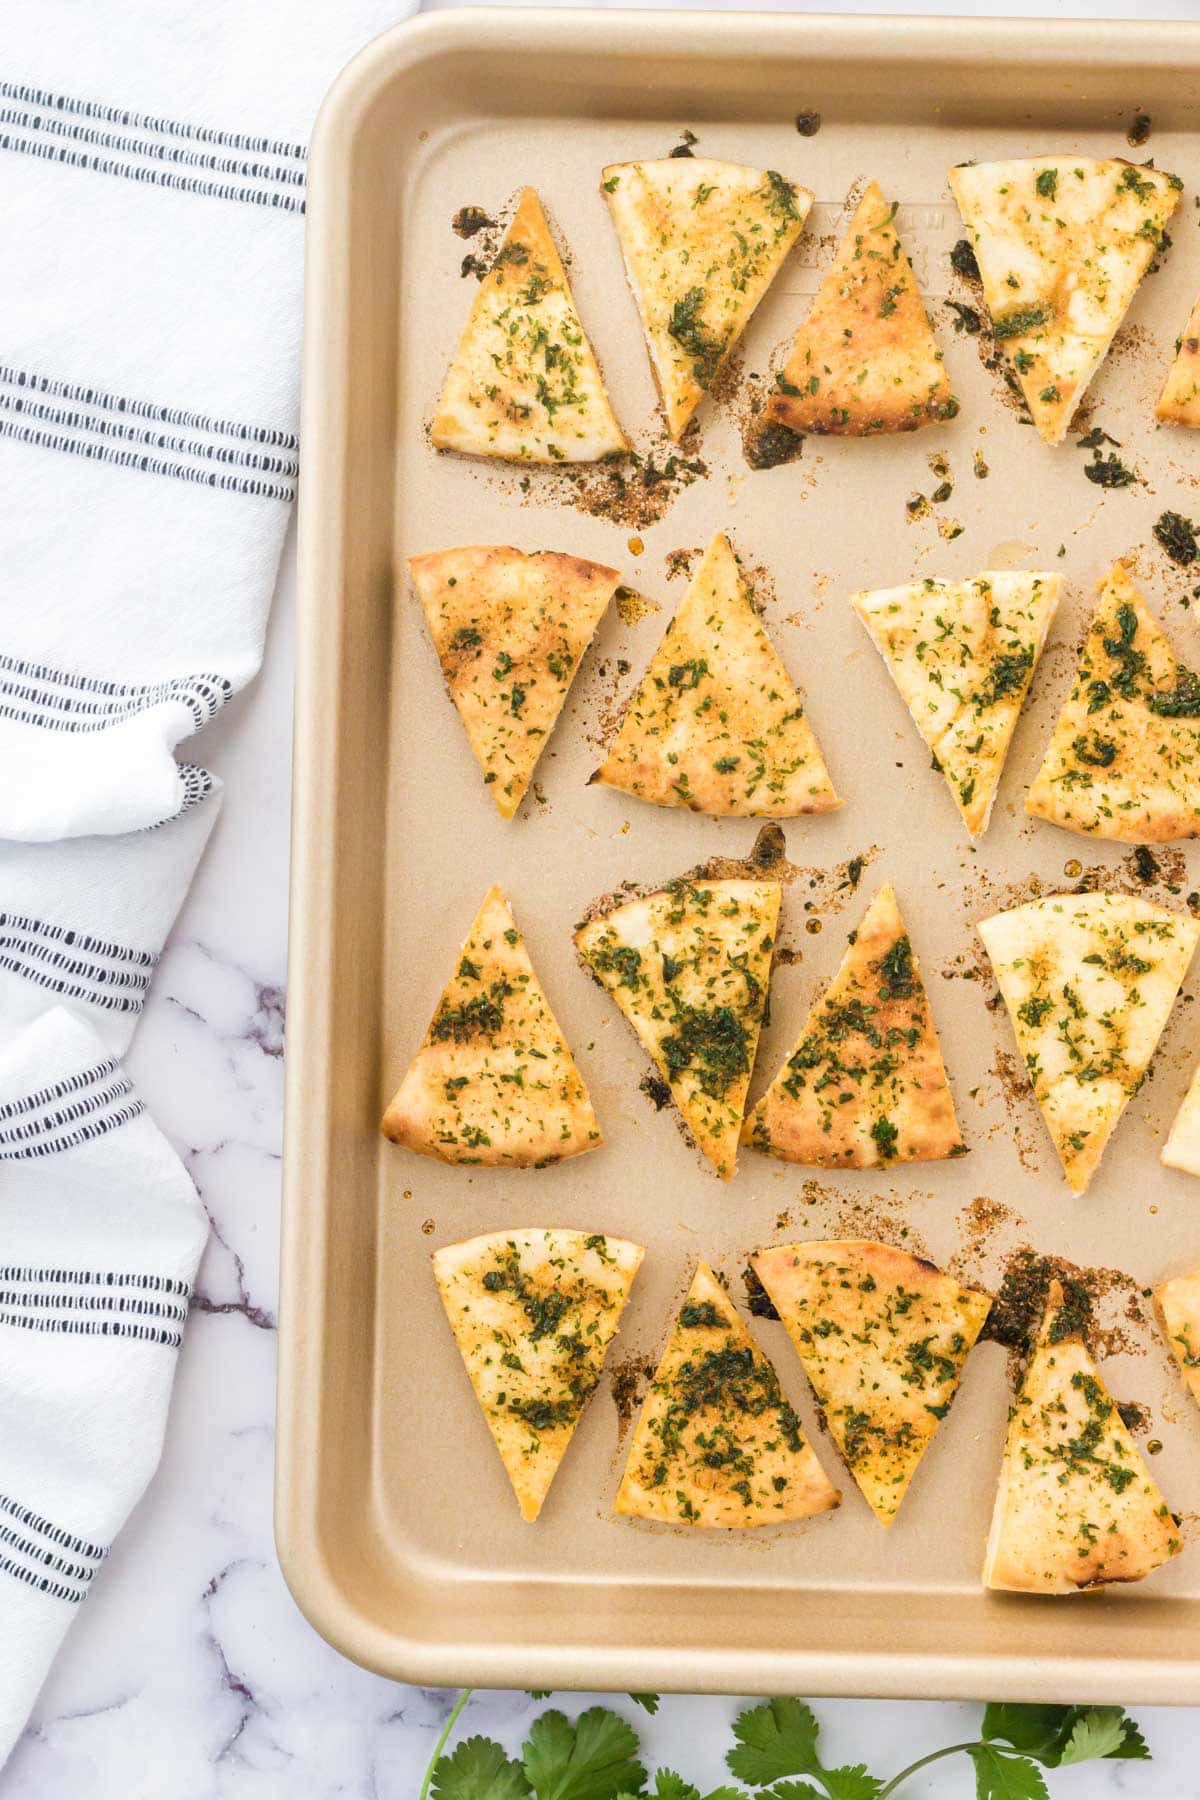
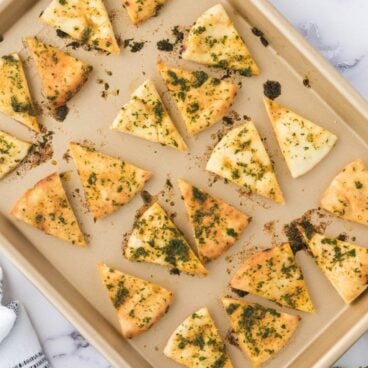
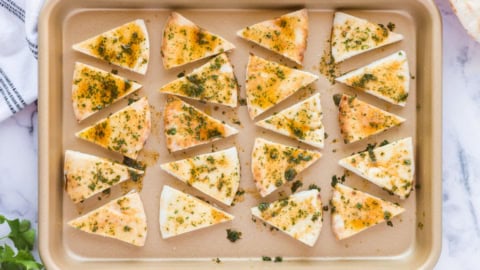
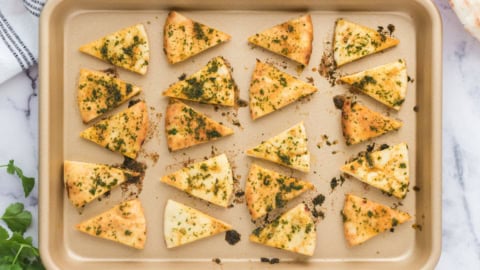
Cut each pita into 8 triangles, similar to slicing a pizza. Arrange the pieces in a single layer on a parchment or foil-lined baking sheet, then brush the tops evenly with the seasoned oil.
If you’re using pita pockets, you can separate the layers first for thinner, extra-crispy chips. Note that this doubles your yield but requires a bit more oil.
- Pro Tip: A silicone brush works especially well to coat the pita without pooling oil.
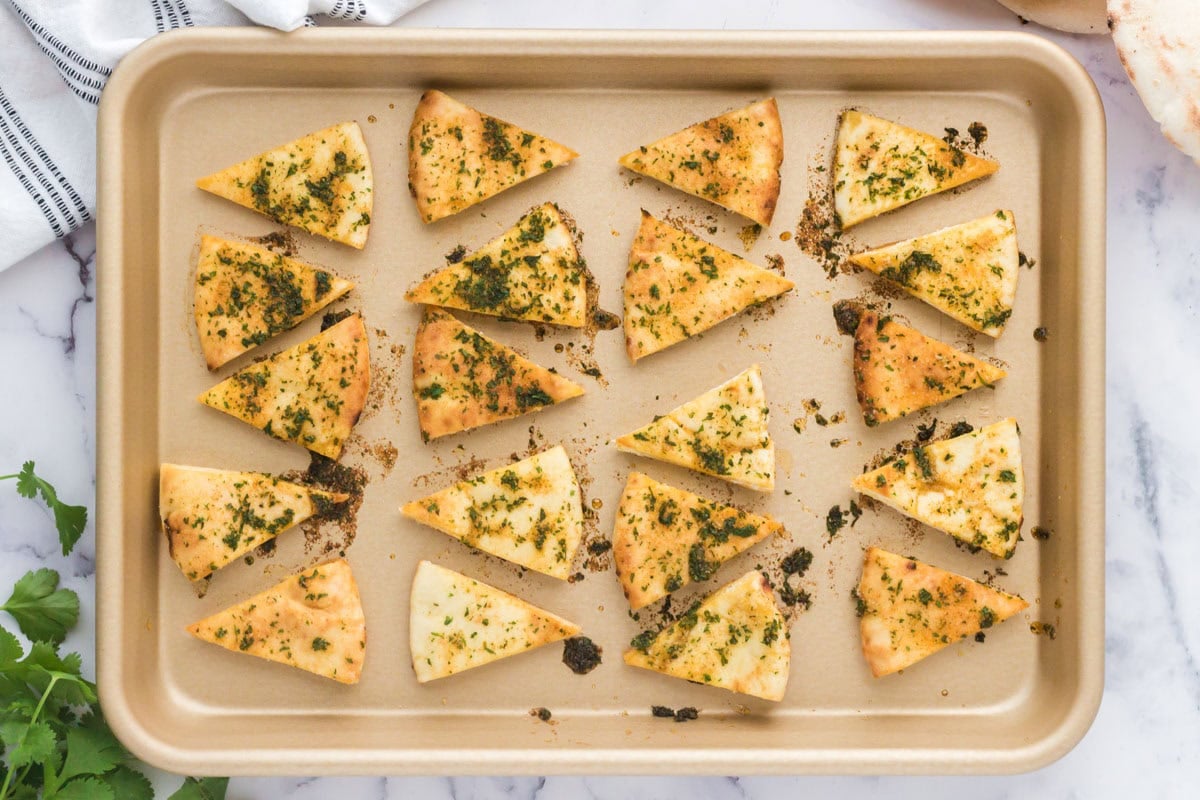
Step 3: Bake Until Golden
Bake at 350°F for about 12 minutes, until the tops are golden and the edges just begin to brown. The chips may feel slightly soft when you first check them, but they’ll crisp up as they cool.
- Tip: Every oven runs differently, so start checking around 10 minutes if your oven tends to run hot. Pull them when they’re golden, not dark brown, to avoid a bitter taste.
Step 4: Cool and Serve
Let the pita chips cool on the baking sheet for a few minutes so they can fully crisp. Serve warm or at room temperature with your favorite dips.
- Homemade pita chips are best enjoyed the same day for maximum crunch, though they can be stored if needed.
Seasoning Variations
- Simple: Just olive oil and kosher salt for a neutral chip that lets the dip shine.
- Everything Bagel: Swap the seasonings for 1-2 tablespoons of everything bagel seasoning.
- Ranch: Use dry ranch seasoning mix (about 1 tablespoon) in place of the herbs and spices.
- Sweet Cinnamon Sugar: Brush with butter, sprinkle with cinnamon sugar. Great with fruit dips or on their own.
What to Serve with Pita Chips
- Classic Mediterranean pairings: Hummus, tzatziki, baba ganoush
- Creamy/cheesy dips: Spinach artichoke dip, buffalo chicken dip, queso
- Fresh options: Bruschetta, salsa, Greek salsa
Storage Tips
Storage and Make Ahead
- Storage – Store in an airtight container at room temperature. These are best within 2-3 days for optimal crunch, but safe up to a week with a softer texture.
- Make Ahead – Can be made a day or two ahead for parties.
- If they lose crispness, a few minutes in a warm oven (300°F) can revive them.
- Freezing is not recommended as it can affect texture.
Frequently Asked Questions
Are pita chips baked or fried?
Homemade pita chips are typically baked, which makes them lighter and less greasy than fried versions. Store-bought varieties are often fried, which is one reason homemade can be a better choice.
How long do homemade pita chips stay fresh?
Store in an airtight container at room temperature. They are best within 2-3 days for optimal crunch, but are safe up to a week (though texture will change). You can re-crisp them with a few minutes in a warm oven (300°F).
What are the best seasonings for pita chips?
Garlic, salt, and paprika make a versatile blend, but you can easily customize. Everything bagel, ranch, or cinnamon sugar make delicious pita chip seasoning blends, and you can also make them plain with salt.
Can you make pita chips without oil?
Oil helps with browning and crispness, but you can reduce it or skip it for a lighter chip. The results will be slightly less golden and crisp, but still work. You could also try a light mist of cooking spray.
What type of pita bread works best for pita chips?
Pocketless pita bread is recommended because it is thicker and crisps evenly; pocket pitas can be separated for thinner chips. White and whole wheat both work, and slightly stale pita is actually ideal since it has less moisture.
More Easy Homemade Snacks
Homemade Pita Chips
Ingredients
- 5 pieces pita bread cut into 8 triangles each
- 2½ tablespoons olive oil
- 1½ teaspoons dried parsley
- 1 teaspoon kosher salt reduce slightly if using fine table salt
- 1 teaspoon paprika
- 1 teaspoon garlic powder
Instructions
- Preheat the oven to 350°F.
- In a small bowl, stir together the olive oil, parsley, salt, paprika, and garlic powder until well combined.

- Cut each pita into 8 triangles. Arrange the triangles in a single layer on a large baking sheet (use two sheets if needed to avoid overlapping).
- Brush the tops of the pita triangles evenly with the seasoned oil mixture.
- Bake for 10-12 minutes, or until the chips are golden on top and the edges are just starting to brown. They may feel slightly soft but will crisp up as they cool.
- Let cool on the baking sheet for a few minutes before serving. Enjoy with your favorite dips!

Notes
- Pita type: Pocketless pita (the thicker kind) crisps up evenly and holds seasonings well. If using pocket pita, you can separate the layers for thinner, extra-crispy chips.
- Slightly stale works great: Pita that’s a day or two old actually makes crispier chips since it has less moisture to bake out.
- Kosher salt recommended: The larger flakes distribute more evenly. If using fine table salt, reduce the amount slightly and adjust to taste.
- Don’t skip the cool-down: Chips will feel soft when they first come out of the oven but crisp up significantly as they cool. Don’t overbake trying to get them crispy in the oven.
- Watch for golden, not dark: Pull the chips when they’re golden with lightly browned edges. Overbaked chips can taste bitter.
- Single layer matters: Overlapping chips will steam instead of crisp. Use two baking sheets if needed.
- Easy seasoning swaps: Try everything bagel seasoning, ranch seasoning mix, or just olive oil and salt for a plain chip. For a sweet version, brush with butter and sprinkle with cinnamon sugar.
- Oil-free option: You can reduce the oil or skip it for a lighter chip. They won’t be quite as golden or crispy, but they’ll still work. A light mist of cooking spray is another option.
- Storage: Store in an airtight container at room temperature for up to a week. Best within 2-3 days for optimal crunch. If they soften, crisp them up in a 300°F oven for a few minutes.
- Make-ahead friendly: These can be made a day or two ahead for parties. Store as directed and refresh in a warm oven if needed before serving.
Nutrition
Nutritional Disclaimer Kristin Maxwell of “Yellow Bliss Road” is not a dietician or nutritionist, and any nutritional information shared is an estimate. For accurate calorie counts and other nutritional values, we recommend running the ingredients through your preferred online nutritional calculator. Calories and other nutritional values can vary depending on which brands were used.


