This post may contain affiliate links. Please read our disclosure policy.
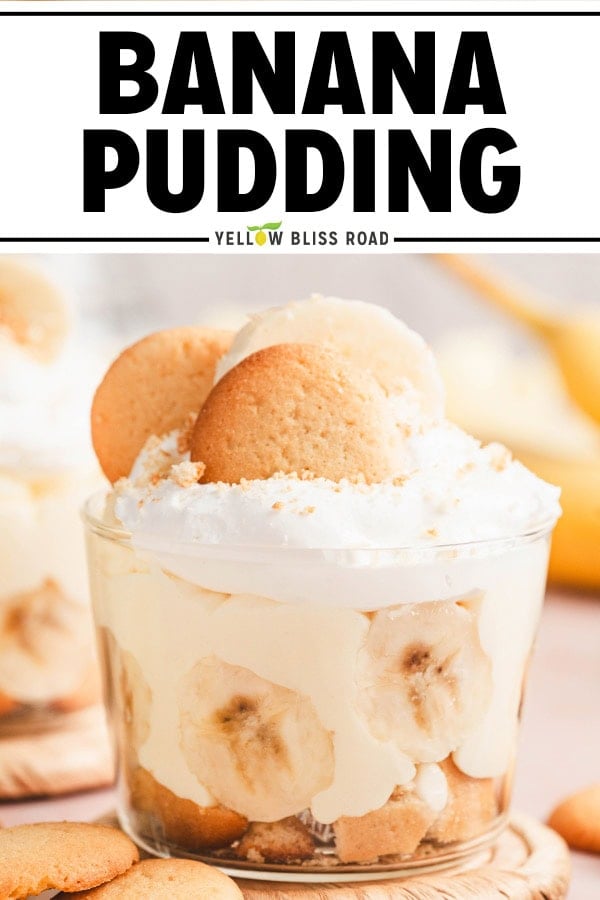
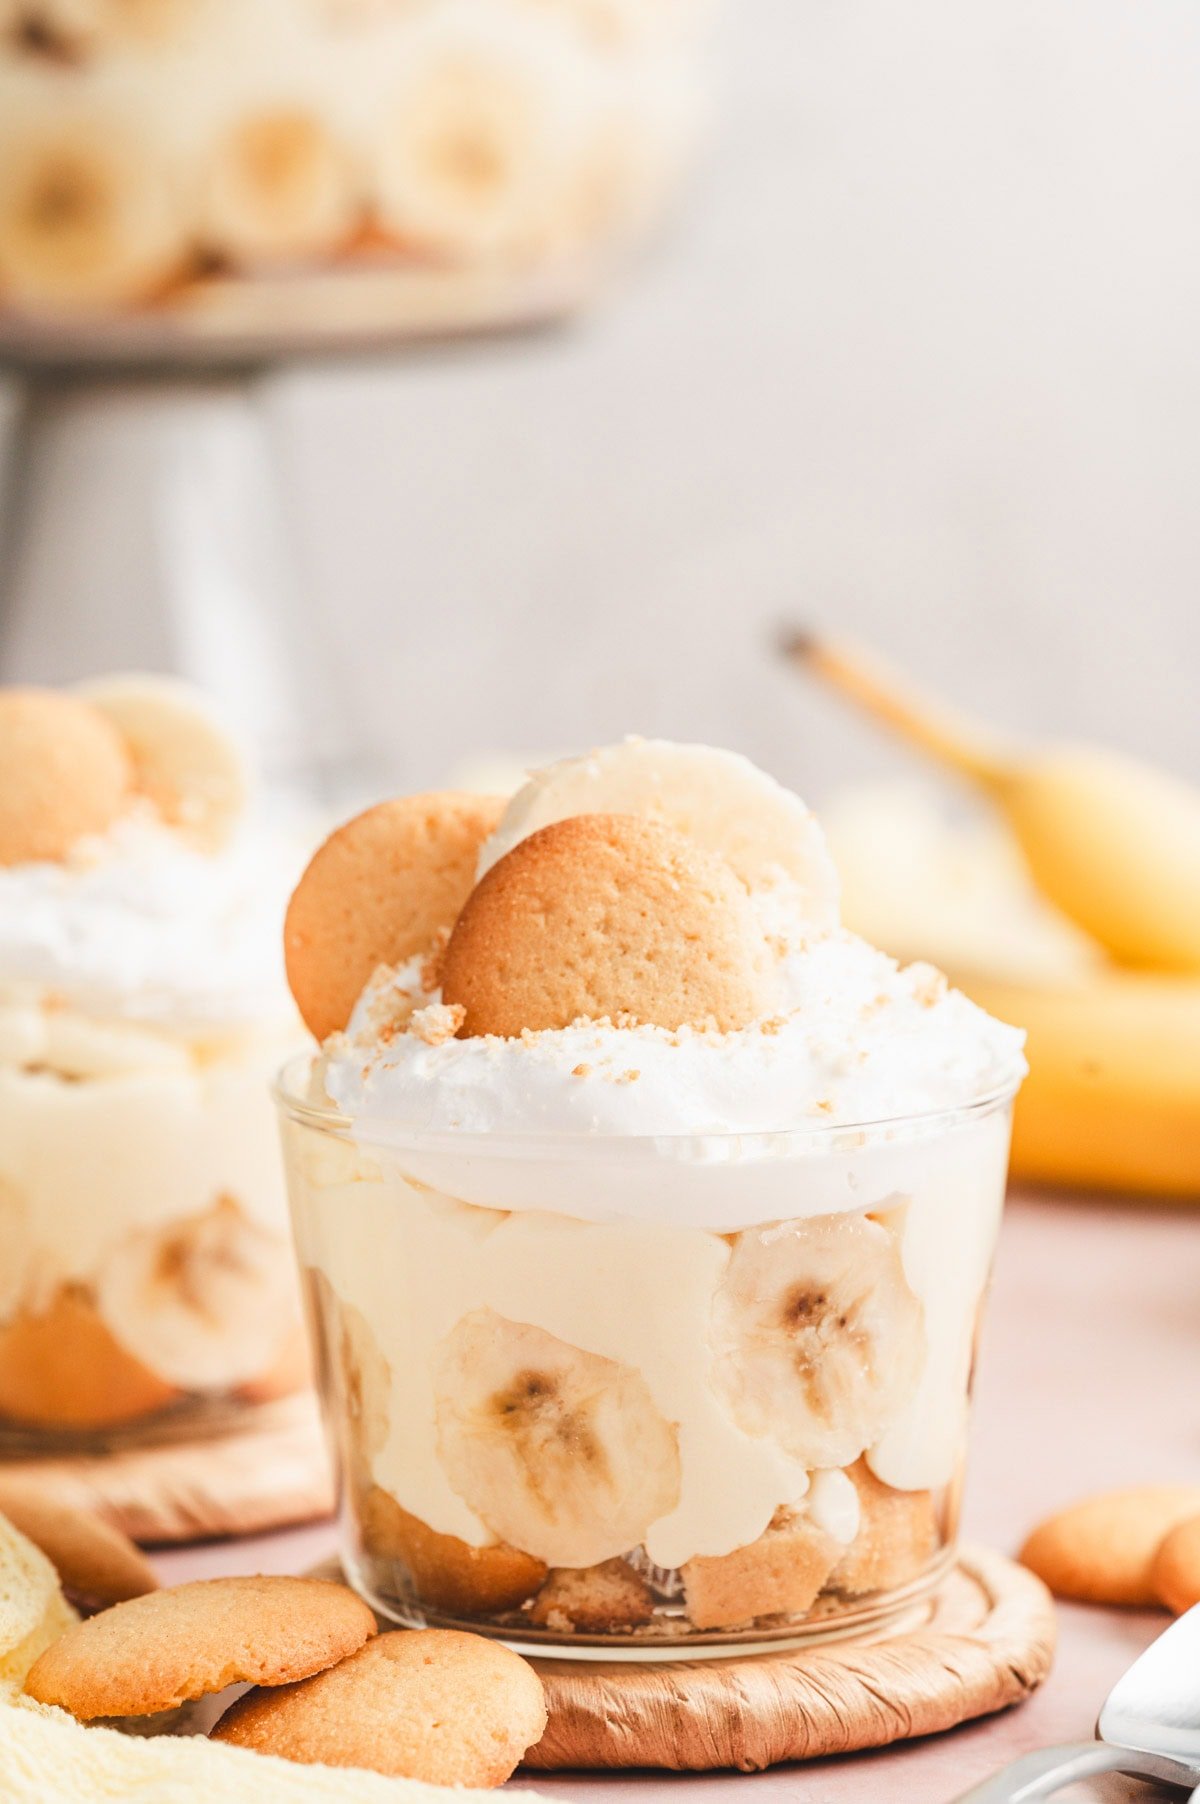
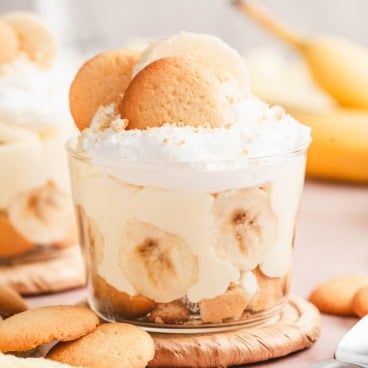
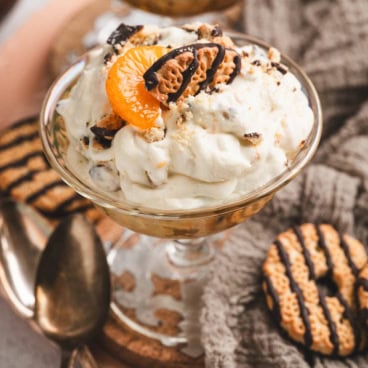
This creamy Banana Pudding is a classic Southern-style dessert made with pudding mix, whipped cream, and layers of bananas and vanilla wafers. It’s easy to make, no baking required, and perfect for holidays, potlucks, or anytime you’re craving a sweet, nostalgic treat.
Looking for more classic desserts? Try Chocolate Pudding Cake, Cherry Crisp, or browse our Dessert Recipes for more crowd-pleasing favorites.
5 Keys To A Great Banana Pudding
- Use instant pudding mix — Not cook-and-serve. Instant sets up firm and creamy without heating.
- Use whole milk — The fat content makes the pudding thicker and creamier.
- Fold whipped cream gently — It keeps the texture light and airy.
- Use ripe but firm bananas — Overly soft ones brown faster and underripe ones won’t be sweet enough.
- Chill for at least 1 hour — This gives the pudding time to set and all the flavors to meld.
RECIPE WALK-THROUGH
How To Make Banana Pudding
See the recipe card below for full, detailed instructions
This easy Banana Pudding Trifle is one of my go-to desserts to make when I need something delicious (and fast). These small details will help you get the best results possible.
Step 1: Make the Pudding
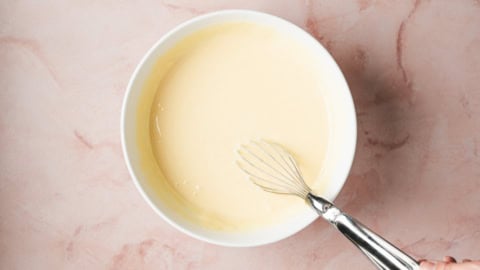
In a large bowl, whisk 2 cups of cold whole milk with two (3.4 oz) boxes of instant banana pudding until smooth. Stir in one (14 oz) can of sweetened condensed milk until thoroughly combined. The texture should be thick and creamy. Set aside.
- If you chill a metal bowl before adding the ingredients, the whole process will go much faster.
Step 2: Whip the Cream
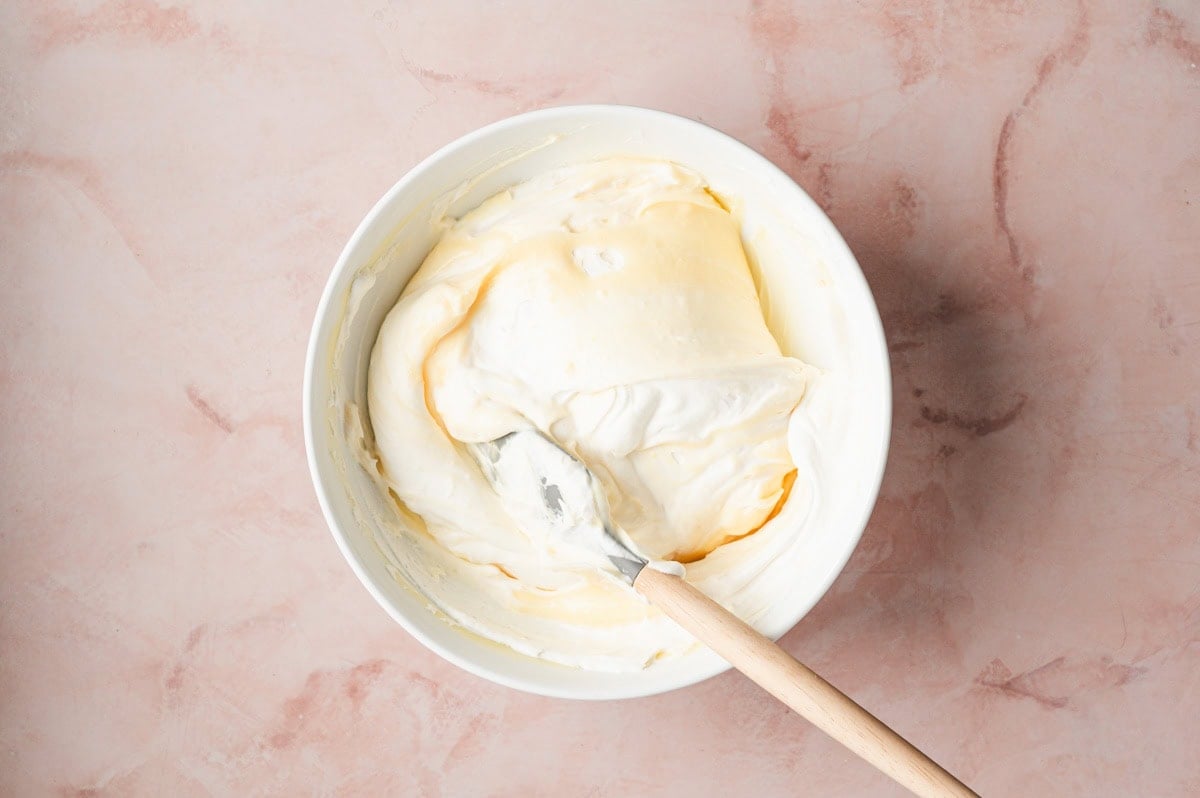
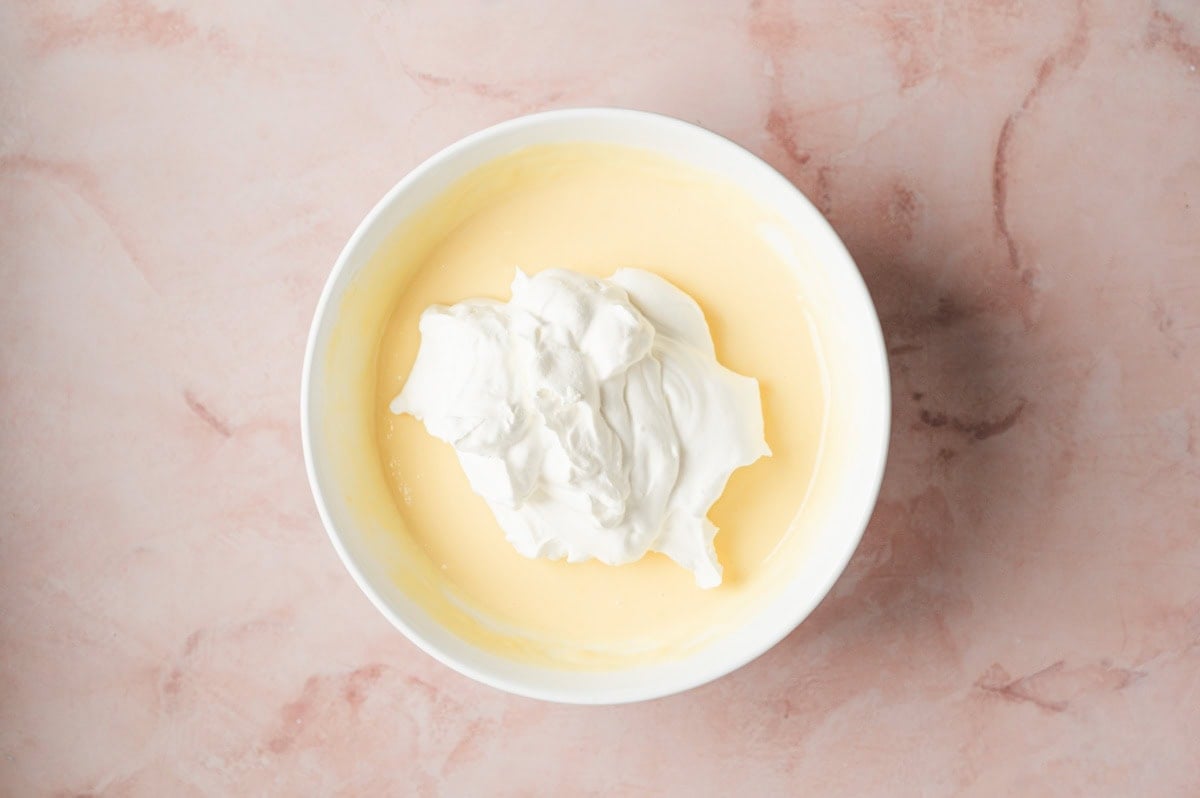
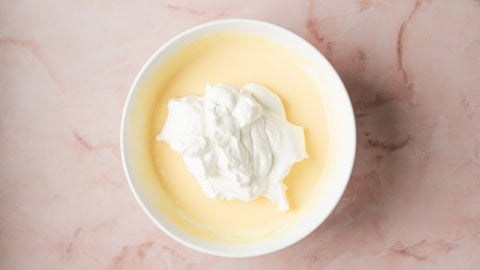
In a stand mixer bowl, whip 2 cups of heavy cream with ½ cup powdered sugar until stiff peaks form (3–5 minutes). Reserve half in the fridge and gently fold the other half into the pudding mixture until combined for a fluffy texture.
- Use a very gentle hand when folding in the whipped cream. You want to keep the air you incorporated into it during the whipping process.
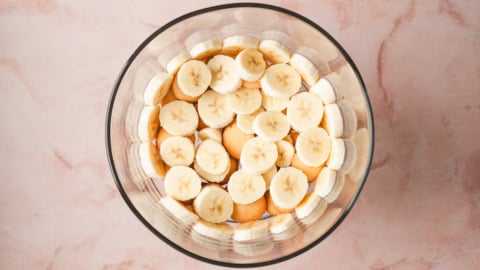
Step 3: Assemble the Layers
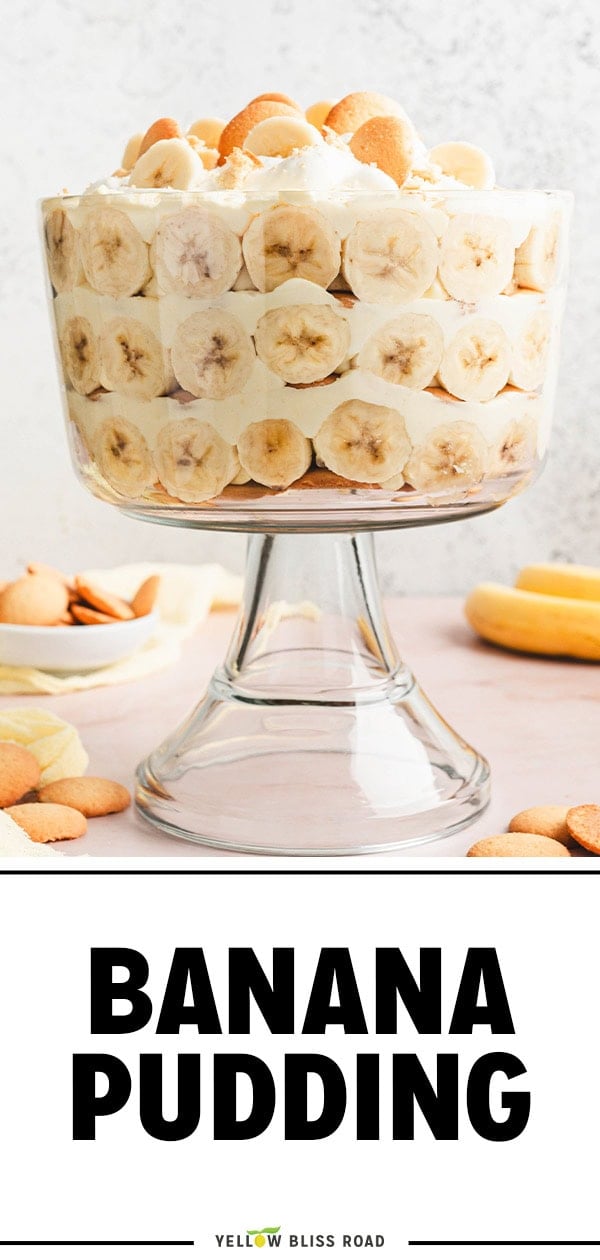
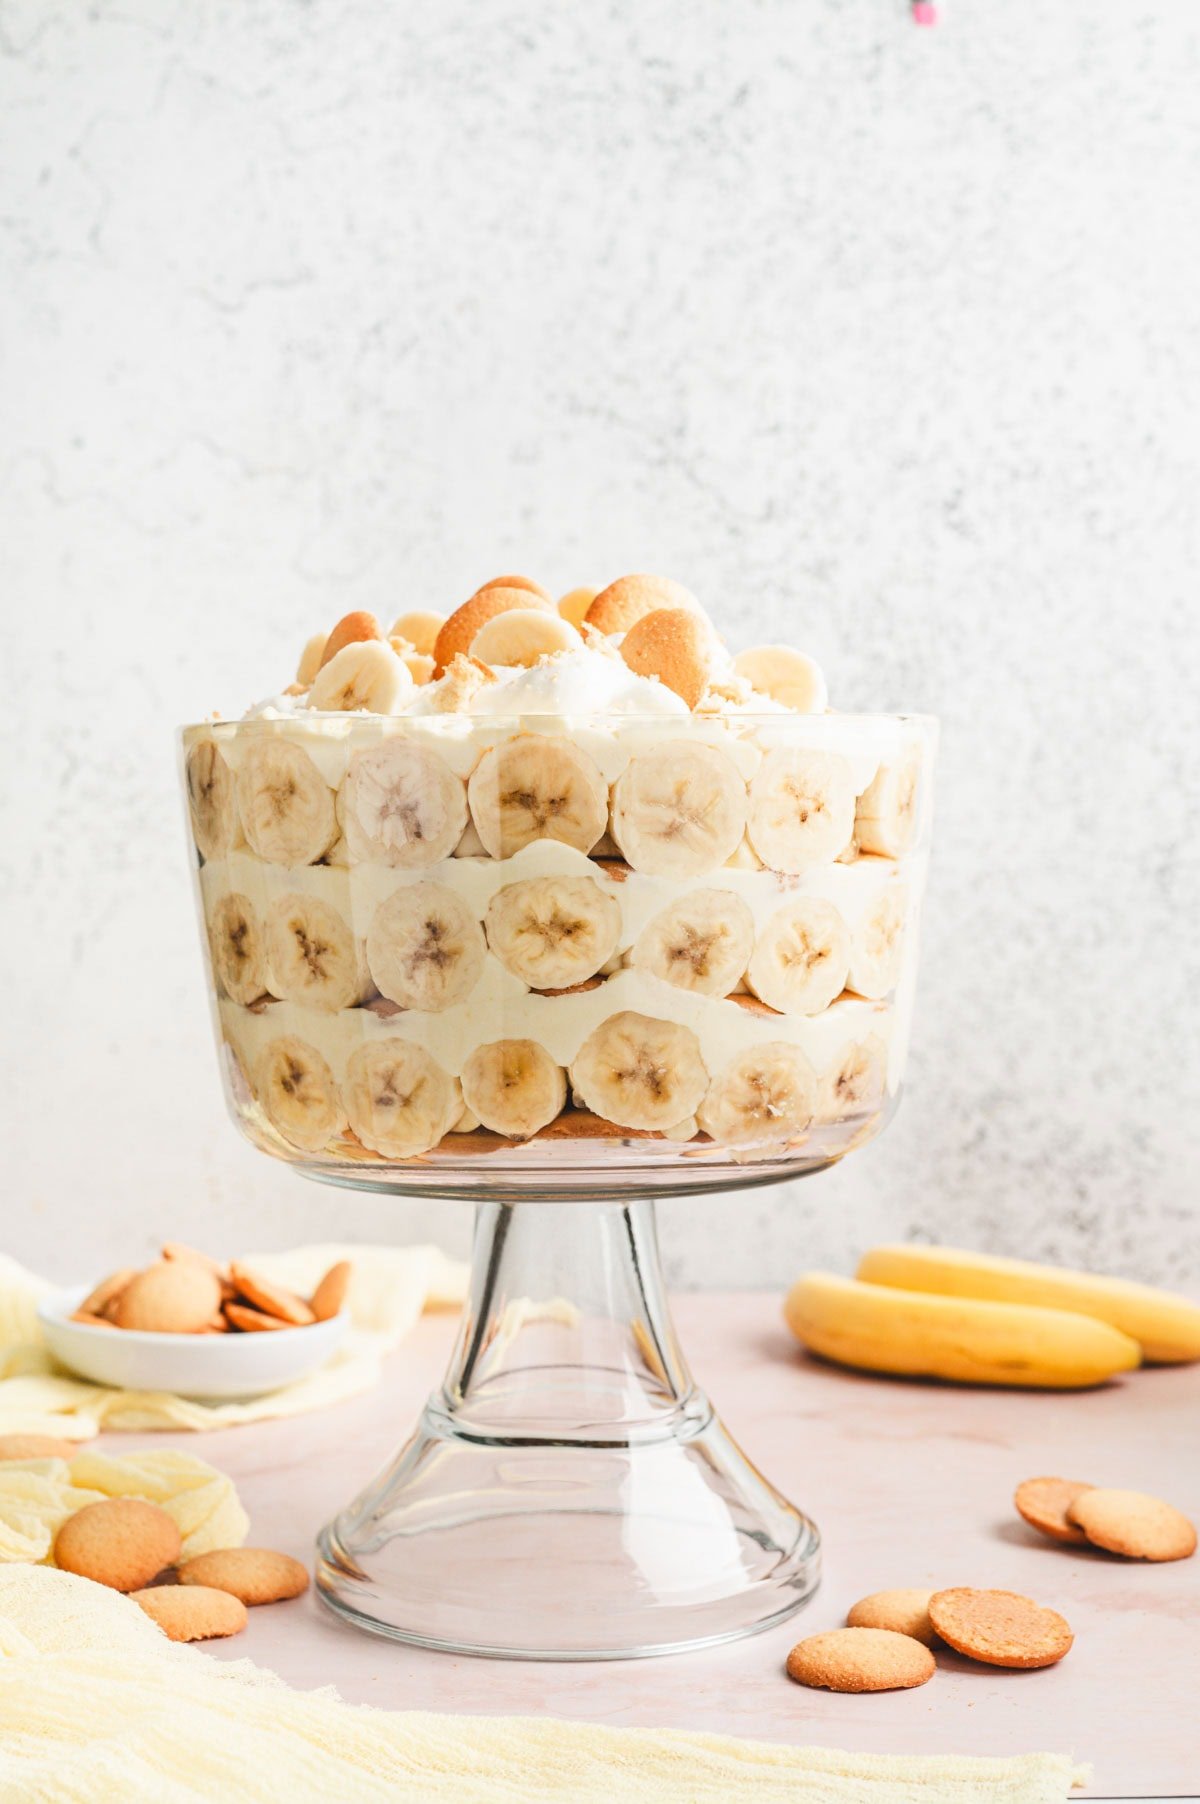
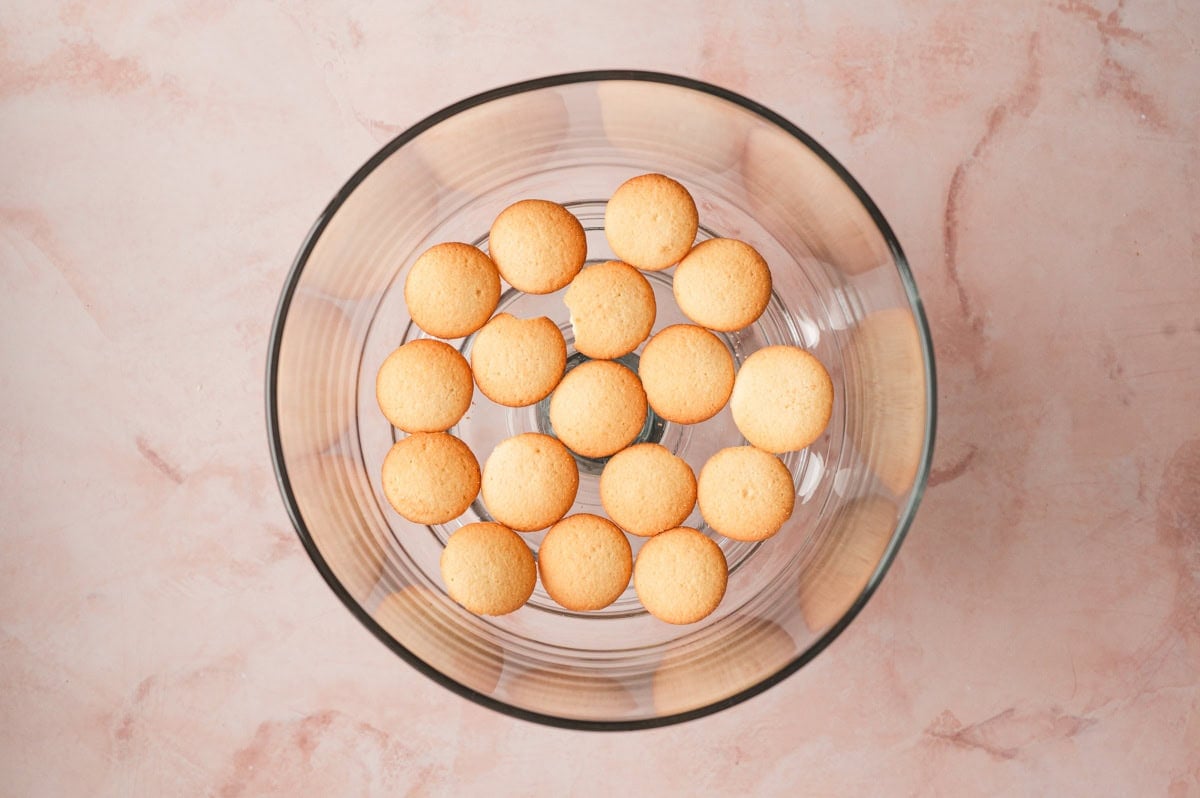
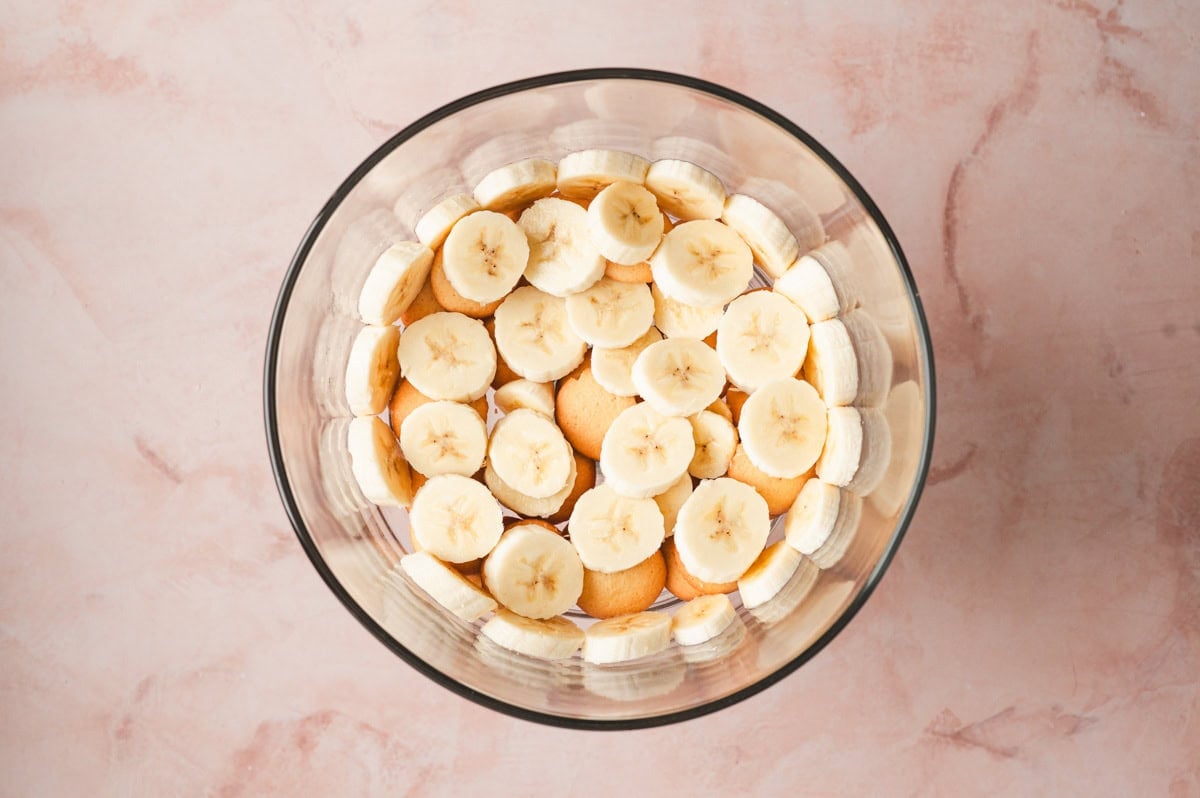
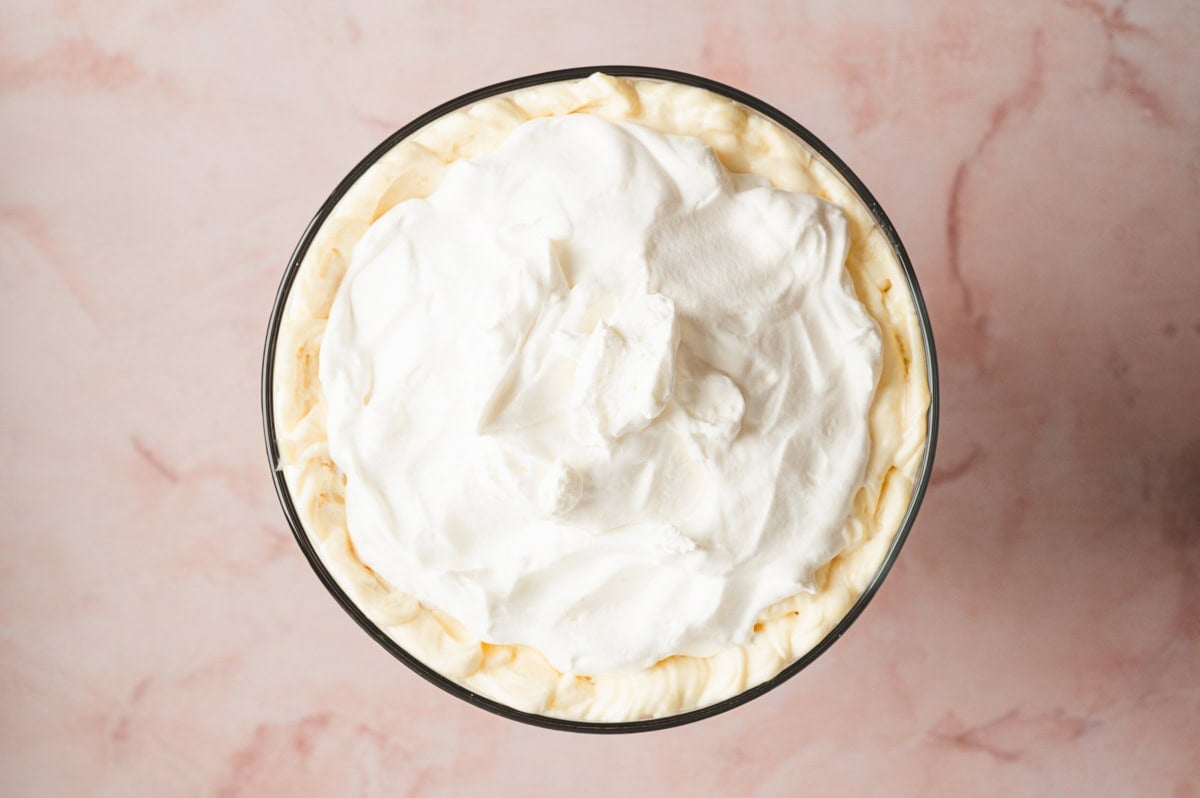
In a 9-cup trifle dish, layer ⅓ of the vanilla wafers, followed by two sliced bananas, and ⅓ of the pudding mixture. Repeat twice more to create three layers. Top with the reserved whipped cream.
- Pro Tip: Use a trifle bowl for a pretty presentation or a 9×13 for easy serving.
Step 4: Chill and Garnish
Cover with plastic wrap and refrigerate for 1–2 hours before serving. Garnish with additional banana slices, whole vanilla wafers, and crushed cookie crumbs.
- Wait to garnish with the banana and wafers until immediately before serving so the bananas don’t brown and the cookies don’t lose their crunch.
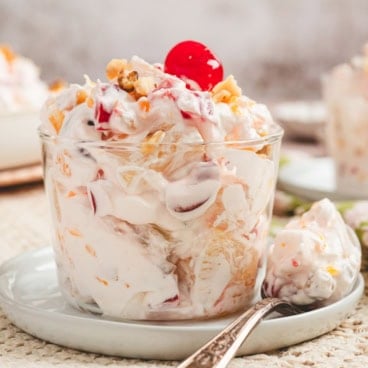
More Trifles and Dessert Salads To Try
Variations
- Mini Banana Pudding Cups: Serve in individual glasses or jars for parties or portion control.
- Chocolate Banana Pudding: Add a layer of chocolate pudding or chocolate chips.
- Strawberry Banana Pudding: Mix in fresh sliced strawberries between layers.
Serving Ideas
Top your banana pudding with extra vanilla wafers, sliced bananas, and crushed cookie crumbs for added texture and a pretty finish. It also pairs beautifully with a cup of coffee or a scoop of vanilla ice cream.
Storage Tips
Storage, Freezing, Make Ahead
- Storage – Store banana pudding in the fridge, tightly wrapped, for up to 2 days. The bananas will ripen further as they sit, enhancing the sweetness but softening the texture.
- Freezing – Freezing is not recommended, as the whipped cream and bananas won’t hold up well.
- Make Ahead – Assemble up to 24 hours in advance; keep refrigerated until ready to serve.
Frequently Asked Questions
Can I use a 9×13 baking dish instead of a trifle bowl?
Yes! Just make sure it’s deep enough to hold the layers without overflowing.
Can I use 2% or skim milk?
You can, but the pudding won’t be as thick and creamy as with whole milk.
What if I don’t have a stand mixer?
Use a hand mixer, though you may need to work in batches due to the volume.
How long does banana pudding last in the fridge?
Up to 2 days, though it’s best within the first 24 hours.
More Banana Recipes
- Banana Peach Smoothie
- Banana Bars Recipe
- Easy Banana Cake
- Caramel Banana Bread
- Sour Cream Banana Muffins
- Banana Crunch Granola
Creamy Banana Pudding
Ingredients
- 2 cups Cold whole milk
- 2 (3.4 oz) boxes Instant banana pudding
- 1 (14 oz) can Sweetened condensed milk
- 2 cups Heavy cream
- ½ cup Powdered sugar
- 1 (11 oz) box Vanilla wafer cookies (Reserving any crushed / crumbs from the bottom into a small dish)
- 6 Medium sized bananas fresh
- Additional vanilla wafers and sliced bananas for garnish if desired
Instructions
- In a large mixing bowl add the milk and pudding mix. Using a whisk, mix together until smooth. Pour in the sweetened condensed milk and mix well to combine. Set aside.

- In the bowl of a stand mixer, add the heavy whipping cream & powdered sugar. Using the whisk /whip attachment, beat for 3-5 minutes, until stiff peaks begin to form.
- Add ½ of the whipped cream to the pudding mixture and fold to combine using a heavy duty spatula. Place the remaining whipped cream in the refrigerator.
- Build the pudding: Add ⅓ of the vanilla wafer cookies to the bottom of a 9 cup trifle bowl. Slice 2 of the bananas into ½ inch thick slices and place on the wafers, I pressed some against the side of the bowl first. Spread ⅓ of the pudding mixture onto the bananas. Repeat two more times to form a total of 3 layers. Top with the remaining whipped cream.
- Cover tightly with plastic wrap and refrigerate for at least 1 hour before serving.
- Garnish with the crushed leftover crumbs, and additional cookies and banana slices if using, and serve.
Notes
- Storage – Store banana pudding in the fridge, tightly wrapped, for up to 2 days. The bananas will ripen further as they sit, enhancing the sweetness but softening the texture.
- Freezing – Freezing is not recommended.
- Make Ahead – Assemble up to 24 hours in advance; keep refrigerated until ready to serve.
- Use whole milk and instant pudding mix for best results.
- Layer wafers and bananas for texture.
- Chill at least 1 hour.
- Add bananas close to serving to prevent browning.
- Store covered in the refrigerator up to 2 days.
- Don’t freeze.
- Perfect for make-ahead or potluck desserts.
- Garnish with extra wafer crumbs before serving.
- You can use a hand mixer to whip the whipped cream; however, at 2 cups, the finished whipped cream will be closer to 4 cups, which might be a bit too much for a single whip attachment to handle.
Nutrition
Nutritional Disclaimer Kristin Maxwell of “Yellow Bliss Road” is not a dietician or nutritionist, and any nutritional information shared is an estimate. For accurate calorie counts and other nutritional values, we recommend running the ingredients through your preferred online nutritional calculator. Calories and other nutritional values can vary depending on which brands were used.