This post may contain affiliate links. Please read our disclosure policy.
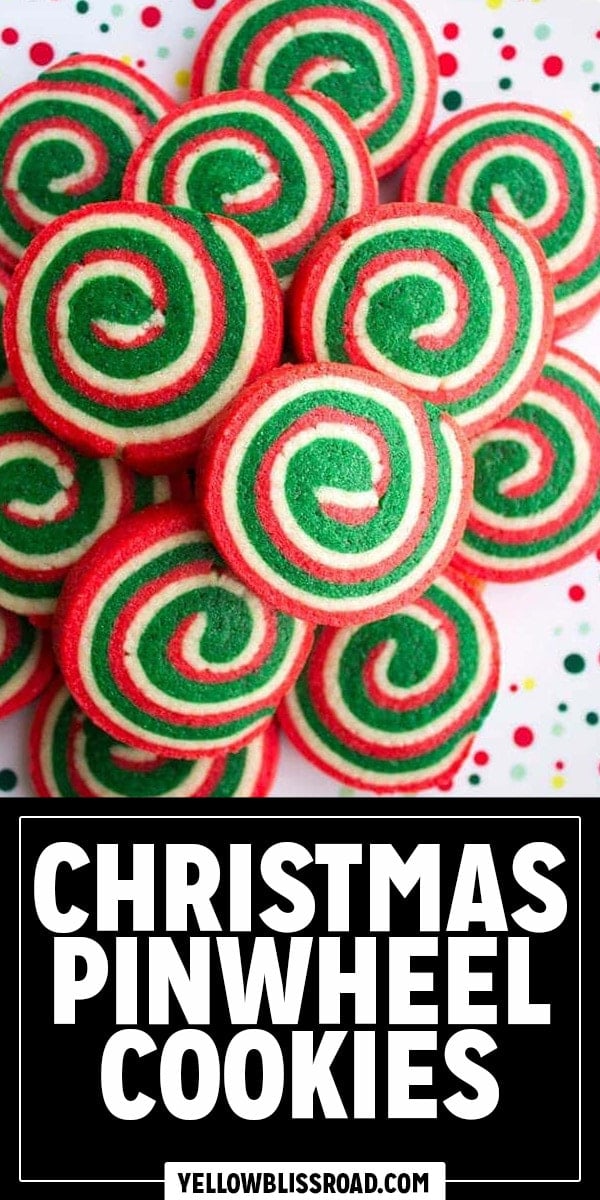
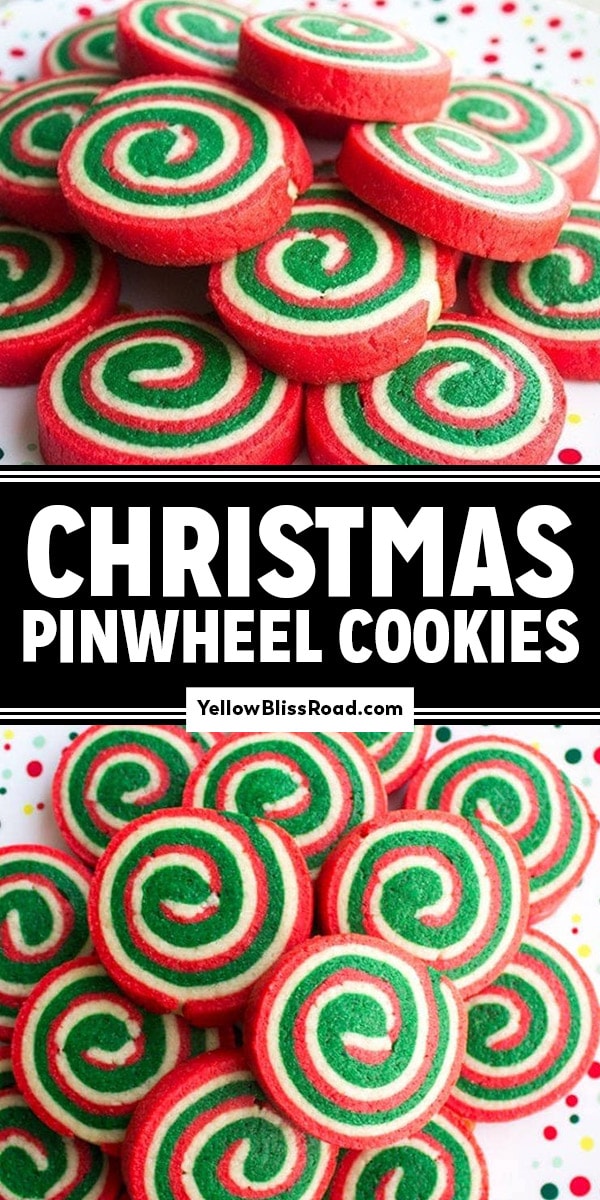
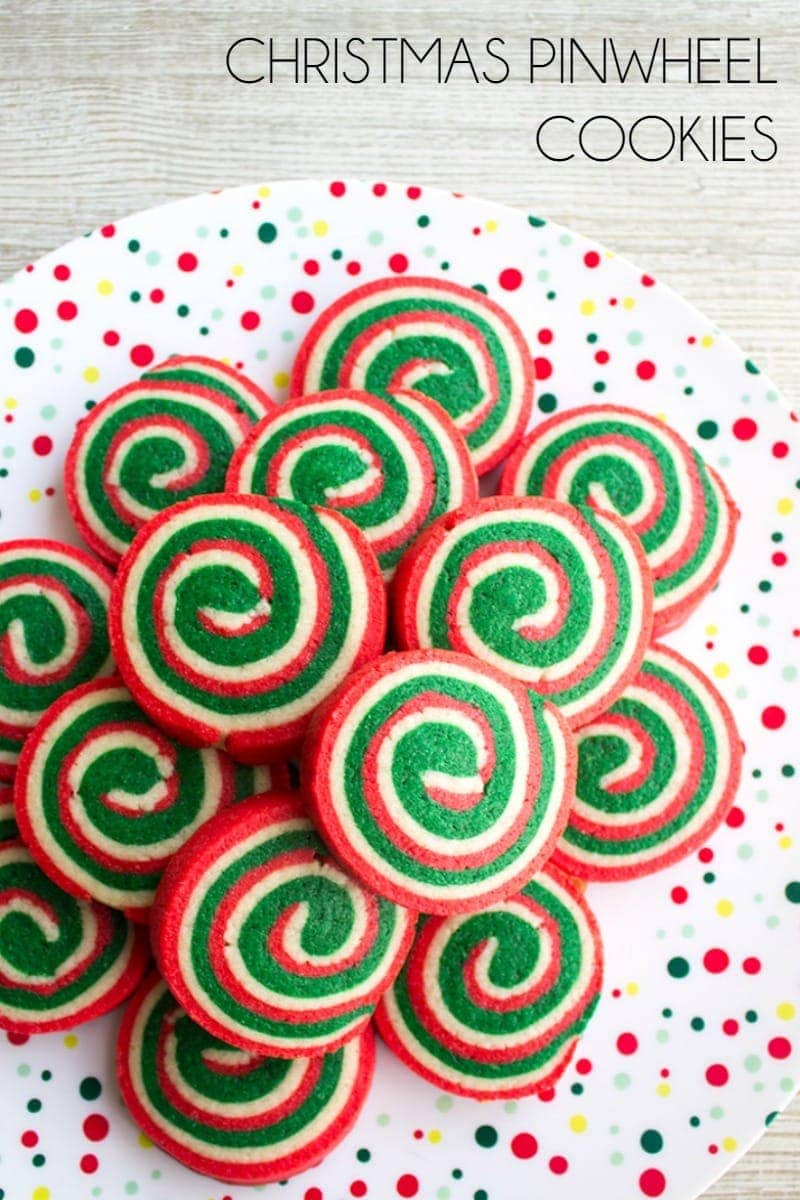
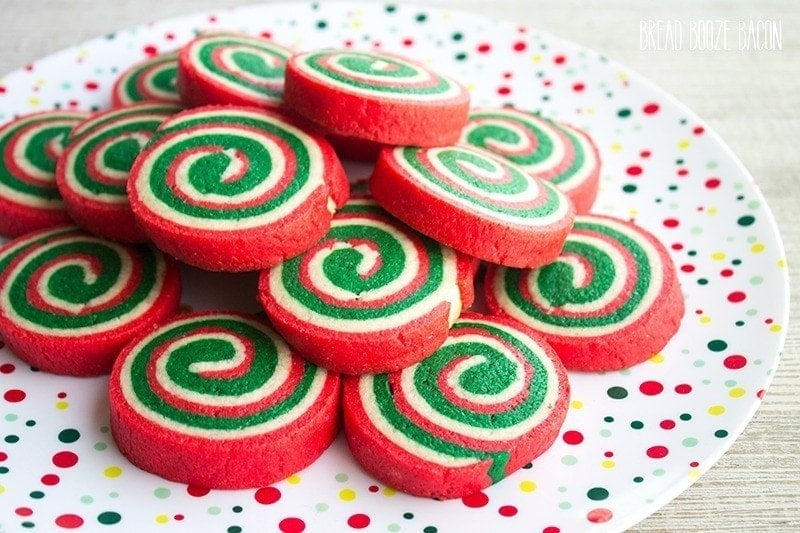
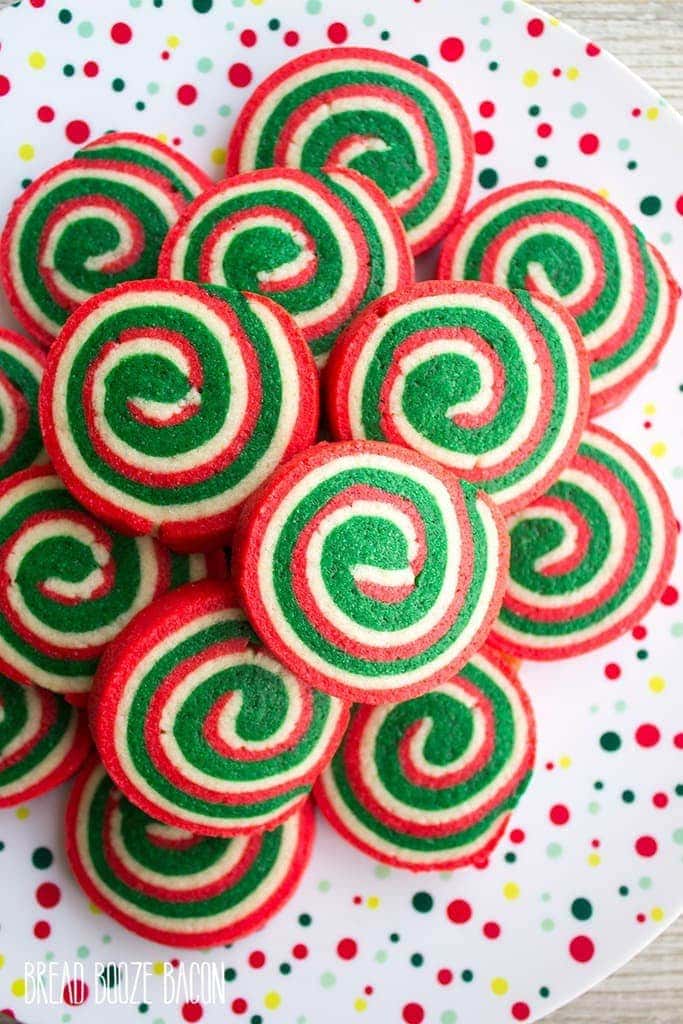
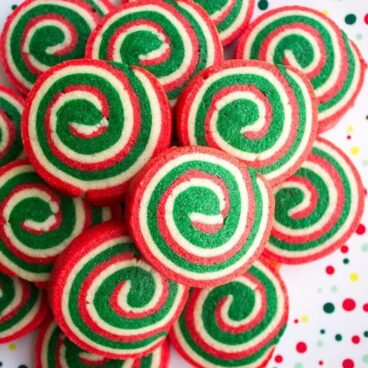
Christmas Pinwheel Cookies are a festive holiday treat that’ll be the star of your Christmas cookies plate!
We love the holidays around here but we REALLY love Christmas Pinwheel Cookies! Snowball Cookies, Red Velvet Cookies and Christmas Cheesecake Cookies are some of our other favorite cookies that we have to make every year!
Why You’ll Love These Christmas Pinwheel Cookies
Christmas baking is seriously my favorite time of the year. All the fun Christmas cookies start showing up in my feed and I get all kinds of excited. Baking is a holiday tradition in my house and my favorite part of Christmas.
But about these cookies!
- They are GORGEOUS! Just look at those swirls of colors! They look so pretty on a big plate of Christmas cookies.
- They taste delicious – These are basically a sugar cookie recipe made into a colorful pinwheel.
- They aren’t as difficult as they might seem – I was once intimidated by these cookies, but after a few batches, I’m a pro!
How To Make Christmas Pinwheel Cookies
See the recipe card below for full, detailed instructions
I’m not going to lie, these Christmas Cookie Pinwheels take a little time and some love, but what good Christmas cookies don’t? While you don’t have to cut out shapes and frost these cookies, like traditional sugar cookies, you do have to do some rolling and practice your ninja baker skills while rolling up the dough.
But you’ve totally got this. If I can do it, so can you! (be sure to scroll down to the printable recipe for the full directions. I’ll share my best tips below).
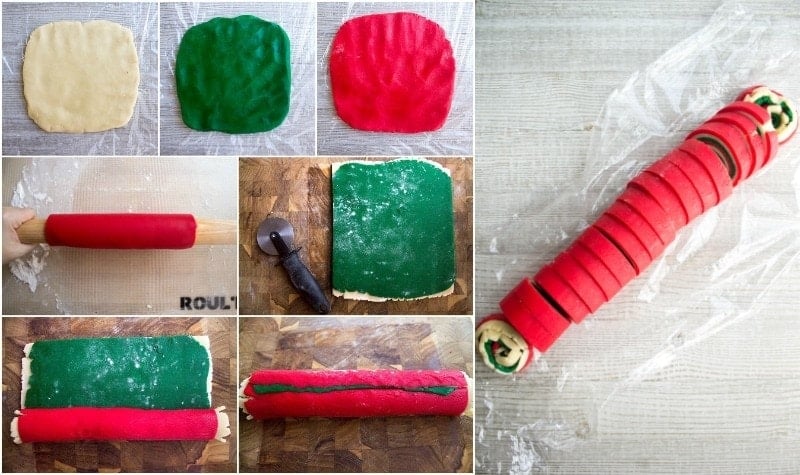
- Make the cookie dough. Combine dry ingredients and wet ingredients in separate mixing bowls. Combine them both together, mixing just until they are combined. You’ll be mixing again when you add the food coloring.
- Color the dough. Divide the dough into 3 equal pieces and roll each one into a ball. PRO TIP – use a kitchen scale to measure the pieces so they are as even as possible. Place one of the balls of dough back into the dough and use a hand mixer to beat in the food coloring until the color is completely incorporated. Start with a few drops, mix, and then add more color as needed. Repeat with a second ball of dough and another color, wiping the beater clean in between. The third ball of dough will remain the white color.
- Roll the dough. Press each ball of dough into a flat square and wrap in plastic wrap. Refrigerate the dough for at least an hour. Once chilled, bring out the dough and use a rolling pin to toll the red dough between 2 sheets of parchment paper, then repeat with the other two colors and refrigerate again.
- Assemble the cookies. Layer the colors together on a flat surface, then roll into a log shape and refrigerate again.
- Bake your Christmas Cookies. Slice cookie dough into 1/4-inch pinwheel shapes using a sharp knife. Arrange cookies on a baking sheet lined with parchment paper. Bake for 12-15 minutes in a 350℉ oven or until the cookies are set.
- Cool on the baking pan for several minutes then transfer ro a wire rack to cool completely.
Storage
Store cooled cookies in an airtight container at room temperature or 4-5 days.
Pinwheel Cookies freeze so nicely. Make them up to 2 months ahead of Christmas and freeze them in a plastic bag. Thaw at room temperature.
Expert Tips
- For the most vibrant colors, I highly recommend using gel food coloring, so you will not need nearly as much. With liquid food coloring, you’ll need at least ¼ teaspoon or more for each color.
- Be careful not to roll the dough too thin and remember to flour everything and often so the dough doesn’t stick to anything but itself.
- Feel free to play around with the different flavored extract, like almond or peppermint, adding a teaspoon of either with the vanilla.
More Christmas Cookies
- Peanut Blossoms
- Chocolate Covered Peanut Butter Balls
- Cheesecake Christmas Cookies
- Sugar Cookie Dough Dip
- Butter Cookies
- Meltaway Eggnog Cookies
- Orange Cranberry White Chocolate Chip Cookies
Christmas Cookie Pinwheels
Ingredients
- 2 cups all-purpose flour plus more for dusting
- 1/2 teaspoon baking powder
- 1/4 teaspoon salt
- 12 tablespoons unsalted butter at room temperature
- 3/4 cup sugar
- 1 egg
- 1 teaspoon vanilla extract
- ½ to 1 teaspoon liquid red food coloring to you color liking
- ½ to 1 teaspoon liquid green food coloring to your color liking
Instructions
- In a medium mixing bowl, mix together the flour, baking powder, and salt, Set aside.
- In a large mixing bowl, beat together the butter and sugar for 1-2 minutes, or until pale and fluffy. Add the egg and vanilla to the butter mixture and beat until combined, scraping the sides of the bowl as needed.
- Add the dry ingredients to the wet ingredients in two additions, mixing until just combined after each addition. Scrape the sides od the bowl as needed.
- Divide the dough into 3 equal pieces and roll each piece into a ball. (You can eyeball it or use a kitchen scale to measure the pieces.)
- Place one piece of dough back in the bowl and add the red food coloring. Beat with your mixer until the color is completely incorporated. (Be sure to use a bowl that won’t stain.) Clean you mixer paddle or hand mixer blades.
- Place one piece of dough back in the bowl and add the green food coloring. Beat with your mixer until the color is completely incorporated. Leave the third piece of dough as is.
- Press each piece of dough into a flat square and wrap in plastic wrap. Refrigerate the dough for 1 hour or until firm.
- Remove the dough squares from the fridge. Place the red dough between 2 sheets of parchment paper or waxed paper. Use a rolling pin to roll out the dough to a 10-inch square. Leave dough between parchment.
- Repeat with the other 2 pieces of dough. Refrigerate cookie dough for 30 mins.
- Remove dough from fridge, and take the top layer of parchment off each sheet of cookie dough. Place the red dough down on a counter. Top with the white dough, non-parchment sides touching. Be sure to try and line up the edges of the dough as much as possible.
- Remove the parchment from the white dough. Top the white with the green, non-parchment sides touching, being sure to line up the edges. Remove parchment from green dough. Use a pizza cutter to trim the left and right edges of the cookie dough into straight lines.
- Very carefully, starting with one of the straightened sides, roll the dough into a long shape until you reach the other trimmed dough edge. Use the parchment paper to lift the dough to get it started. Once the dough log is complete, gently pinch the seam closed along with any breaks on the outer red layer.
- Wrap the dough log in plastic wrap and refrigerate for 1 hour or until firm.
- Preheat your oven to 350 degrees F. Line a baking sheet with a silicone mat or parchment paper.
- Use a sharp knife to cut the dough log into 1/4-inch thick slices. (Discard the ends since they don't make a nice pinwheel design.) Place the cookies 2 inches apart on your prepared baking sheets and bake for 12 to 15 minutes, or until the cookies are set.
- Carefully remove from the oven and let cool for 5 minutes on the baking sheet before transferring to a wire rack to cool completely. Serve immediately or store in an airtight container until ready to serve.
Notes
Nutrition
Nutritional Disclaimer Kristin Maxwell of “Yellow Bliss Road” is not a dietician or nutritionist, and any nutritional information shared is an estimate. For accurate calorie counts and other nutritional values, we recommend running the ingredients through your preferred online nutritional calculator. Calories and other nutritional values can vary depending on which brands were used.

Very good, detailed recipe. Cookies turn out great. Except – how do you get 16 cookies if you slice a 10″ log every 1/4 inch? That would technically be 40 cookies. A few less to account for trimming the ends.
Delicious! Great for a bad day when you need to cheer up!
Thank you Leah!
Hello, is it possible to substitute the sugar for honey or maple syrup in this recipe?
Thanks in advance!
How many grams flour for the 2 cups? I typically weigh my flour at 120g/cup but I know some bakers use more so thought I’d ask. Thanks.
Can u tell me what the flour is in grams please? 2 cups usually equals 240g but some bakers differ.
Thanks
Is it possible to make the dough ahead of time and leave it wrapped in the fridge for 1 day? Or should I freeze the log and the thaw to room temp before cutting and baking?
Yes you could leave the dough for a day, but no longer.
This turned out very well, not too sweet, so the sprinkles do add a bit of sweetness. Love it and so festive-looking!