This post may contain affiliate links. Please read our disclosure policy.
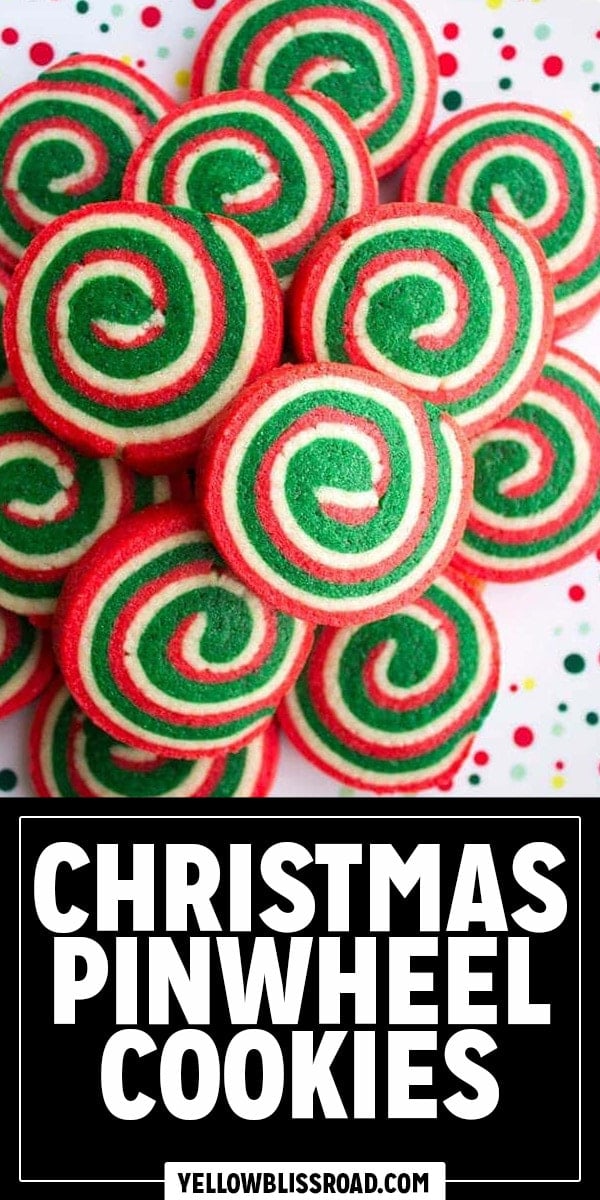
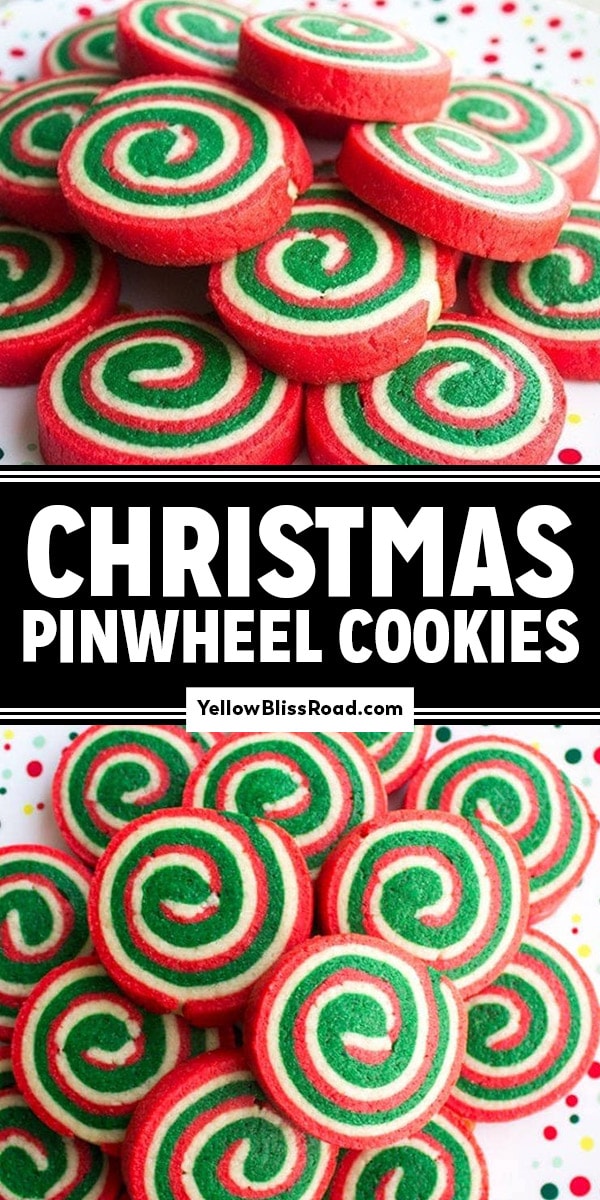
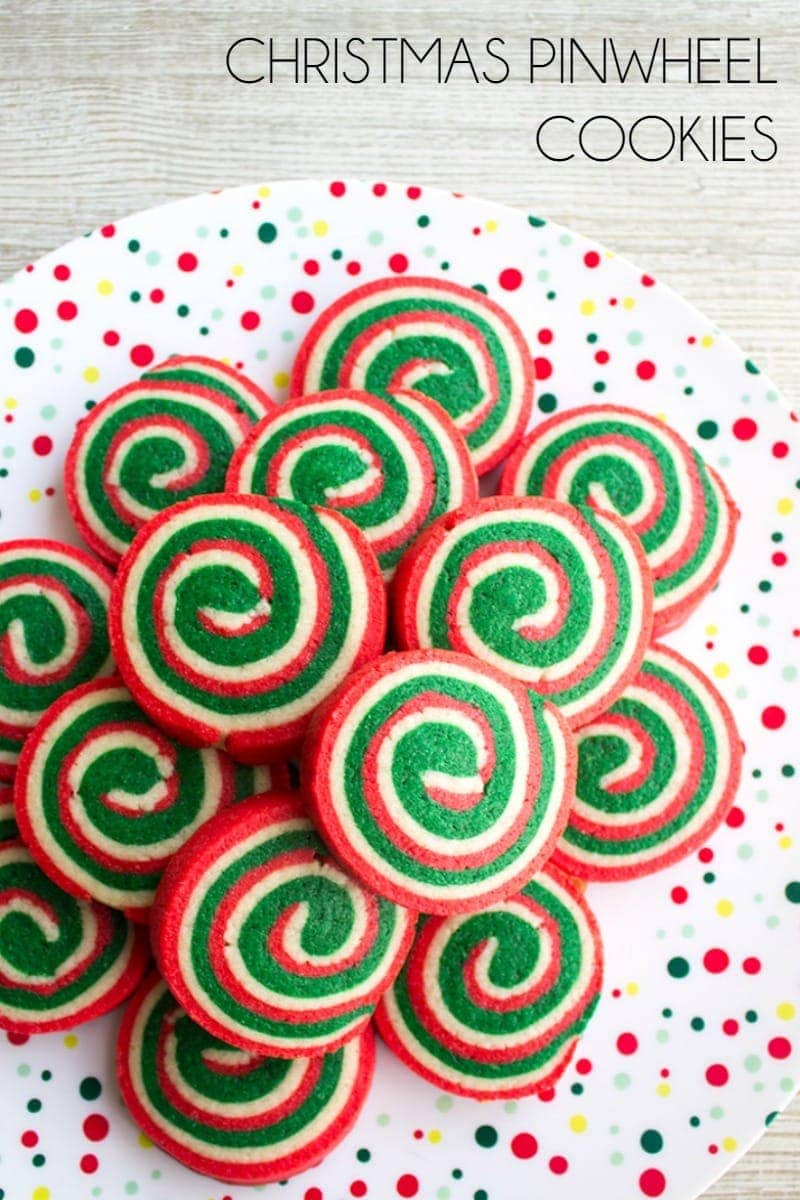
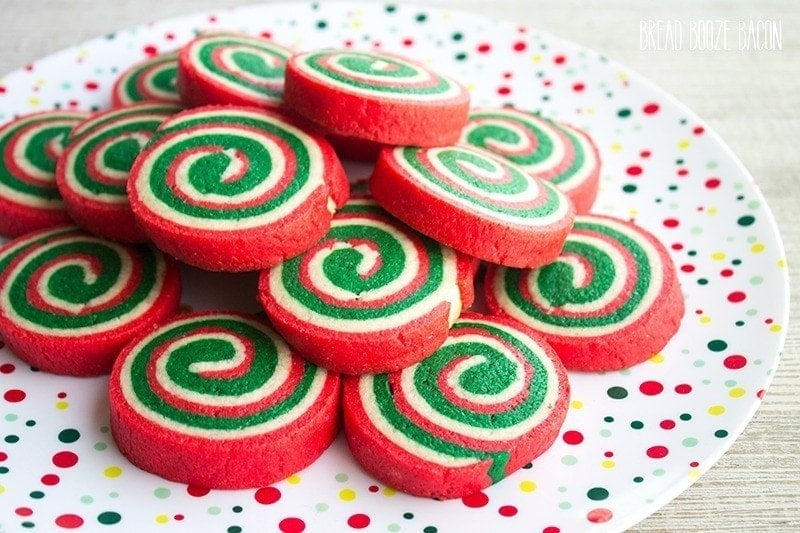
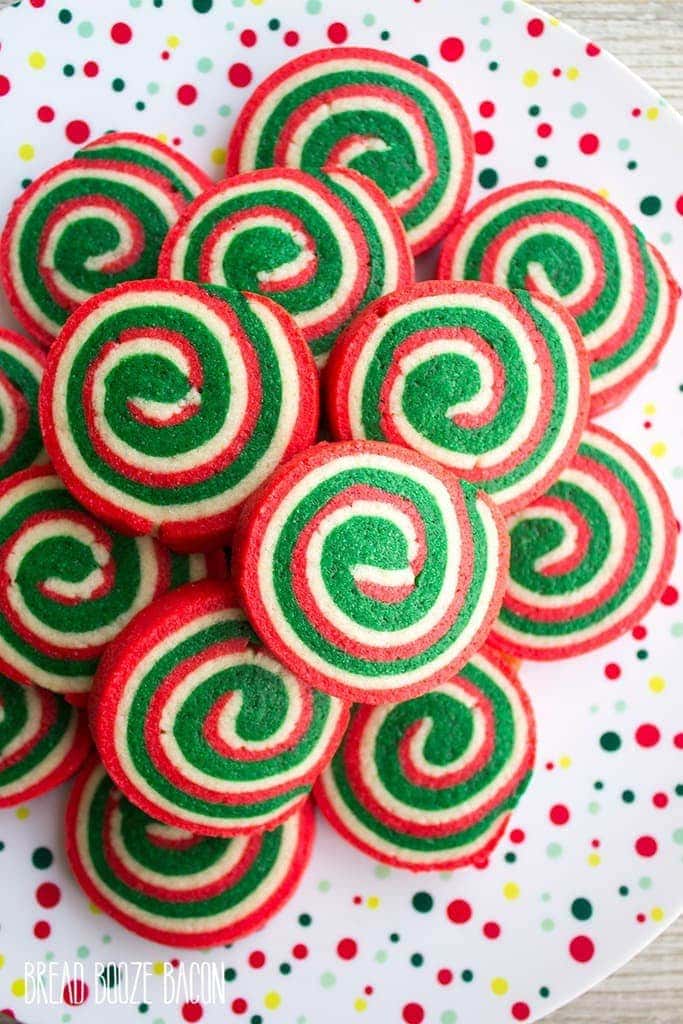
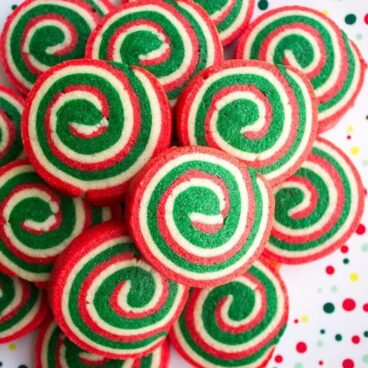
Christmas Pinwheel Cookies are a festive holiday treat that’ll be the star of your Christmas cookies plate!
We love the holidays around here but we REALLY love Christmas Pinwheel Cookies! Snowball Cookies, Red Velvet Cookies and Christmas Cheesecake Cookies are some of our other favorite cookies that we have to make every year!
Why You’ll Love These Christmas Pinwheel Cookies
Christmas baking is seriously my favorite time of the year. All the fun Christmas cookies start showing up in my feed and I get all kinds of excited. Baking is a holiday tradition in my house and my favorite part of Christmas.
But about these cookies!
- They are GORGEOUS! Just look at those swirls of colors! They look so pretty on a big plate of Christmas cookies.
- They taste delicious – These are basically a sugar cookie recipe made into a colorful pinwheel.
- They aren’t as difficult as they might seem – I was once intimidated by these cookies, but after a few batches, I’m a pro!
How To Make Christmas Pinwheel Cookies
See the recipe card below for full, detailed instructions
I’m not going to lie, these Christmas Cookie Pinwheels take a little time and some love, but what good Christmas cookies don’t? While you don’t have to cut out shapes and frost these cookies, like traditional sugar cookies, you do have to do some rolling and practice your ninja baker skills while rolling up the dough.
But you’ve totally got this. If I can do it, so can you! (be sure to scroll down to the printable recipe for the full directions. I’ll share my best tips below).
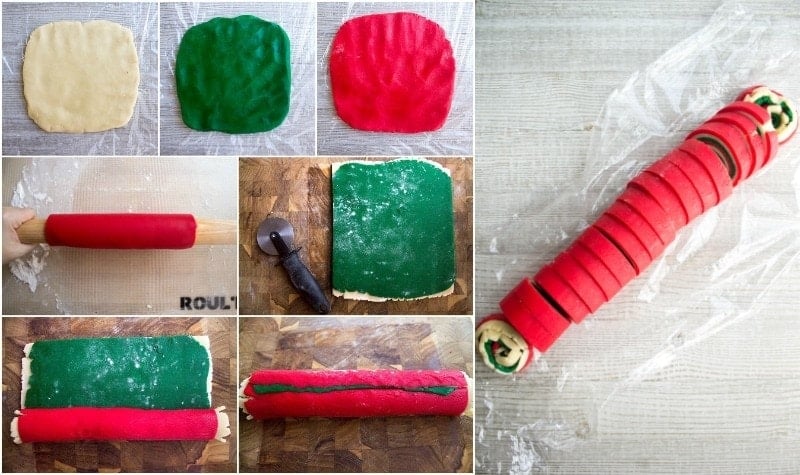
- Make the cookie dough. Combine dry ingredients and wet ingredients in separate mixing bowls. Combine them both together, mixing just until they are combined. You’ll be mixing again when you add the food coloring.
- Color the dough. Divide the dough into 3 equal pieces and roll each one into a ball. PRO TIP – use a kitchen scale to measure the pieces so they are as even as possible. Place one of the balls of dough back into the dough and use a hand mixer to beat in the food coloring until the color is completely incorporated. Start with a few drops, mix, and then add more color as needed. Repeat with a second ball of dough and another color, wiping the beater clean in between. The third ball of dough will remain the white color.
- Roll the dough. Press each ball of dough into a flat square and wrap in plastic wrap. Refrigerate the dough for at least an hour. Once chilled, bring out the dough and use a rolling pin to toll the red dough between 2 sheets of parchment paper, then repeat with the other two colors and refrigerate again.
- Assemble the cookies. Layer the colors together on a flat surface, then roll into a log shape and refrigerate again.
- Bake your Christmas Cookies. Slice cookie dough into 1/4-inch pinwheel shapes using a sharp knife. Arrange cookies on a baking sheet lined with parchment paper. Bake for 12-15 minutes in a 350℉ oven or until the cookies are set.
- Cool on the baking pan for several minutes then transfer ro a wire rack to cool completely.
Storage
Store cooled cookies in an airtight container at room temperature or 4-5 days.
Pinwheel Cookies freeze so nicely. Make them up to 2 months ahead of Christmas and freeze them in a plastic bag. Thaw at room temperature.
Expert Tips
- For the most vibrant colors, I highly recommend using gel food coloring, so you will not need nearly as much. With liquid food coloring, you’ll need at least ¼ teaspoon or more for each color.
- Be careful not to roll the dough too thin and remember to flour everything and often so the dough doesn’t stick to anything but itself.
- Feel free to play around with the different flavored extract, like almond or peppermint, adding a teaspoon of either with the vanilla.
More Christmas Cookies
- Peanut Blossoms
- Chocolate Covered Peanut Butter Balls
- Cheesecake Christmas Cookies
- Sugar Cookie Dough Dip
- Butter Cookies
- Meltaway Eggnog Cookies
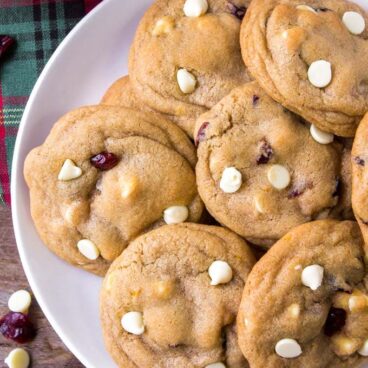
- Orange Cranberry White Chocolate Chip Cookies
Christmas Cookie Pinwheels
Ingredients
- 2 cups all-purpose flour plus more for dusting
- 1/2 teaspoon baking powder
- 1/4 teaspoon salt
- 12 tablespoons unsalted butter at room temperature
- 3/4 cup sugar
- 1 egg
- 1 teaspoon vanilla extract
- ½ to 1 teaspoon liquid red food coloring to you color liking
- ½ to 1 teaspoon liquid green food coloring to your color liking
Instructions
- In a medium mixing bowl, mix together the flour, baking powder, and salt, Set aside.
- In a large mixing bowl, beat together the butter and sugar for 1-2 minutes, or until pale and fluffy. Add the egg and vanilla to the butter mixture and beat until combined, scraping the sides of the bowl as needed.
- Add the dry ingredients to the wet ingredients in two additions, mixing until just combined after each addition. Scrape the sides od the bowl as needed.
- Divide the dough into 3 equal pieces and roll each piece into a ball. (You can eyeball it or use a kitchen scale to measure the pieces.)
- Place one piece of dough back in the bowl and add the red food coloring. Beat with your mixer until the color is completely incorporated. (Be sure to use a bowl that won’t stain.) Clean you mixer paddle or hand mixer blades.
- Place one piece of dough back in the bowl and add the green food coloring. Beat with your mixer until the color is completely incorporated. Leave the third piece of dough as is.
- Press each piece of dough into a flat square and wrap in plastic wrap. Refrigerate the dough for 1 hour or until firm.
- Remove the dough squares from the fridge. Place the red dough between 2 sheets of parchment paper or waxed paper. Use a rolling pin to roll out the dough to a 10-inch square. Leave dough between parchment.
- Repeat with the other 2 pieces of dough. Refrigerate cookie dough for 30 mins.
- Remove dough from fridge, and take the top layer of parchment off each sheet of cookie dough. Place the red dough down on a counter. Top with the white dough, non-parchment sides touching. Be sure to try and line up the edges of the dough as much as possible.
- Remove the parchment from the white dough. Top the white with the green, non-parchment sides touching, being sure to line up the edges. Remove parchment from green dough. Use a pizza cutter to trim the left and right edges of the cookie dough into straight lines.
- Very carefully, starting with one of the straightened sides, roll the dough into a long shape until you reach the other trimmed dough edge. Use the parchment paper to lift the dough to get it started. Once the dough log is complete, gently pinch the seam closed along with any breaks on the outer red layer.
- Wrap the dough log in plastic wrap and refrigerate for 1 hour or until firm.
- Preheat your oven to 350 degrees F. Line a baking sheet with a silicone mat or parchment paper.
- Use a sharp knife to cut the dough log into 1/4-inch thick slices. (Discard the ends since they don't make a nice pinwheel design.) Place the cookies 2 inches apart on your prepared baking sheets and bake for 12 to 15 minutes, or until the cookies are set.
- Carefully remove from the oven and let cool for 5 minutes on the baking sheet before transferring to a wire rack to cool completely. Serve immediately or store in an airtight container until ready to serve.
Notes
Nutrition
Nutritional Disclaimer Kristin Maxwell of “Yellow Bliss Road” is not a dietician or nutritionist, and any nutritional information shared is an estimate. For accurate calorie counts and other nutritional values, we recommend running the ingredients through your preferred online nutritional calculator. Calories and other nutritional values can vary depending on which brands were used.

Very good, detailed recipe. Cookies turn out great. Except – how do you get 16 cookies if you slice a 10″ log every 1/4 inch? That would technically be 40 cookies. A few less to account for trimming the ends.
Delicious! Great for a bad day when you need to cheer up!
Thank you Leah!
Hello, is it possible to substitute the sugar for honey or maple syrup in this recipe?
Thanks in advance!
How many grams flour for the 2 cups? I typically weigh my flour at 120g/cup but I know some bakers use more so thought I’d ask. Thanks.
Can u tell me what the flour is in grams please? 2 cups usually equals 240g but some bakers differ.
Thanks
Is it possible to make the dough ahead of time and leave it wrapped in the fridge for 1 day? Or should I freeze the log and the thaw to room temp before cutting and baking?
Yes you could leave the dough for a day, but no longer.
This turned out very well, not too sweet, so the sprinkles do add a bit of sweetness. Love it and so festive-looking!
These cookies are lovely! Wonderful flavor along with design. Do you have any suggestions for if I wanted to turn these into a 4″ cookie by chance?
I suppose you could just make the roll thicker, by doubling the recipe.
Made these cookies, and they turned out great! Wonderful step by step instructions my teen and I could follow to make some Christmas magic. Thank you!
You are so welcome Kristen! Thanks for stopping by.
Awesome recipe. These are not the easiest cookies in the world to make, but this recipe does a great job of walking you step by step to get it right! And they taste great too!
Awesome feedback Connor! Thanks for stopping by.
Hello! I’ve already made these cookies last week and they came out absolutely great! However, I was wondering if I could make the dough and roll it into the log ahead of time and freeze it until I’m ready to bake?
Absolutely yes! I would say no more than 2 months in advance.
this was a really good recipe it was easy, and they turned out good.
Thank you Bob!
They turned out great!! To the green, I added peppermint oil drops and to the red, I added cherry oil drops. My husband said they tasted great!! The grandchildren will love them.
That’s awesome Sylvia! Thanks for the awesome feedback.
I’ve made these for several years now, and they’ve become a demanded family favorite. I’ve also done other colors for different seasons and holidays, like Easter, autumn and even my favorite college football team (Notre Dame, blue & gold). Thanks for posting this!!!
You are so welcome Cynthia! Thanks for stopping by.
I love the concept of this recipe, I would love to make it for Christmas.
Would I be able to us almond flour instead of APF so does the amount stay the same? Also I would need to use almond extract that I’m sure I can judge. I use gel not food coloring is that a problem with the recipe?
You should be able to swap almond flour, the gel food coloring should be fine.
I just made these, and they turned out amazing!! First time with food coloring and cookie dough. I was a bit worried due to the consistency of the dough, but they are beautiful and delicious!!! I’ll be making them again!!!
Nice! Thanks for stopping by Ashley.
Just made these and they turned out amazing! The kids took one look at them and were saying they look like Christmas lol.
Nice! Thanks for stopping by Brandi.
I used store-bought sugar cookie dough since I was doing Christmas baking and had 7 other cookie recipes to do. When I was done baking them in the oven, they were flat, not rounded and beautiful like yours. Is there something I should do differently next time? Is there any way I could still use store-bought dough to make it easier during the holiday baking time? Thanks!
Hi Montana, I’m sorry the cookies didn’t turn out for you but store bought dough isn’t the same as making dough from scratch. Unfortunately that is the issue with your cookies not turning out. This recipe does take a little extra time but the result is a beautiful cookie!
I like your page and recipes look great, but the videos have sooo many commercials you can’t even watch them. At some points it is every 2 seconds. ?
I don’t have any videos that have ads every 2 seconds. Is it possible your page was refreshing for some reason? Even then it wouldn’t continuously show ads. I wish that we could be ad free but unfortunately this is our family’s income after spending 30+ hours a week and thousands of dollars a month writing, testing, photographing and researching recipes so that we can offer them for free.
Hi,
Unfortunately my entire batch didn’t turn out because I didn’t know they had to be spaced apart. Can you please add that to the recipe?
Thank you
Of course! Sorry for the confusion. A good rule of thumb with any cookie is to place the dough at least 2 inches apart.
How many cookies does this recipe make?
About 2 dozen, depending on the cut size.
With my first batch, I had trouble with the outer layer breaking and peeling off. So, with my next batch, I did not refrigerate the rolled-out layers. Instead, I sprayed the outer layer with water, then applied the second layer, also spritzed it with water, and then applied the top layer. While it was still around room temperature and quite flexible, I rolled everything up and refrigerated the roll for 30 minutes before slicing. I got much better results this way.
Thank you for sharing your fantastic tip!
can i make the dough ahead of time and then just take it out when I am ready to bake?
Yes, just wrap tightly in plastic wrap and store in the fridge for up to 48 hours.
You’re cookies are so beautiful!! I can’t wait to try the pinwheels!!!
Quick question! I made the dough but I want to freeze the rolls for a few weeks until we get closer to Christmas. Should I roll them in sprinkles before I freeze it or should I roll them after it is thawed right before baking? TIA
I haven’t tried it so I can’t say for sure. I’d probably go with thawing and then rolling in sprinkles.
Did this with my granddaughter. It was great. I demonstrated with 1/3 of the dough and she took over each step as we went. The looked and tasted great. We did roll them in nonpareils before slicing and baking. Even her brother was impressed!
What’s the difference between using a gel food coloring and a liquid food coloring??
The gel is thicker and more vibrant.
Awesome. Going to look good at my afternoon tea party. The only issue was i had to google how much butter by weight (170grams) as tablespoons would have taken ages. In NZ we use weight more often. I think these will be an annual make. Thanks,
Thank you! and thank you for your feedback.
This recipe seems great so far and was pretty easy, but I didn’t get anywhere near enough dough to make three 10 inch squares. Do you have to triple the recipe to get that amount?
No need to triple the recipe, but you may need to roll the dough out thinner.
These turned out so spectacular! They dress up a plate of varied Christmas cookies. I used gel colors to make them vibrant. A little time consuming, but so worth it!
This the first time I have made a cookie of this type
They turned out pretty good. The taste was great. The
Only problem I had was getting them a 10×10. Next time
I will make it square before refrigeration. All in all
Loved them.
Thank you Mary and thanks for sharing your feedback.
Not only do these cookies look amazing, they taste DELICIOUS! I used 1 tsp of food dye for each color, and they look perfect. Before baking, I rolled the outer edges of my cookies with christmas sprinkles to give them some extra holiday flare. Will definitely be making these again, and again, and again!
Thank you Allie. Glad you loved it.
Hi Julie!
How many does this make?
For whatever reason (too much flour) the outer roll of dough pulled away as it was baking.
With the second batch I very lightly brushed the green with a little milk before rolling. Perfect!
Hi Cindy, I love that you were able to make it work for you!
Time consuming to make but in the end it is a pretty design and nice tasting cookie too.
Thank You Sherry!
I was looking for a Christmas cookie recipes for my jobs Christmas party bake off and came across this recipe! These cookies look simple to make and very delicious! Thanks for posting this recipe! Looking forward to making these for the party!
Thank you Brittany and thank you for stopping by!
really not sure how everyone got 40 cookies? i got 18. super dry dough, had to add an extra egg and more butter. not the best cookies i’ve ever made
Hi Megan, Sorry the recipe didn’t work out for you, but thanks for sharing your feedback.
You can use dental floss to cut the slices. This helps to not flatten the roll when cutting. I turn my roll once when it is in the fridge to prevent 1 very flat side. Then when ready to cut cookies, gently roll and shape it a bit to get rid of any flat sides. I like the paper towel tube idea.
Great idea Pat! Thank you for stopping by!
I followed the recipe exact and it was super crumbly. When I rolled it. It just tore and broke every where. I took my time with each step and put a lot of work in these and they didn’t turn out. Partially due to the crumbly fall apart dough.
I’m sorry to hear that Cori. Is it possible that you left out an ingredient? Or that you are at a high altitude?
I made these for the first time today! They look marvelous and taste Great too! These will be on my cookie tray every Christmas!!
Thank You for sharing
Thank you Kim! So glad you enjoyed it!
Can I make the dough in advance and freeze?
Yes, you can roll, wrap, and freeze. Let it defrost in the fridge before slicing.
I didn’t see how many cookies the recipe made as is and I needed at least 3 dozen so I doubled the recipe. This came out to exactly 3 lbs. of dough so easy to divide into 3 1lb. balls. I used 40 drops of food coloring for each color which seemed to give me a nice deep color. I split the balls in half again to get 2 rolls using the 10×10″ rectangles. I recommend shaping each chunk of dough into a square shape before putting them in the refrigerator. Makes it easier to get the right shape when rolling.
Doubling yielded me about 4.5 dozen cookies (about 54 cookies). I froze the dough for a few hours so that it was easier to cut the logs.
Also, I marked 10×10″ on a piece of parchment and rolled the dough out using that as a guide. Using parchment reduces the amount of flour needed to keep the dough from sticking. I only needed to flour the rolling pin. When the red dough was rolled out, I transferred it to another sheet of parchment and rolled the next two sheets of dough on the marked parchment. This made it easy to line up the sheets since each sheet of dough will stick to the marked parchment until I peel it off.
Once the slices were on the baking sheet, I sprinkled coarse white sugar crystals over the top. This made it a little more festive but didn’t hide the gorgeous pinwheels.
These were a big hit at my cookie swap. 🙂 Thanks for the recipe!
These are definitely worse the extra effort. Love them, they are beautiful!
I baked these tonight and they came out perfect – in presentation and taste. I followed the directions to the T. The hardest part for me was rolling out into 10×10 squares. The dough softened quickly after removing it from the refrigerator and it seemed really thin. But I was generous with the flour, as indicated, and just kept going. Once I got them layered it was pretty easy to roll. I had read through the comments and saw that using a paper towel roll was recommended to keep the round shape while in the fridge – worked like a charm. I ended up leaving them in the fridge for slightly over 24 hours. The dough cut very easily. Baked for 13 minutes the first batch, but found that 12 was better. I got about 37-40 cookies.
Does the dough goes in the freezer or refrigerator?
Will these do okay if I leave them in the freezer for a week or so before I bake them?
How many cookies does this recipe make?
Wanting to know this as well. Thanks!
I got 37-40 cookies
I tried your pinwheel cookies and after I made the roll and put it in the freezer it all flattened out on one side. They tasted great but weren’t very pretty. I have had the same problem with other cookies in the past. HELP! How do you keep the rolls nice and round???
Put it in a paper towel tube slit up one side.
How about standing them on end in the freezer?
(Or put them straight up into a very tall glass until ready to use.