This post may contain affiliate links. Please read our disclosure policy.
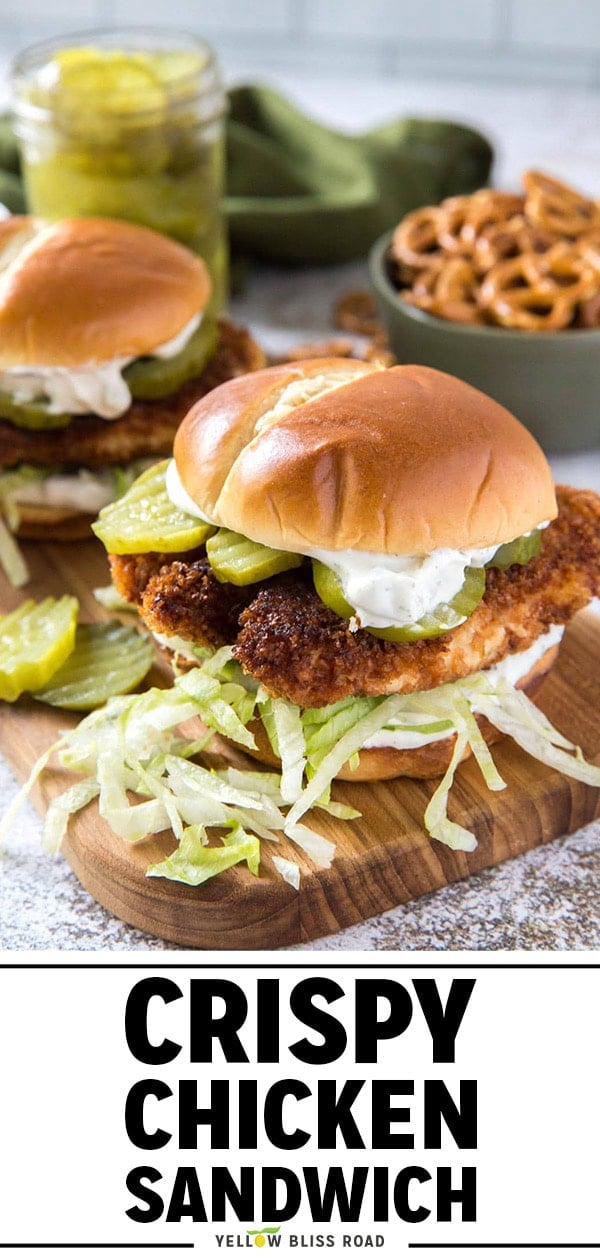
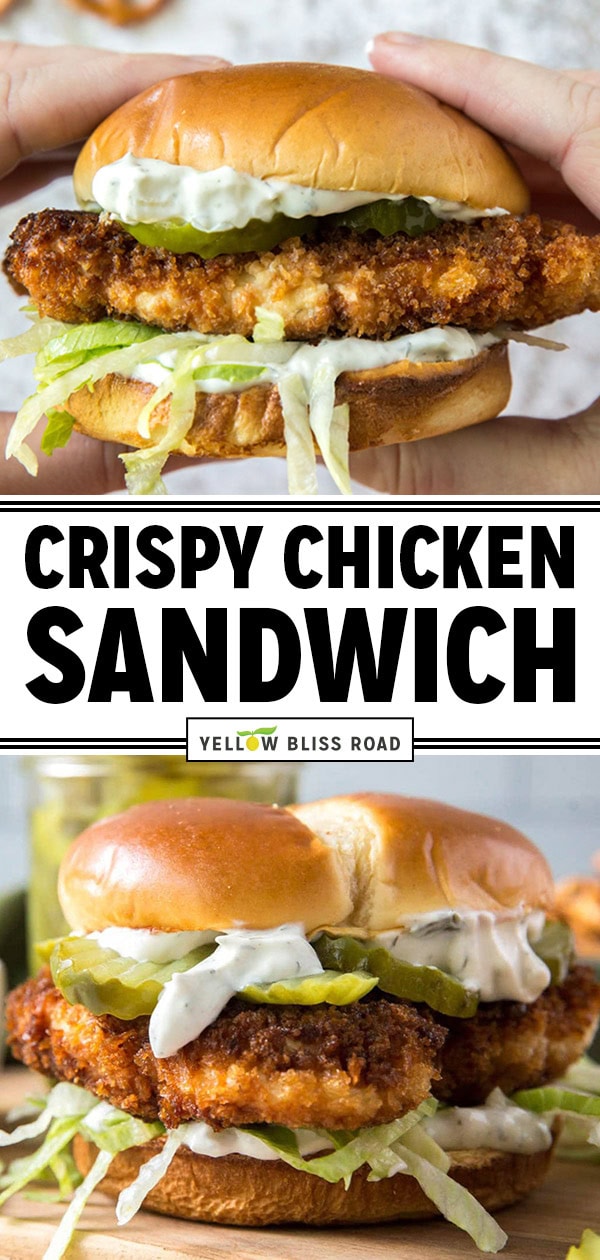
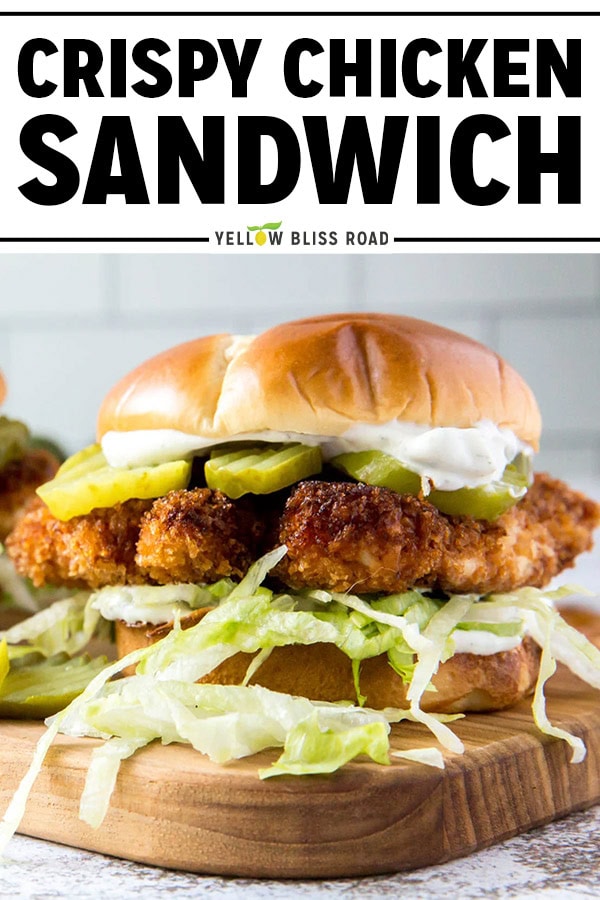
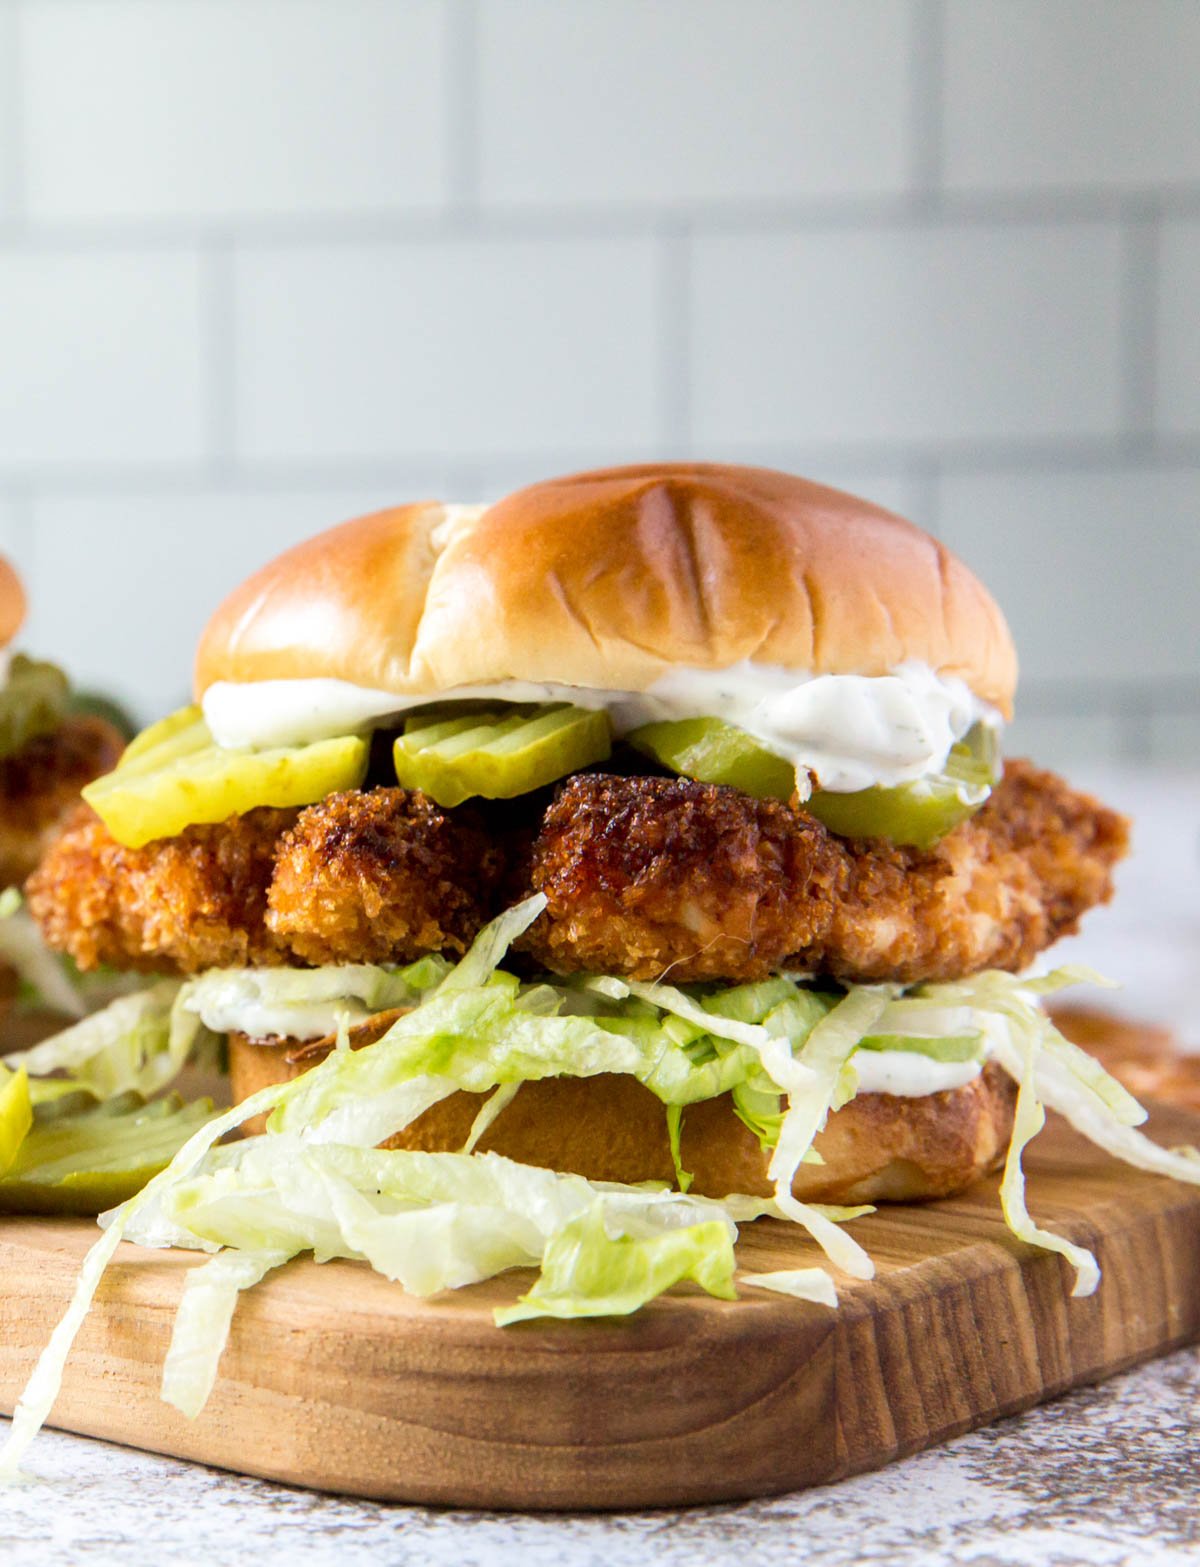
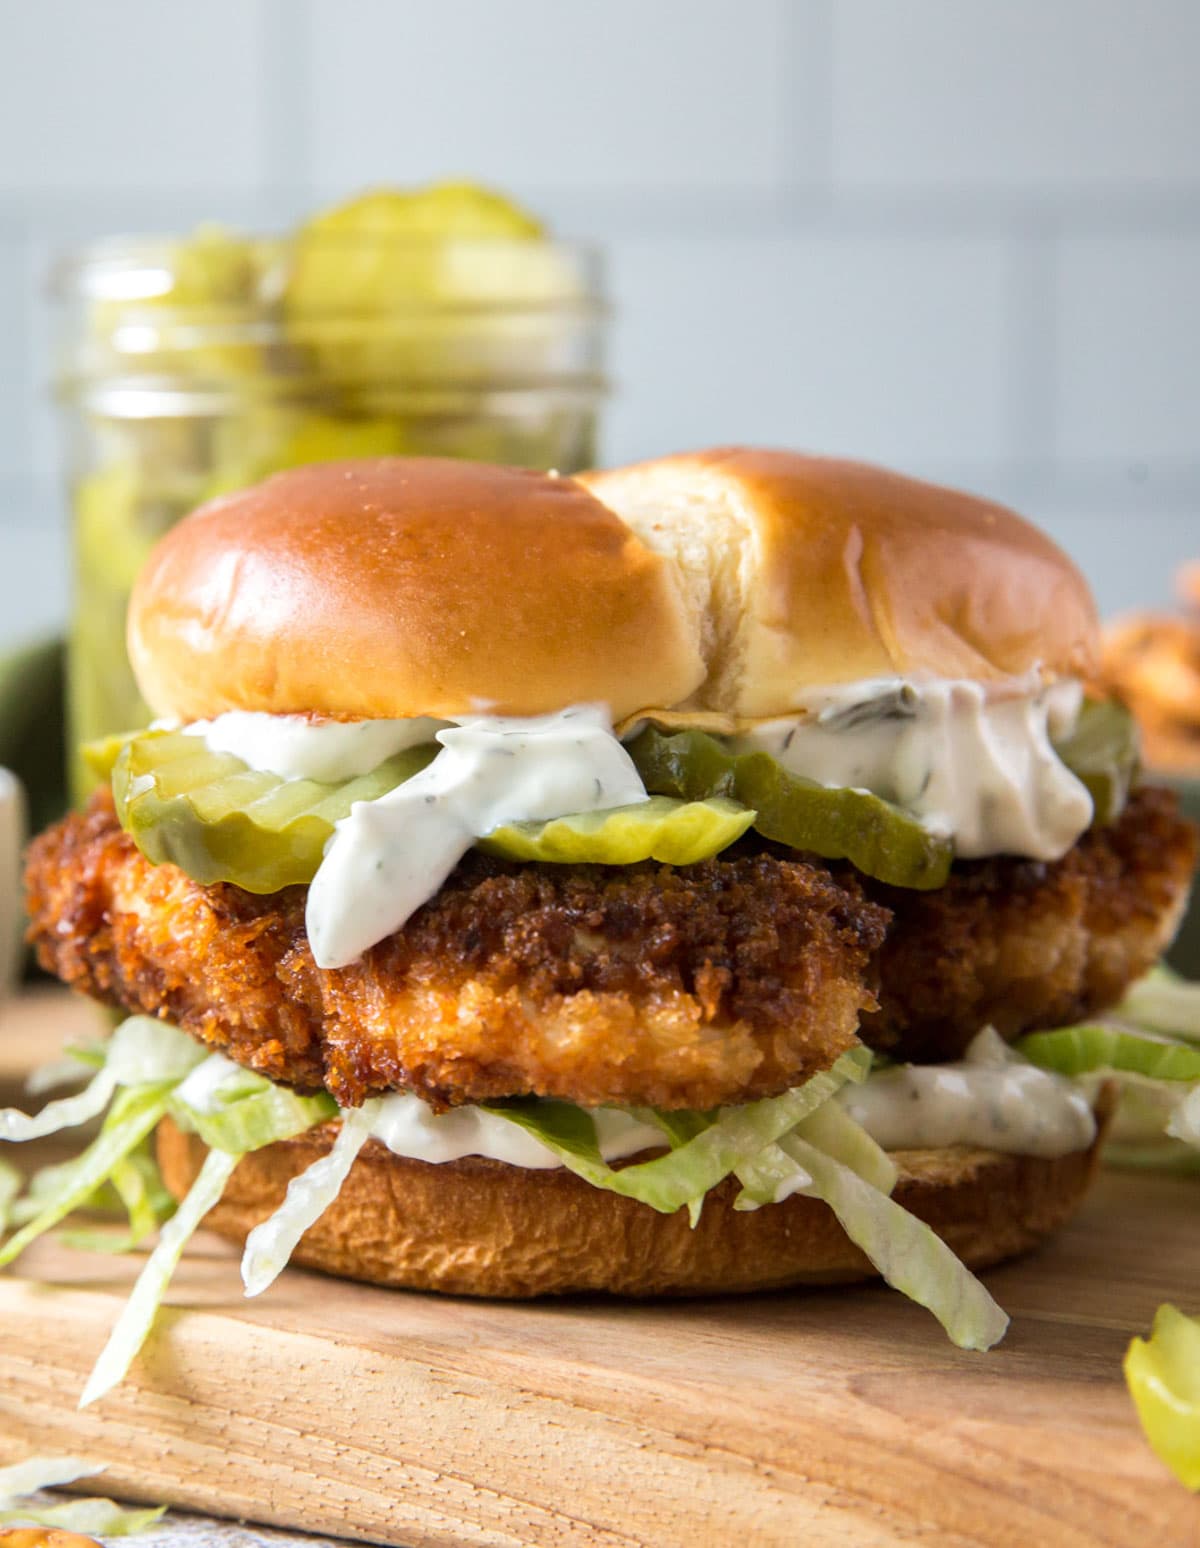
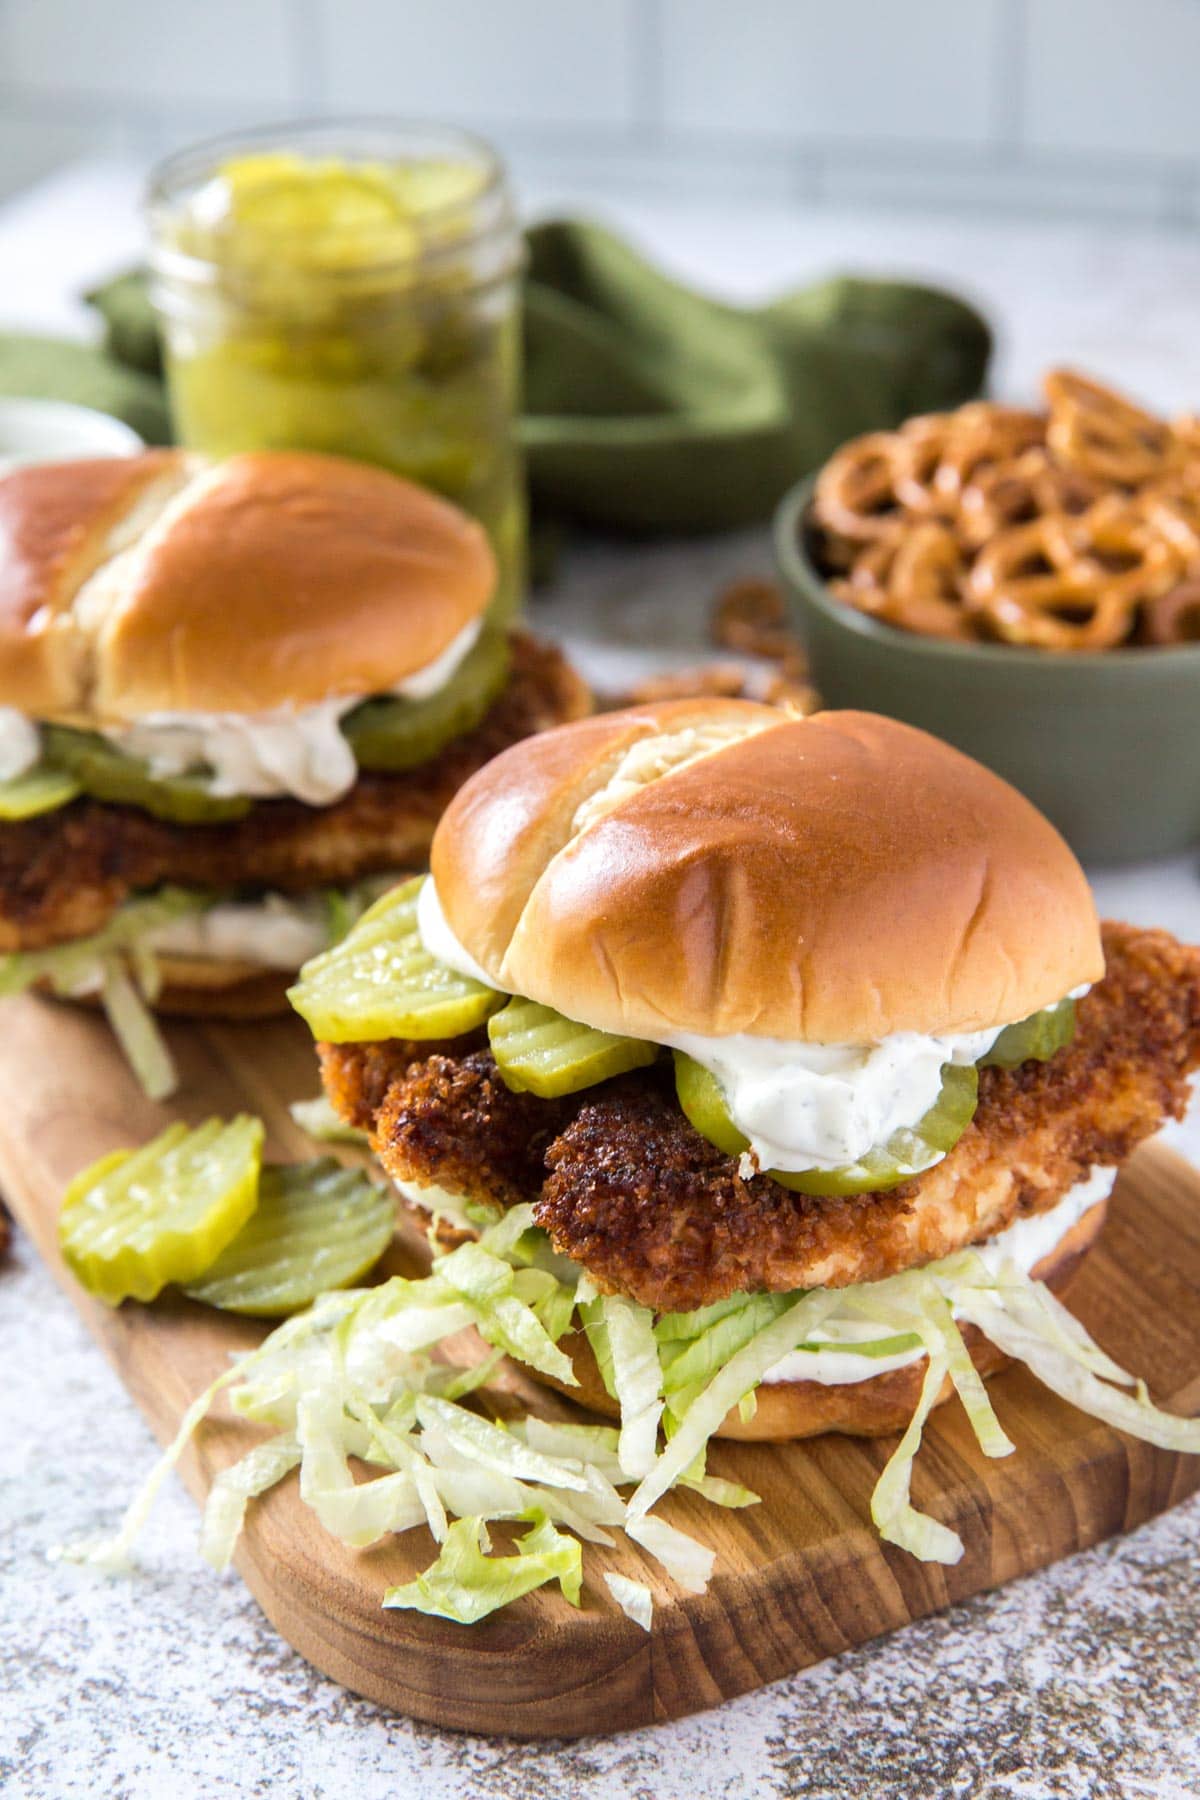
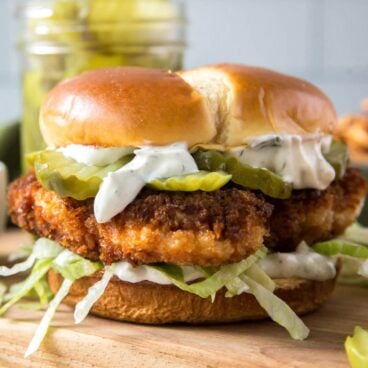
Skip the drive-thru line and learn how to make the best crispy chicken sandwich at home! Crispy baked or fried chicken seasoned with dill and piled high with lettuce and crunchy dill pickles, topped with a creamy Greek Yogurt Ranch sauce.
For other hot chicken sandwich options, try our Grilled Chicken Sandwich and Teriyaki Chicken Sandwich.
5 Things That Will Make or Break This Crispy Chicken Sandwich
- Even thickness. It’s so important for the chicken breasts to be even in thickness from end to end so they will cook evenly.
- Extra crispy chicken: For sandwiches, I like the chicken to be crispy, but not too crispy. If you want your fried chicken even crispier, add a tablespoon of cornstarch to the flour.
- Season well. Don’t skimp on the seasoning – it adds all the flavor to your chicken so make sure to season the flour well.
- Oil temperature. When frying your chicken, it’s important for the oil to remain at a steady temperature. I recommend using a cast iron skillet for the best heat conduction. Keep the oil around 325-350 degrees F.
- Don’t drain on paper towels. Set a wire rack on top of a baking sheet. After frying, set each filet on the rack so the oil can drip off. You could line the baking sheet with paper towels for easier clean-up.
RECIPE WALK-THROUGH
How to Make the Best Crispy Chicken Sandwich
See the recipe card below for full, detailed instructions
Breading Station: Set up three shallow dishes for your breading station. One with flour and dried dill, one with whisked eggs and one with Panko breadcrumbs. Dredge the chicken in the flour, then the egg, then the Panko.
- Press the Panko into the chicken to help it stick.
Bake or Fry: Fry breaded chicken in hot oil for several minutes per side. Or bake on a foil-lined baking sheet topped with a baking rack. Whichever method you use, you’ll want to flip them about halfway through to ensure they cook evenly on both sides.
Rest: Give the chicken time to cool a bit and redistribute the juices before serving. 5- 10 minutes is plenty. I don’t recommend covering the hot chicken as this would cause moisture to build up that would soften the breading. Lay out on a wire rack set on top of a baking sheet.
Dill Pickle Sauce
In a small bowl, combine plain Greek yogurt, fresh or dried dill, Ranch seasoning, chopped dill pickles, and pickle juice.
Mix everything together and save it in the fridge until you’re ready to assemble your chicken sandwiches. It also makes a delicious dip for potato chips and fries!
Sandwich Assembly
To assemble the crispy chicken sandwiches, heat buns in the microwave for 30 seconds or under the broiler of your oven for a couple of minutes.
- I used a brioche bun, but you could use any kind of burger bun. Just be sure to pile on the pickles!
Spread a tablespoon of the dill pickle sauce on the bottom bun, then top with shredded lettuce, crispy chicken, and sliced pickles. Spread more of the sauce on the top bun and place on top of the sandwich. Serve them immediately, while they’re still hot.
More Chicken Sandwiches
Serving Suggestions
Serve crispy chicken sandwiches for lunch or dinner, or fry them up for your next picnic and serve with some of our favorite sides:
- Air Fryer Tater Tots
- Homemade Baked French Fries
- Macaroni Salad
- Fruit Salad
- Bacon Ranch Red Potato Salad
- Grilled Balsamic Veggies
- Summer Spaghetti Salad
Storage Tips
Make Ahead and Storage Guide
Make Ahead
- Sauce: The Greek yogurt dill pickle sauce can be prepared a few days in advance. It will keep for several days in the refrigerator.
- Chicken: Bread the chicken (flour, egg, breadcrumbs) and place it on a baking sheet in a single layer. Cover loosely with plastic wrap and refrigerate for up to 24 hours before cooking. This helps the coating stick better too.
Storage
- Refrigerator: Store in a shallow airtight container with a paper towel on the bottom to absorb extra moisture. Leave a little space around each piece if possible so the coating doesn’t soften from touching. Refrigerate for up to 3–4 days.
- Freezer: Place cooled chicken on a baking sheet in a single layer and freeze until solid. Then transfer to a freezer bag or airtight container. Frozen breaded chicken will last about 2 months.
Reheating
- Oven: Reheat in the oven at 375°F on a wire rack set over a baking sheet. This allows hot air to circulate and keeps the breading crisp.
- Air Fryer: An air fryer also works well at 350°F for a few minutes until warmed through.
- Skip the microwave if possible—it tends to make the coating soggy.
Frequently Asked Questions
Chicken breasts should be fried for about 3-4 minutes per side. The internal temperature should register 165℉ on an instant read digital thermometer. Make sure to keep your oil at a steady temperature for the best results.
If your crispy fried chicken starts to get too brown, transfer to a wire rack set over a baking sheet and into a 375℉ oven to finish cooking.
It’s usually from moisture. Let the chicken cool on a wire rack before storing and reheat on a rack or in an air fryer to keep air circulating.
More Chicken Recipes
- Chinese Chicken Pasta Salad
- Baked Chicken Breasts
- Greek Chicken Salad
- Barbecue Chicken Biscuit Sandwiches
- Chicken Burgers
Crispy Dill Chicken Sandwich
Ingredients
Dill Pickle Ranch Sauce
- 1 tablespoon Ranch seasoning mix half of a packet
- 6 ounces Greek Yogurt or sour cream
- 1 teaspoon Dried dill or 2 teaspoons fresh
- 8 Sliced dill pickles
- 2 teaspoons Pickle juice
Chicken Sandwich
- 1/2 pound Chicken breast (2 small breasts) pounded to 1/2-inch thick
- 1/2 cup Panko breadcrumbs
- 1 Large egg
- 1 tablespoon Milk
- 1/2 cup All-purpose flour
- 1 teaspoon Dried dill
- Salt and pepper to taste
- 2 Large sandwich buns
- 1 cup Shredded iceberg lettuce
- 16 Sliced dill pickles
Instructions
Dill Pickle Ranch Sauce
- Combine all ingredients in a small bowl. Cover and place in the refrigerator for at least 30 minutes. (Can be used right away if necessary, but flavor only gets better with time). Store leftovers in an airtight container in the fridge for up to 4-5 days.
Crispy Chicken Sandwiches
- Pat chicken dry with paper towels. If using full sized chicken breasts, pound to a uniform thickness, about ½ inch or so to ensure even cooking. Cut larger pieces in half if necessary so they'll fit on the sandwich buns.
- Set a wire rack over a baking sheet and set aside.
- Prepare three shallow containers (like pie pans) as follows: Flour and dried dill whisked to combine in the first pan, eggs and milk whisked to combine in the second pan, Panko breadcrumbs in the third pan.
- Dip 1 piece of chicken into flour mixture until completely covered, shaking off any excess. Then dip into egg mixture, and then Panko, making sure to press crumbs into the chicken. Set aside and repeat with second chicken breast.
- For frying, heat about ½ cup vegetable oil in a cast iron skillet over medium high heat. Carefully place room temperature chicken in the hot oil and fry for about 3-4 minutes per side, until chicken is no longer pink. Transfer to the wire rack.
- To bake instead, preheat oven to 400 degrees. Line a rimmed baking sheet with foil, top with a baking rack if you have it, and spray with nonstick cooking spray. Place chicken on the rack and bake for 15-20 minutes, flipping once after about 10 minutes to ensure even crisping on both sides. If chicken doesn't brown enough, broil for a couple of minutes. Spraying the chicken with a butter flavored cooking spray before baking can also help with crisping.
- Allow chicken to rest and cool slightly before assembling sandwiches.
Sandwich Assembly
- Heat buns in the microwave or under the broiler of your oven. Spread a tablespoon of the Greek Yogurt sauce on the bottom bun, then top with crispy chicken, shredded lettuce sliced pickles. Spread more of the sauce on the top bun and place on top of the sandwich. Serve immediately.
Notes
Nutrition
Nutritional Disclaimer Kristin Maxwell of “Yellow Bliss Road” is not a dietician or nutritionist, and any nutritional information shared is an estimate. For accurate calorie counts and other nutritional values, we recommend running the ingredients through your preferred online nutritional calculator. Calories and other nutritional values can vary depending on which brands were used.

So tasty!! My while family loved this. The sauce is the shining star though. We used the little bit leftover as a chip dip. Definitely making this again!
Awesome feedback CLT! Thanks for stopping by.