This post may contain affiliate links. Please read our disclosure policy.
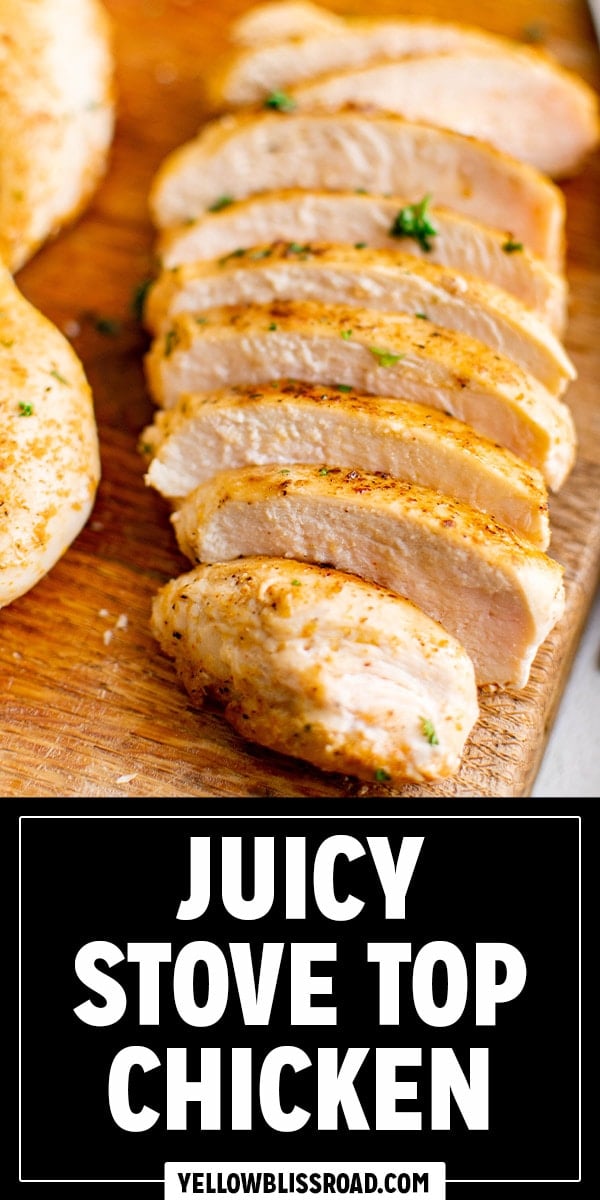
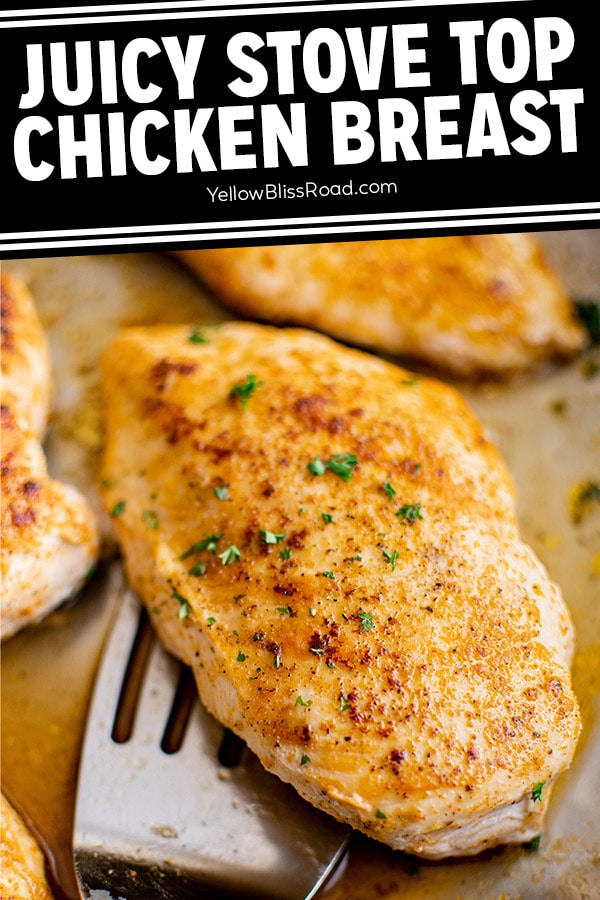
This Stove Top Chicken Breast recipe is so incredibly tender and juicy and takes only 25 minutes from start to finish. It’s one of the best chicken recipes there is when you want a fresh, home cooked meal on a busy weeknight!
Make it a complete meal with your favorite veggies, a Butter Lettuce Salad, and some Roasted Baby Potatoes.
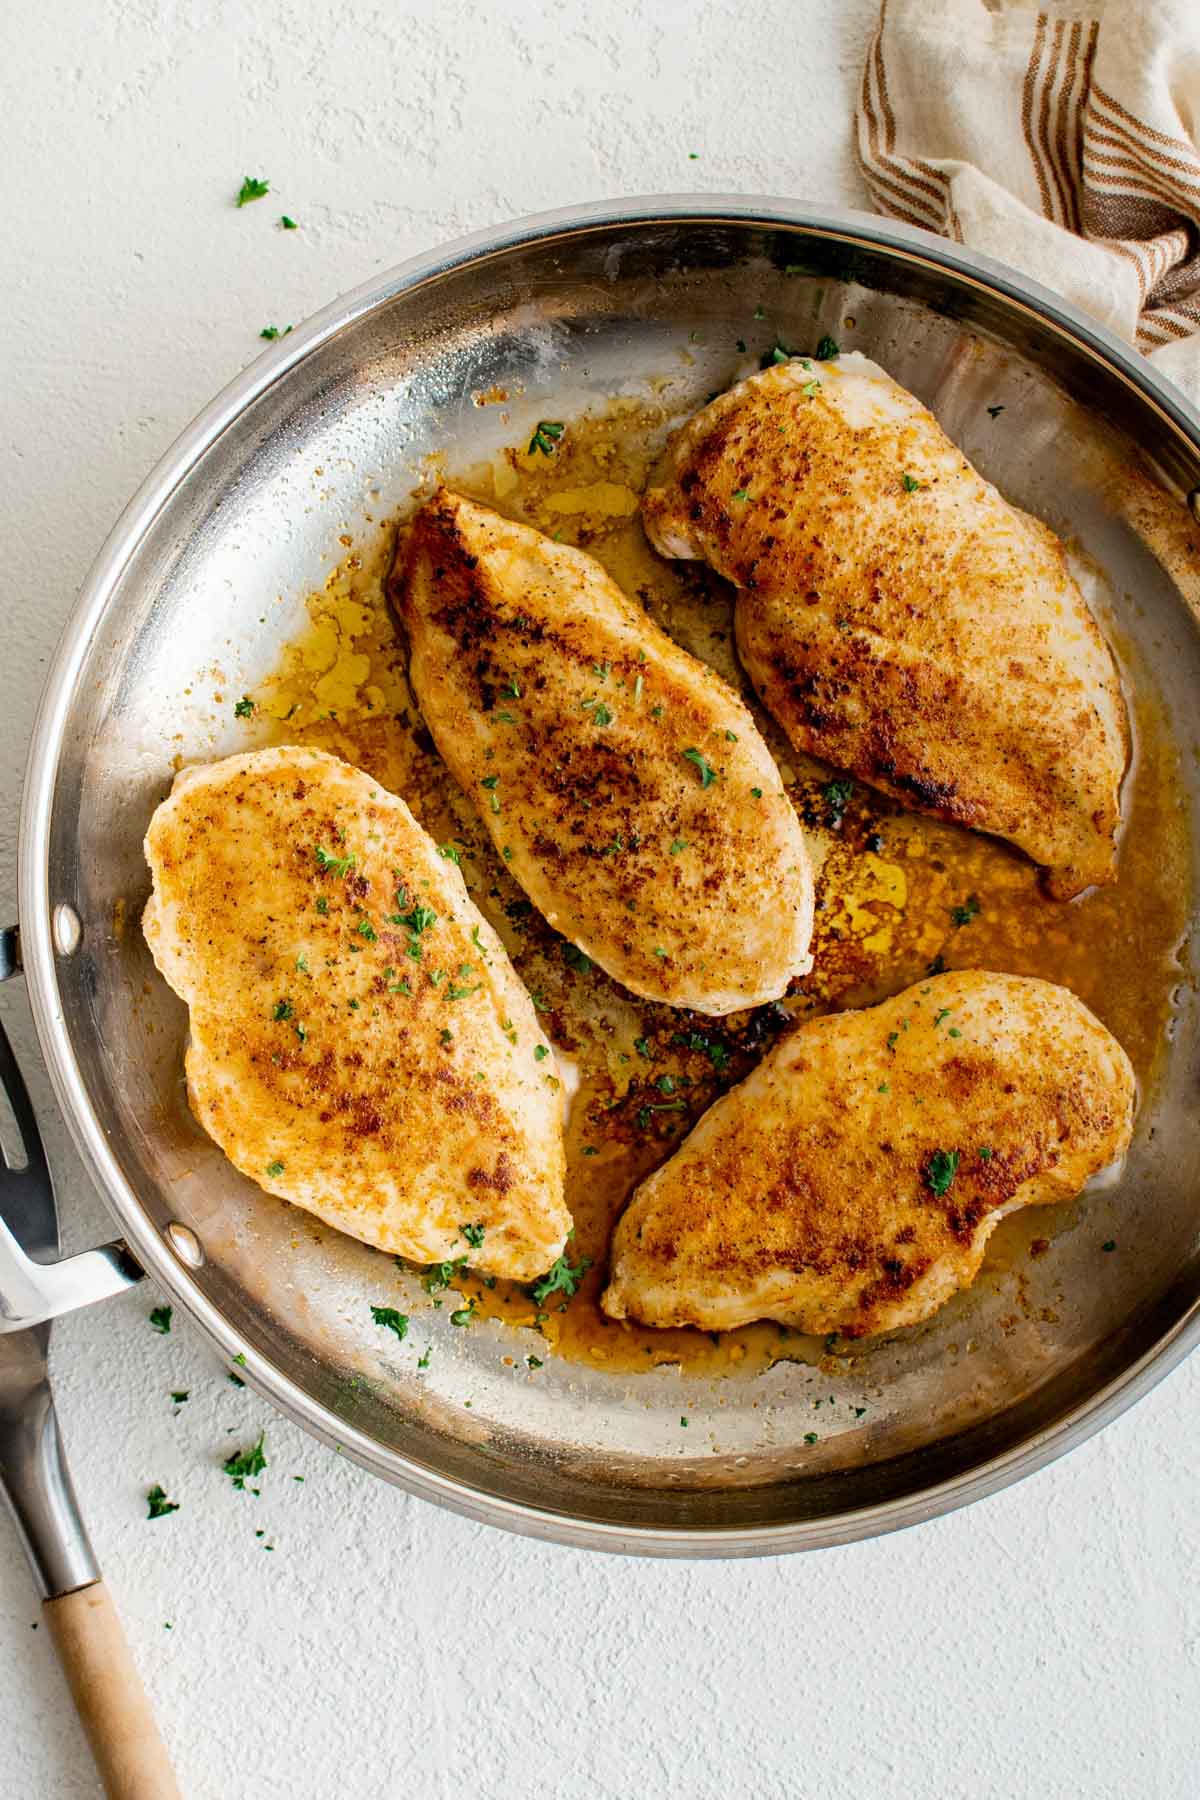
Why We Love This Stove Top Chicken Breast Recipe
Pan-seared chicken breasts are a staple in our household because they are quick and easy to cook and they can take on a variety of flavors.
This stove top chicken recipe is:
- Flavorful – I use my favorite Chicken Seasoning, which is a simple blend of spices – garlic powder, onion powder, paprika, salt, and pepper – that really gives this stovetop chicken its incredible flavor. The best part is you probably already have them in your pantry, and it works for all kinds of chicken recipes, like my popular Baked Chicken Breasts.
- Simple – Pantry staple seasonings, butter, and olive oil. That’s it, just a few simple ingredients that are commonly found in most kitchens.
- Fast – It really does take under 30 minutes from start to finish!
- No heating the oven – Cook your main course right on the stove top and free up your oven for some Frozen Dinner Rolls, Roasted Vegetables, or even some yummy Snickerdoodle Bars for dessert!
Key Ingredients
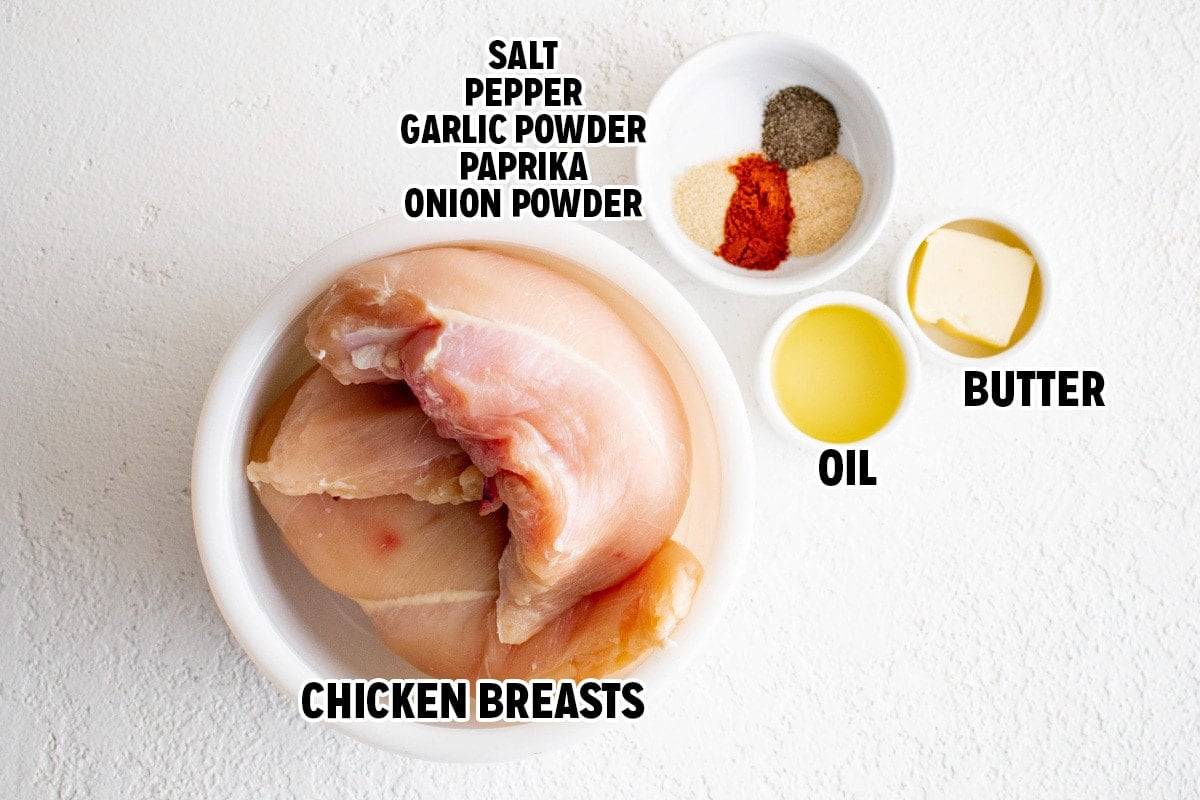
- Chicken Breasts – Boneless, skinless chicken breasts, pounded lightly to even thickness.
- Olive Oil – To sear the breasts.
- Butter – To lock in the juices and add a flavorful sauce.
- Chicken Seasoning – Garlic powder, onion powder, paprika, salt, black pepper.
How To Make Cook Chicken Breasts On The Stove Top
See the recipe card below for full, detailed instructions
This cooking process is simple but does require a little patience.
Step One: Tenderize the chicken. Gently pound pieces with a meat tenderizer until they are evenly sized throughout.
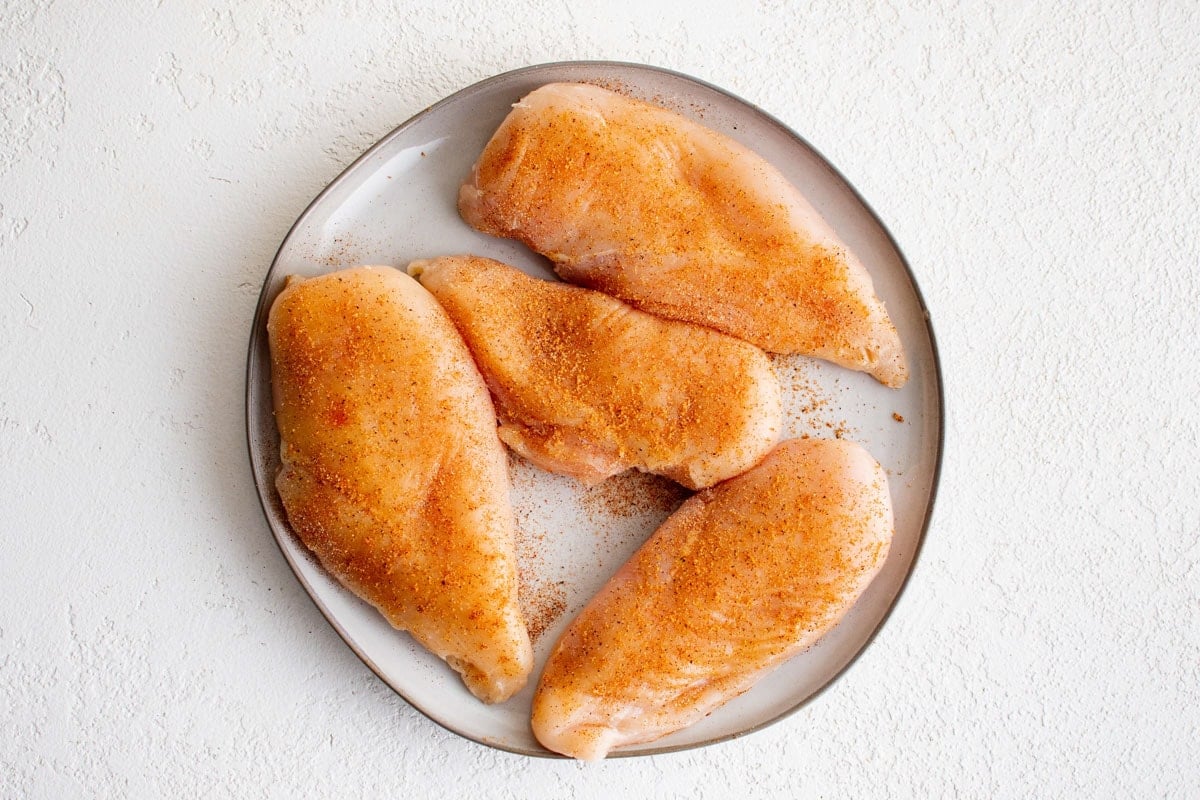
Step Two: Season the chicken. Combine the garlic powder, onion powder, paprika, salt, and pepper, and sprinkle it all over both sides of the chicken.
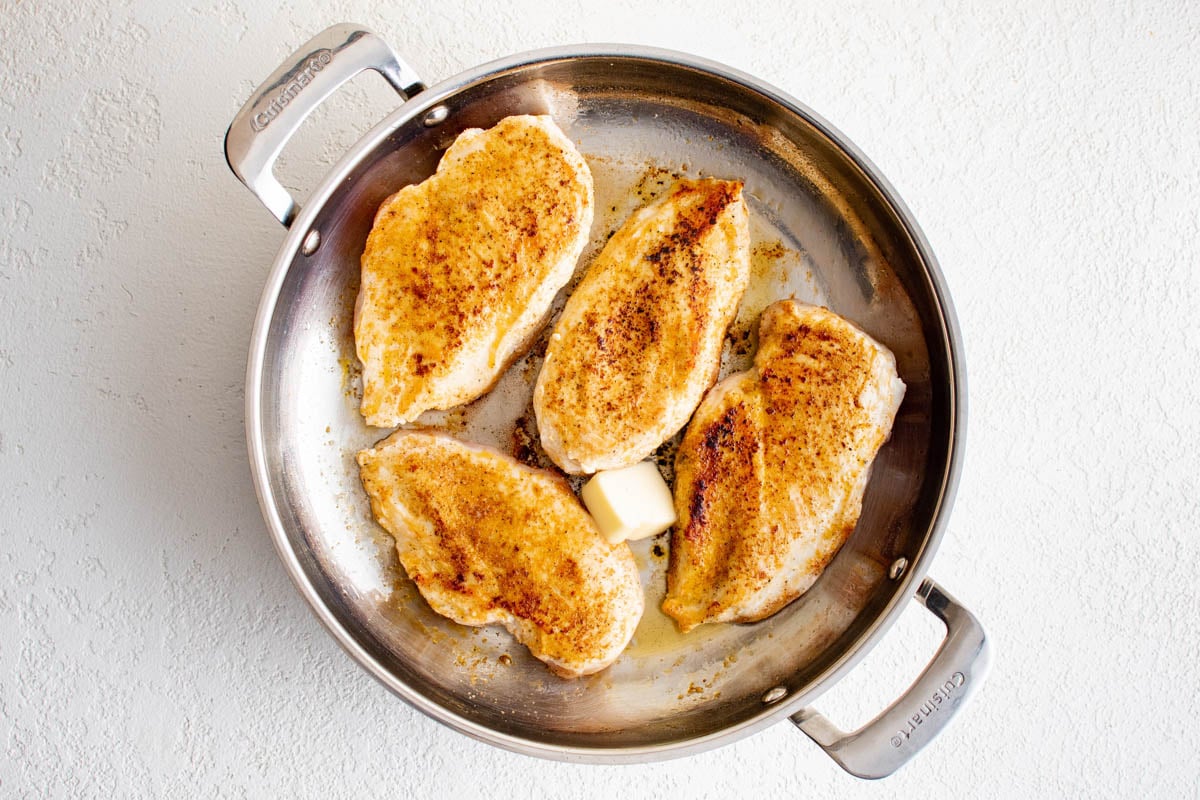
Step Three: Sear and let it sit. Melt some olive oil in a large skillet over medium-high heat and arrange the chicken breasts in your pan or skillet. Whatever you do, don’t touch them for 4 minutes. You want to give them some time to get a beautiful golden crust.
Step Four: Flip and sit some more. Flip over each piece and cook for about 2 minutes, then turn the heat to low and add a pat of butter. Let the butter melt, then spoon some over the chicken.
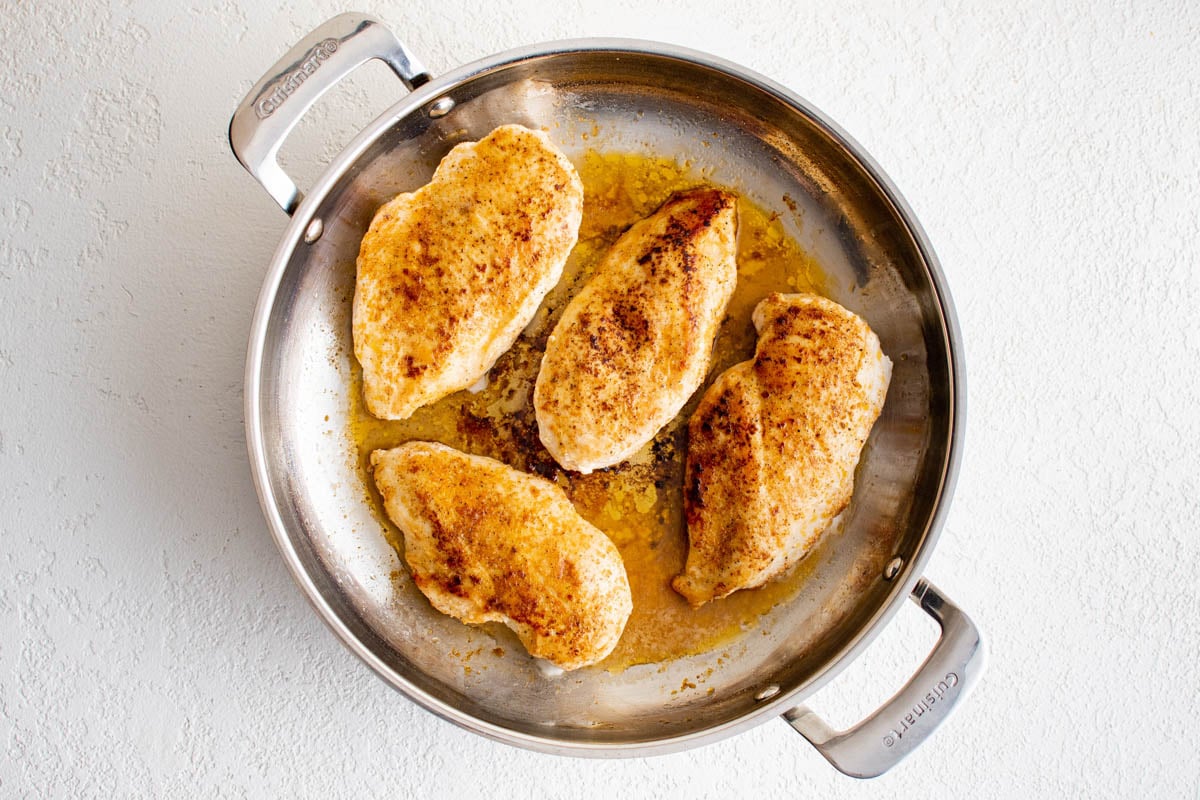
Step Five: Cover and cook gently. Now that your chicken has a nice sear on each side, you’re basically going to let it steam the rest of the way through. Cover the pan and turn the heat down to low for 10 minutes so the meat can continue to cook without the risk of scorching.
Step Six: Let it rest. Turn off the burner and move the skillet off the heat. Keep it covered and let the chicken rest for about 5-10 minutes.
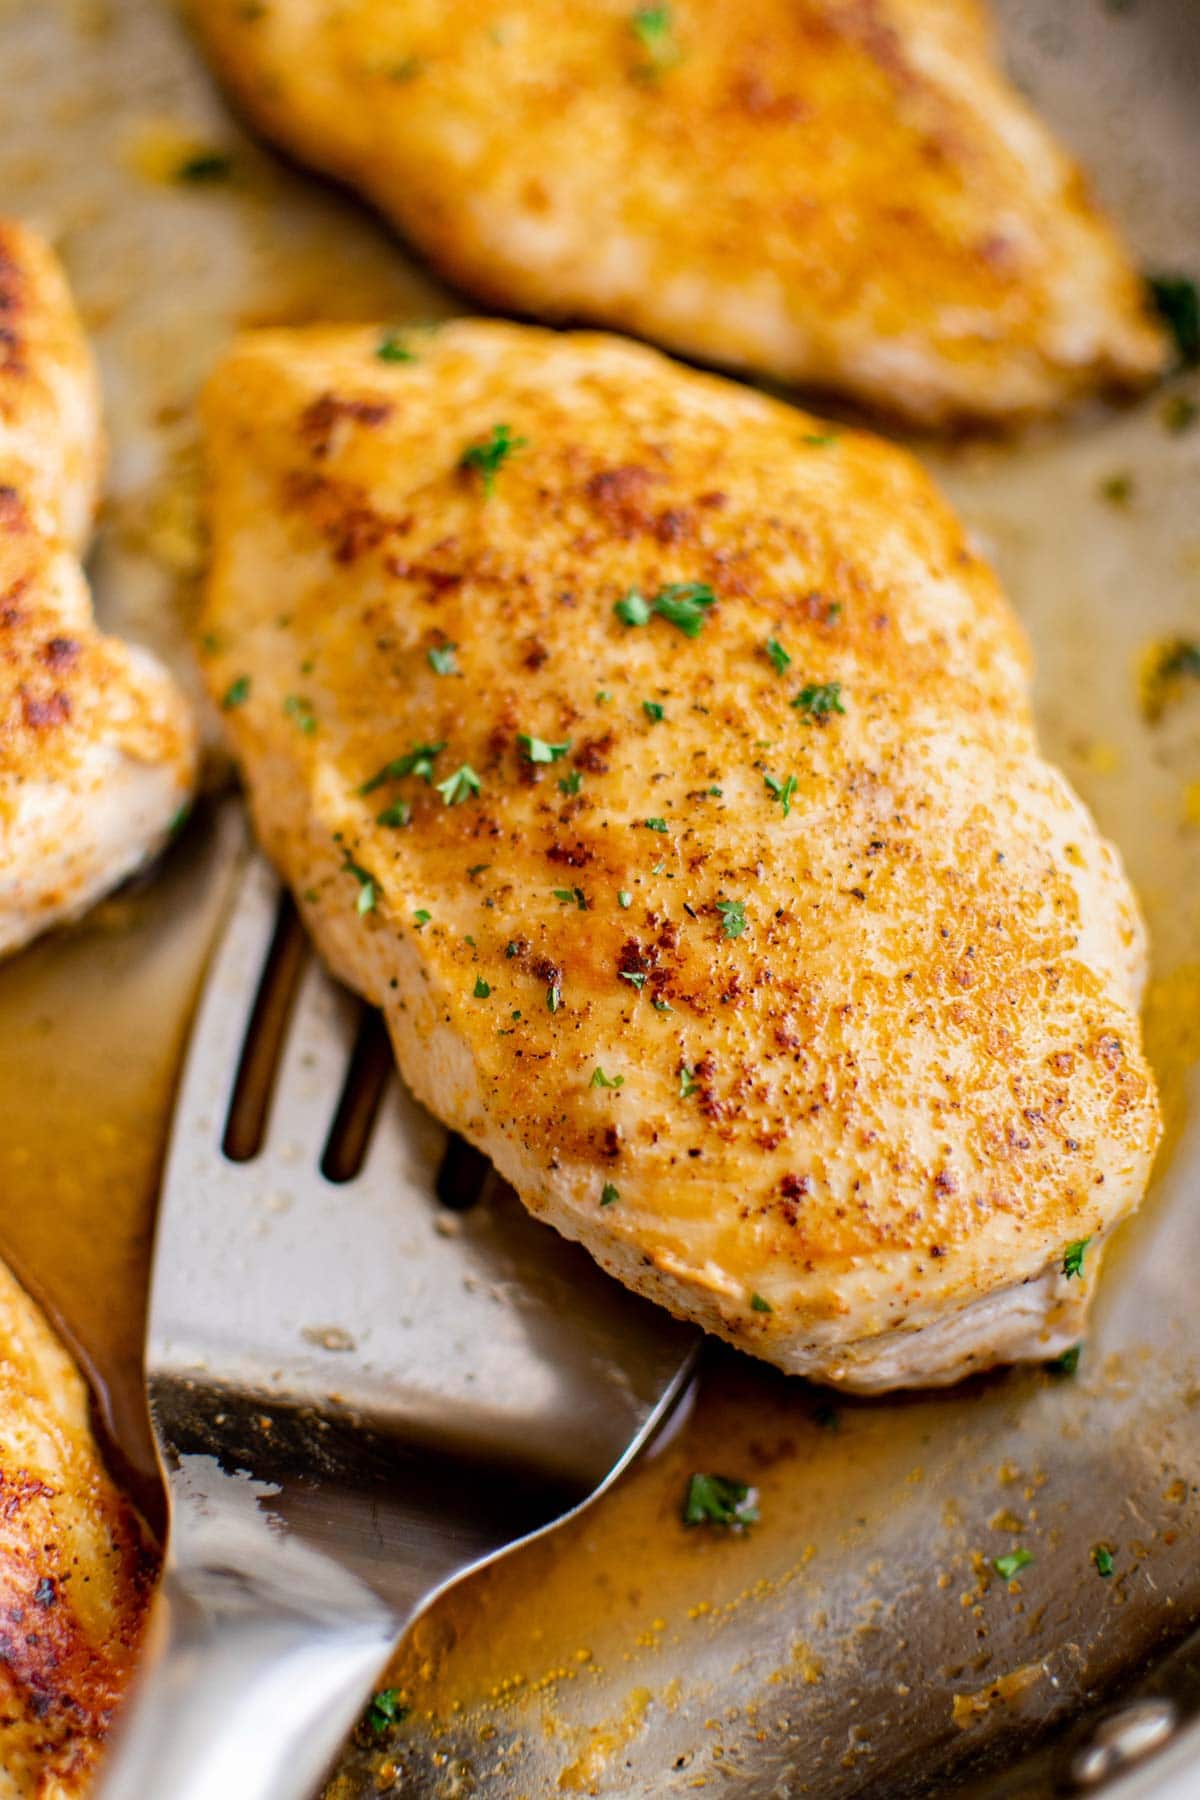
Step Seven: Serve with pan juices. You should have some beautiful juices left behind in the pan, so use those to spoon over the chicken. To make more sauce, add some more butter, fresh garlic, and a little chicken stock and simmer that for a few minutes. Make sure to scrape up all the brown bits from the chicken – that’s where the flavor is!
Recipe FAQs
Using this method, it will take about 25 minutes to cook the chicken breasts. But most of that is hands-off time. The result is a beautifully seared, super tender and juicy piece of meat that you just can’t get with high-heat searing.
I always add butter to the pan to keep the chicken nice and juicy. But it’s also really important that you don’t overcook it, so be sure to keep an eye on the temperature.
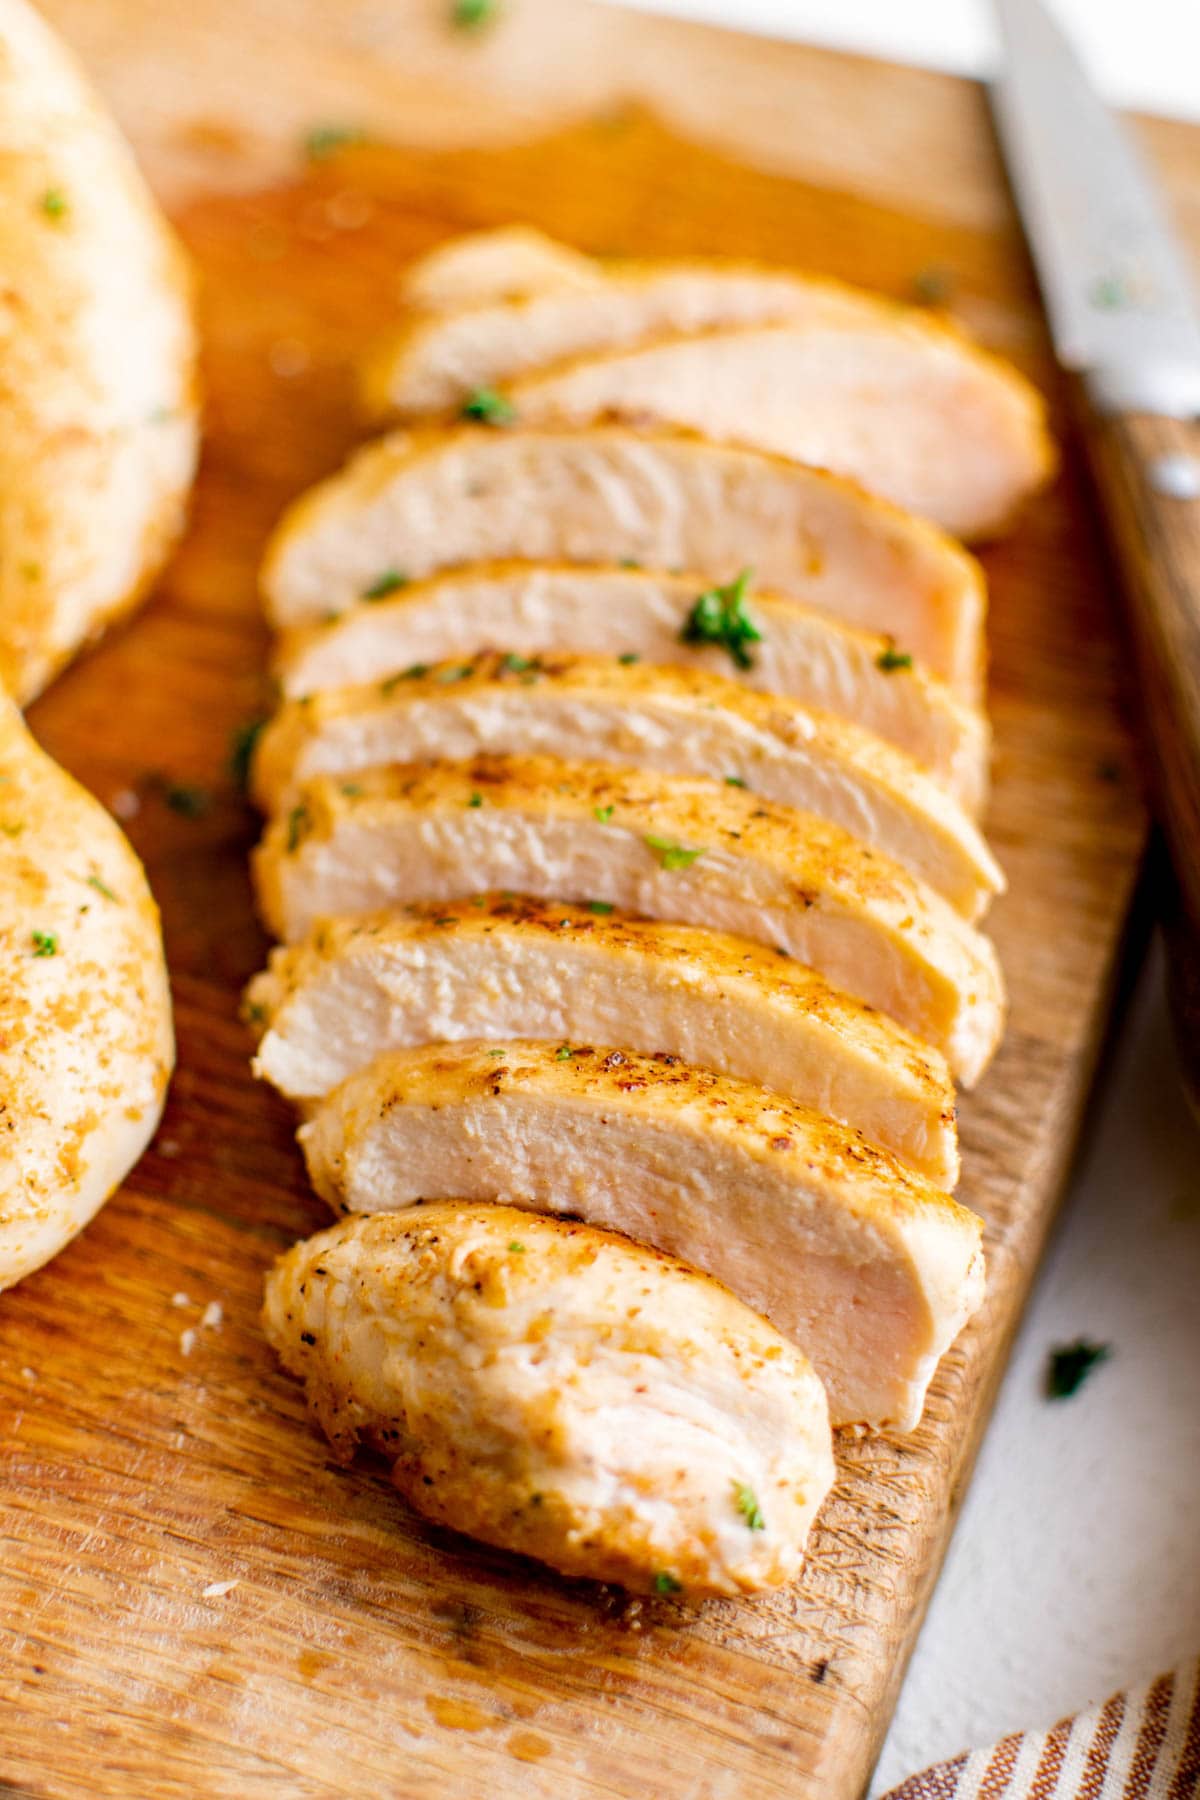
Use a meat thermometer to keep track of the internal temperature – it should be between 155-160℉ when you turn off the heat, and it should rise to 165℉ while it rests.
Leftovers
- Refrigerate: Let the meat cool completely, then store in an airtight container for up to 3-4 days.
- Freeze: Let the meat cool completely, then store in a freezer bag or other type of freezer safe container for up to 3 months.
- Reheating: Chicken can easily overcook when reheated, so I recommend reheating on the stove top if you can. You can also reheat in the microwave, but set it to 50% power.
- Using Leftovers – Toss in salads or soups, shred for sandwiches and wraps, or use for meal prepping.
Pro Tips
- This recipe will work with a variety of different types of skillets, but I highly recommend using a cast iron skillet for the best sear.
- Don’t skip the butter! Adding a pat of butter to the skillet really does help to lock in the juices.
- Chicken should be 1 1/2-inch thick, max. Do pound that chicken if it’s really thick on one side. The meat will cook more evenly.
- Resist the urge to push the chicken around, press down on it or flip it before the recipe says to. I promise your patience will pay off with a beautifully golden sear.
Serving Suggestions
- Broccoli Rice Casserole
- Air Fryer Green Beans
- Cauliflower Gratin
- Arugula Salad
- Easy Oven Roasted Vegetables
More Chicken Recipes
- One Pan Lemon Chicken Picatta
- Baked Caprese Chicken
- Creamy Chicken & Wild Rice Soup
- Chicken Stroganoff
- Chicken Tortilla Soup
- Grilled Chicken Marinade
- 19 Recipes for Boneless Chicken Thighs
Stovetop Chicken Breast Recipe
Ingredients
- 4 boneless skinless chicken breasts (about 2 pounds)
- 1 tablespoon olive oil
- 1 teaspoon kosher salt
- 1/2 teaspoon black pepper
- 1/2 teaspoon chili powder
- 1/2 teaspoon garlic powder
- 1/2 teaspoon onion powder
- 1 tablespoon butter
Instructions
- In a small bowl, whisk together salt, pepper, garlic powder, onion powder and chili powder. Place the chicken on a plate and sprinkle the seasoning mixture over both sides of the chicken and rub it in with your hands.
- Heat olive oil in a large skillet (with a tight fitting lid) over medium-high heat. Add chicken and leave it alone (uncovered) to sear and cook for 4 minutes on the first side.
- Flip the chicken and add the butter to the skillet, swirling it around the pan as it melts. Cook for 2 minutes, then cover the skillet with a tight fitting lid.
- Turn heat down to low for 10 minutes. Remove the skillet from heat and rest, covered, for another 5-10 minutes. Chicken is done when it reaches an internal temperature of 165 degrees.
- Serve immediately with parsley garnish, if desired.
Notes
Nutrition
Nutritional Disclaimer Kristin Maxwell of “Yellow Bliss Road” is not a dietician or nutritionist, and any nutritional information shared is an estimate. For accurate calorie counts and other nutritional values, we recommend running the ingredients through your preferred online nutritional calculator. Calories and other nutritional values can vary depending on which brands were used.


Thank you for this amazing recipe! It is my “go to” recipe for cooking chicken breast on the stove. It’s always quick, easy, tender and tastes amazing!
You are so welcome Sandra! Thank you for stopping by.
I also want to add that the directions were clear and easy to follow. I’m an experienced cook but I still love clear directions in recipes. My only issue is the chili powder or paprika
Thank you Betty! I really appreciate your feedback.
I made this. Chicken turned out juicy and delicious. But I’m confused and just need a clarification..the recipe cals for chili powder. I knew my son would not like the chili powder so just added a tiny bit rxtra gsrlic and onion powder. Seasoning was delicious. But then I read the top part( i hit go straight to recipe) and it says paprika not chili powder. …And my family would be fine with paprika. So is it paprika or chili powder. At any rate they were delicious. I left one chicken breast s bit too thick. It wasn’t done after the 10 minutes of resting. But was my bad. It’s always best to get chicken uniform size. And rdpecially not leave pieces too thick when done on stove top. I’m very excited to try dome more of your yummy recipes. This is my first visit to your site.
Hi Betty, Thank you for your beautiful comment! I’m so glad that you enjoyed the recipe. Originally the recipe used chili powder, but my family actually prefers it with paprika, so I change it up. I’ll look through the post to make sure it’s clear for next time. Thanks!
The chicken turned out perfectly. Very tasty. Easy directions to follow. My family loved it!
Will definitely make again😊
Nice! Thank you for your feedback Melissa.
I cooked these tonight and although they came out ok, no where in the instructions did it mention the temperature to cook to. I know chicken should be cooked to 165 degrees but after following the instructions, the temp, at the end, was 178 degrees. When I turned off the heat to sit covered for another 10 minutes, the temp increased 15 degrees which took it way over the proper temp.
They were flavorful and tender but not as juicy as I would have expected. I know now that for my stove and pan I will have to remove from the heat at around 150 degrees to let it raise in temp to the proper 165 degrees.
PS. After cooking for the 4 minutes, flipping, then another 2 minutes, after that, the temp was about 123 degrees. Are you saying that at that temp, once I remove from the heat, the temp will raise another 42 degrees? Thanks
Hi Mark, I did leave out the temp but I have added it now. I also added a note that cook times can vary depending on the size and thickness of your chicken, the heat of your stove and even the pan you use. In your PS you asked about taking it off the heat after the 6 minutes, but after that saute you cover and cook on LOW heat for another 10 minutes. At that point, the chicken should be close to the 160 mark and needs to rest for a bit. Again, depending on your own kitchen, it’s possible the time could vary.
This recipe is incredibly delicious! I’ve never had chicken breasts turn out so tender. I did check out other recipes on other sites, but they had so many ingredients that I lost interest! Thank you Kristin, for this and so many other tasty dishes.
You are so welcome Sue! Awesome feedback, thanks for stopping by.
I love this recipe. I love this site. Yellow Bliss is like having a really old copy of your mom’s favorite cookbook that she updated with all the new methods of cooking and modern recipes. I’m a 61 year old granny that still loves cooking and gathering around the table.im amazed that such a young lady has such a library . Thank you for all your hard work. I appreciate you and I love Yellow Bliss!
You are so welcome Christy! Thank you for the kind words. ( You Made My Day! 🙂
Easy, quick and delicious way to prepare chicken. No more dry chicken! I make this all the time. If I need a dish to take to friends, I do this chicken with a vegetable. Thank you for sharing!
You are so welcome Dan! Thanks for stopping by.
K.
good soup
Can you use boneless skinless chicken thighs instead of breasts?
I have made thighs on the stovetop, but they tend to be messier because of the higher fat content, and also take a little longer to cook through depending on the thickness.
Thanks Kristin, this is a really good EASY recipe! With the full amounts of seasoning, mine came out pretty salty — I think I will try it agin halving the amounts. Has anybody made suggestions for how to back off the saltiness a bit? For your readers, if I’ve done my math correctly, sodium is only about 570mg per chicken breast, which is not bad given a 2,300mg / day USRDA. Only other comment is that I didn’t need the whole 10 minutes on low covered. After the 4 + 2 I checked and my chicken was already at 135. I typically shoot for 150 to get carryover up to ~160-165. Only took about 4 of the 10 minutes on low to get there!
Hi Rick, saltiness is definitely a personal taste, so you can cut down if you prefer. Chicken breasts can range in size and thickness quite a bit so the time it takes to get to 165 can vary, so I definitely recommend using a meat thermometer, which it sounds like you did. Sounds like you really enjoyed the recipe though, thanks for your review!
Delicious! Do you have nutrition facts for this chicken?
We are working on adding nutritional content, but even then it would be for informational purposes only. In the meantime there are several online calculators you can use, like myfitnesspal.com.
Just love it, easy, tasty,
Nice! Thank you for stopping by Nas.
this is the best chicken breast recipe ever!!! My go to!!!!
That’s awesome Valerie! Thanks for stopping by.
My family loved it!
Nice! Thanks for stopping by Adela.
This recipe sounds amazing! Can’t wait to try this tonight!!
Thank you Abbey! Thanks for stopping by
It was a hit!
Nice! Thank you Lori for stopping by.
Delicious
Thank you Gracie! Thanks for stopping by.
It was a hit!
I didn’t have all the ingredients but I had taco seasoning which had a few of them and then some. I slipped on the olive oil but continued to follow the recipe and it was delicious and juicy. THANK YOU
You’re so welcome Brenda! thank you so much for stopping by!
Thank you so much for this recipe! I cooked the chicken in a pan (not funny paying attention to the skillet part by accident) so I left it on low for 25min instead of 10 since to make sure it cooked fully & it was still delicious and juice!!
You’re so welcome Brenda! thank you so much for stopping by!
Thank you for this recipe! I was looking for a quick and easy chicken recipe, and this one hit the spot! I needed chicken to go on a salad I was making, and everyone that ate the salad commented on how good the chicken was. It will be my go to from now on!! Thanks again!
Thank you for Stopping by Kim.
This is my new favourite chicken! I spiced mine with salt, pepper, steak spice and omg it was so juicy and tender! I drizzled the butter sauce overtop afterwards it it was to die for on a bed of rice! My boyfriend absolutely loved it and we will definitely be making again!
Thanks Phylicia! and thanks for stopping by.
This has come out perfectly every time! When I turn the heat down to low for the last 10 minutes, I insert a temperature probe (on a wire connected to a meter) and set the temperature for 145 degrees. Sometimes it takes 8 minutes, sometimes 12 minutes. It depends on the thickness of the chicken breast and how cold it was. Then it rests at least 5 minutes. It always comes out juicy and delicious.
Thanks for sharing that tip Carole! Glad you are enjoying one of our favorite chicken recipes!
And I should have mentioned that the temperature always rises another 5-10 degrees while resting.
Your recipe was clearly stated; it was well-demonstrated, and it was easy to follow! The week before, I had ‘bombed out’ with chicken breasts, and had to blend it into a meat sauce: it was that bad! But this time, I followed your instructions and reaped the harvest of a delicious dish! Thank you, again!
That’s awesome David!
I made it today, and the chicken was JUST what I wanted—tender, well-cooked( 165+) AND moist and delicious! My daughter was ecstatic: The delicious chicken and zucchini spaghetti, with onions, and peppers!
Nice! thank you David!
It was great ! Very moist, great taste, and best of
All it was easy Thanks for the recipe ?
Thank you Mary! and thank you for the positive feedback and experience.
This was easy, simple, and absolutely perfect. My Instant Pot broke and it was like I forgot how to cook chicken. Thinking it was going to be some huge ordeal, I found your recipe while Googling for quick stove-top chicken and turned on the gas. Man, this was much, much better than in the Instant Pot. I don’t think I can go back.
Too funny – we are hooked on this recipe too.
Love this! I might play with the seasonings (but great as is), but I have never made chicken this was before and it was so tender – my husband and 2 daughters all loved it!
Hi Tara, So happy that you and your family loved this recipe!
This was SO GOOD!! It’s the first time I’ve ever made chicken this way. My 14 year old had 3 helpings of the chicken! I should have made more. Will definitely make like this again. Followed the recipe to a T and it was perfect! Thank you!
Thank you Danica!
So the breast only cooks for 4 minutes on one side and 12 on the other right?
Basically, yes, but the times are at different temperatures to ensure even cooking throughout. Then rest for 5-10 minutes.
I fixed this in an electric skillet, and boy was it a hit!! I used every ingredient as listed.
What is the best way to utilize the drippings to make the gravy? I have horrible luck with gravy..
You wont have a ton of drippings. However you could melt some more butter in the pan to make a nice sauce. Or you could add a little more butter and some flour, and once that’s cooked add chicken stock.
This is the 3rd time doing this recipe, so do I need to tell you how much I love it?! This time I varied it by using a marinade & chicken thighs. I’m not a working mom, but a busy single, running her own business & teaching herself how to cook. Recipes like this are a life saver! Thank you!
Thank you Lisa! So glad you enjoyed it!
Delicious! I seasoned mine with salt, garlic pepper and paprika.
Thank you Michele! and great idea.
This is the only way I have cooked chicken breast as an entree since I found this method several months ago. Perfect! Thank you for posting!
Thank you Koren!
Thank you for the recipe! I’ve been looking for a go to method for making chicken, and now I’ve found it.
Your welcome Ryan. Thank you for stopping by!
I just tried it. It is soooo good!! I squeezed a fresh lemon over it..yummy!!!! I am in love with this recipe. Thank you
Thank you! So happy that you loved this recipe!
Thank you for stopping by!
I love your simple but delicious recipes, so glad I found you web site. Please keep posting these incredible simple dishes.
Thank you
You’re very sweet Lisa, thank you!
Excellent recipe! Nice and simple!
This recipe was delicious! Everything came out so moist and flavorful! So perfect! I did season them pretty good so I went through the first batch and made a second.
Thank you!!
SO moist! Previously I always seem to dry out my chicken breasts, and I love that you can really use any spice you like for flavour (though I really like the suggestion in the recipe) 🙂
Delicious and EASY. Five stars!
Just made this for lunch. It was SO GOOD!!! So simple and fast. Really appreciate your recipe! 😀
This was the best chicken I loved the flavor. Followed the cooking instructions exactly. I did double the seasoning ingredients. Delish
Hi, Kristin! Thank you for this recipe! I made it tonight for dinner.I didn’t have onion powder and it didn’t matter. I added Chipotle powder along with garlic powder and chili powder, salt and pepper. I followed your recipe but, had just picked some hot peppers from our garden and threw 2 of them into the skillet with 2 chicken breasts after they were browned. We like our food a little spicy. My husband raved at how tender and juicy the chicken tasted and he loved the little bit of heat from the peppers. I will certainly make this again and share your recipe with my friends. 🙂
Thanks a lot for the recipe.
Going to make this in the upcoming days.
Excellent recipe! I cooked as directed and adjusted ingredients for 1 chicken breast. Turned out perfect! Thanks for sharing. This will be used time and again. ?
can i bake this ?
I just made this, but I didn’t have the chili powder. Instead just substituting with my own on hand powders. Not that hard to make, easy and simple instructions. I would do this again.
Just made this tonight! The best recipe! It was so good! Thank you!
I am now making this for the second time and we just love it! This method really works! And the seasoning combination is great. The proof is in the pudding – my picky teens all loved it and now ask for it. The only thing I did differently the second time is make more of it!
Hello!
Thank you so much for sharing this delicious and easy recipe!! I followed it to the ‘T’ and everything turned out perfect! My kids and husband loved it, and I have made sure to share it with my sister and mom!
And the fact that it was easy, is a wonderful bonus!! 🙂 Thank you again!!
Hi, thanks for the recipe, it’s a pretty nice way to make the chicken breast. Only thing I should have done was maybe started it later, it ended up being done first before all my sides so my timing was off.
First note I will admit I do not like chicken much but I am trying to get more in my diet and have been trying different recipes. I really like this with the spices you recommended and will be sure to make it again. Yes I had to fiddle around with my stove temp. Made two sets. First set cautious because of previous comments then second set with a fairly close to high setting for my old electric glass top stove. Second set got seared better. Thanks so much for this recipe. Moist and very tasty. I will be sure to make is often and maybe even experiment with some different seasoning. YOU are a life saver. THANKS!
Yum! I’ve made this 5-6 Times now and it keeps getting better each time. I didn’t have any chili powder so used Cajun powder instead and it’s amazing. Love this recipe!! Thank you.
Incredibly moist. Both my teenage boys loved it. Thanks for sharing the tip of searing and not moving it. Then letting it rest. So juicy!
Yay! Thanks for your comment!
I used a different marinade so I will only comment on the stove top directions. A little disappointed that my chicken was burned when I flipped it after the first 4 minutes. I don’t know why, as I had it on medium-high and dropped it to medium after only 2 minutes when I saw that it was browning faster than it should. I love your sausage/peppers/rice skillet dish though, and showed it to my sisters and mom, who both make that recipe now as well!
It’s tough to say what happened because every kitchen is different. I have some burners that just get hotter than others. You’ll have to use your best judgement and just keep an eye on it.
I have tried this two more times, and I cooked it on my electric stovetop on just over medium heat so as to avoid burning. It worked great following the rest of your cooking instructions. Very tender and flavorful! I can now rate this 5 stars! I would suggest to people trying this cooking method for the first time to check your chicken when it is cooking on that first side to make sure it isn’t burned after a couple minutes! I am wondering if this stovetop method will work for boneless skinless chicken thighs? I’m going to try it today!
Great to hear Shallan!!
This recipe is amazing. I also tweaked it for chicken legs and they were just as good!
what if I add Golden Mushroom soup and when should I do it?
I was nervous about this method (let the chicken rest for 10 minutes – will it even be cooked?!) but I am SO HAPPY with the result. It tastes amazing and it was so easy! Plus, it freed up my oven for roasted veggies. Great post, thank you!
So glad you gave it a try. I love this method because the chicken gets a nice sear, then continues to cook after you turn off the heat and cover it so it almost “steams” it and it stays super juicy!
OMG! I tried your stovetop chicken method. I can’t believe I have been cooking it wrong all these years! Your method is by far the best stovetop chicken I have ever cooked. I didn’t use your seasoning though, as I am currently in love with Adobo and black pepper as a seasoning for chicken. Thanks so much for the technique. I am going to try this with turkey breast cutlets too. Yum.
That’s the best part about this method – you can use any seasoning you like! We had this for dinner just last night. Still a favorite!
Try it with Herbes de Province and salt and pepper. It’s delicious.
The medium-high directions are misleading, my poor chicken breasts are burnt ?
Unfortunately each stove is different. Medium-high works perfectly on mine, however you have to use your discretion in your own kitchen.