This post may contain affiliate links. Please read our disclosure policy.
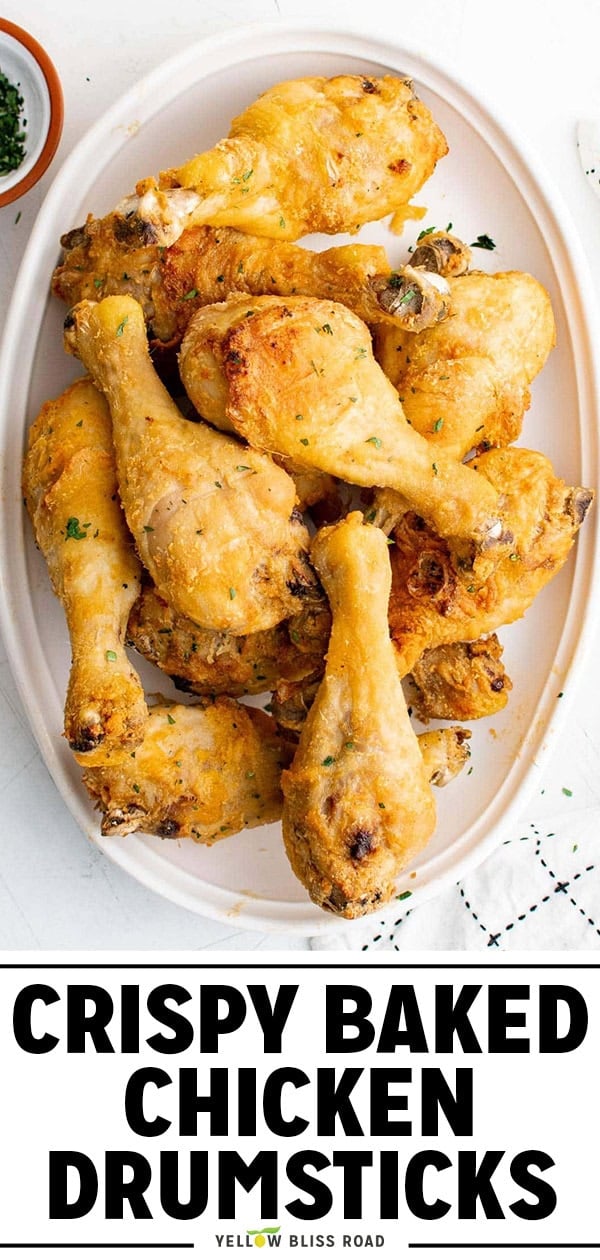
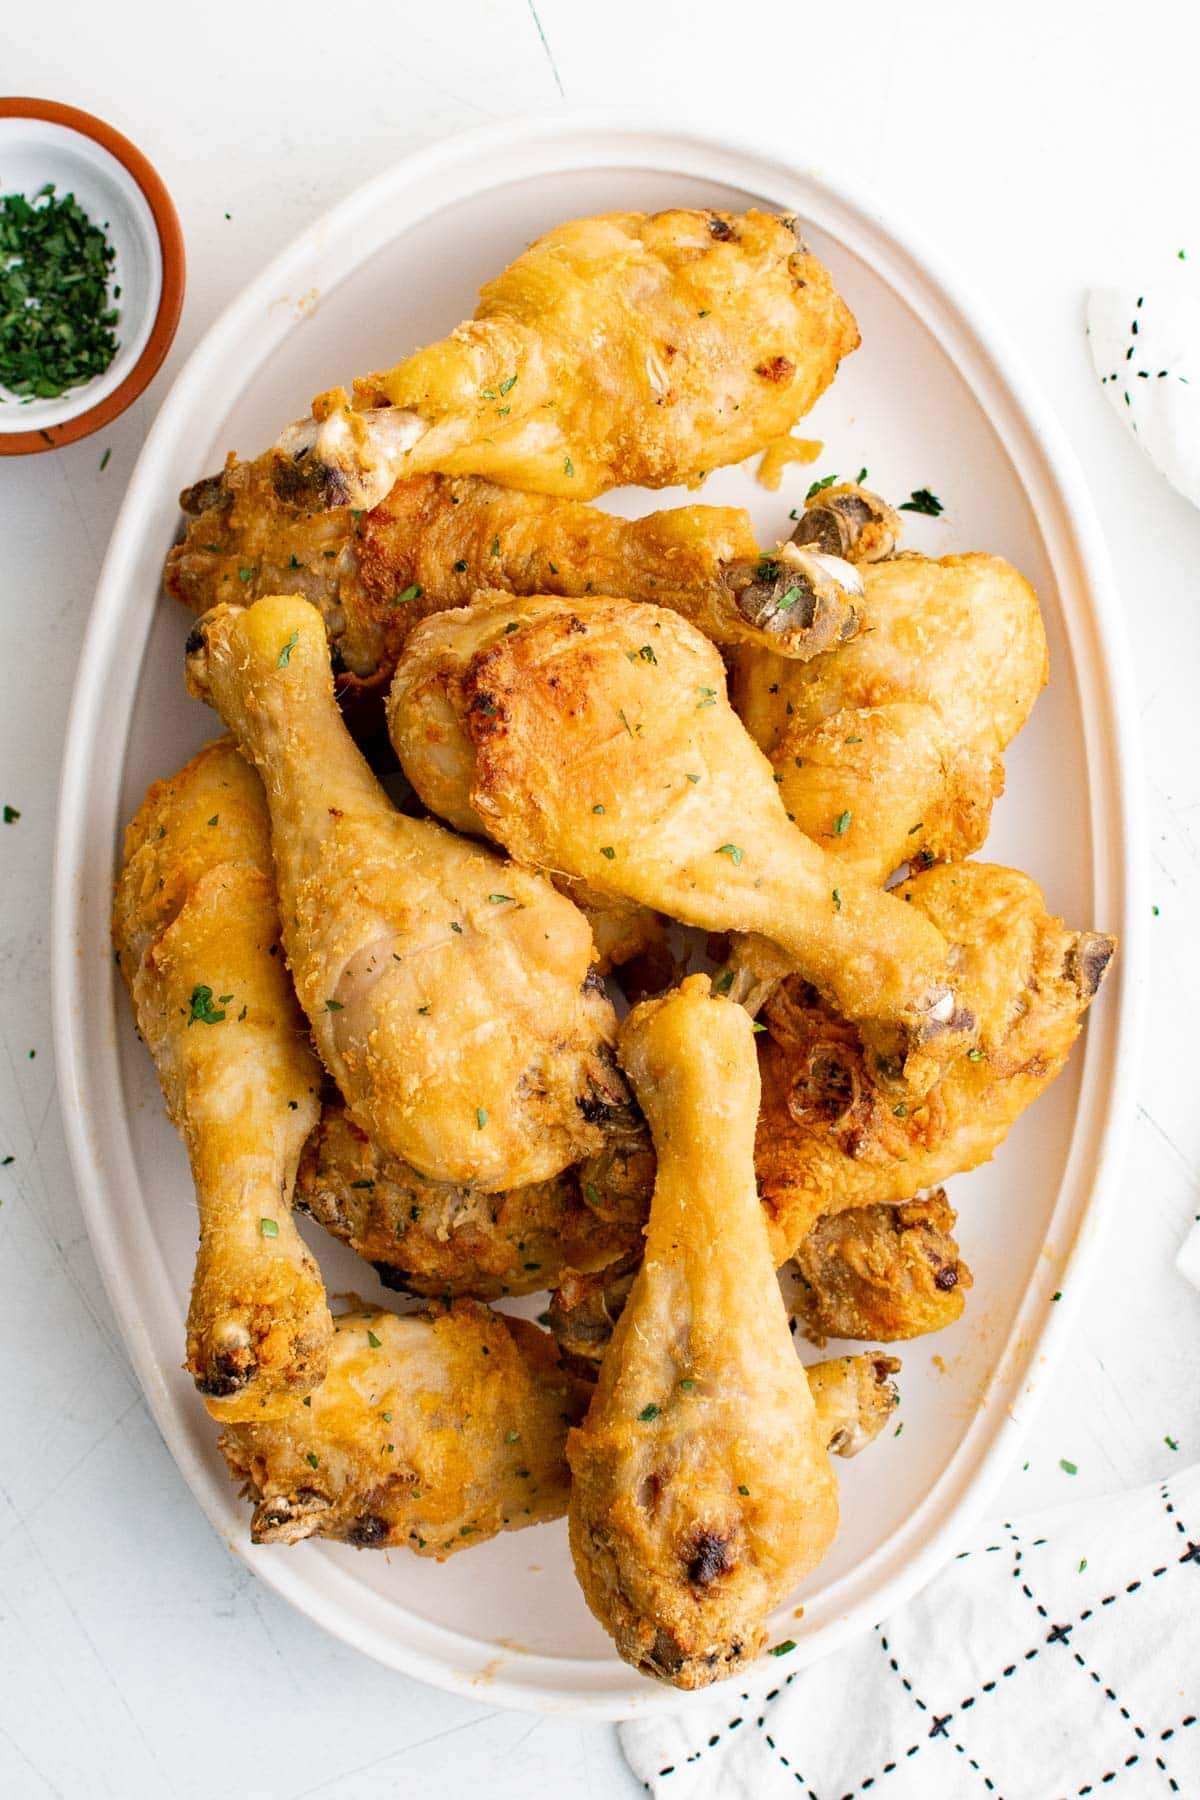
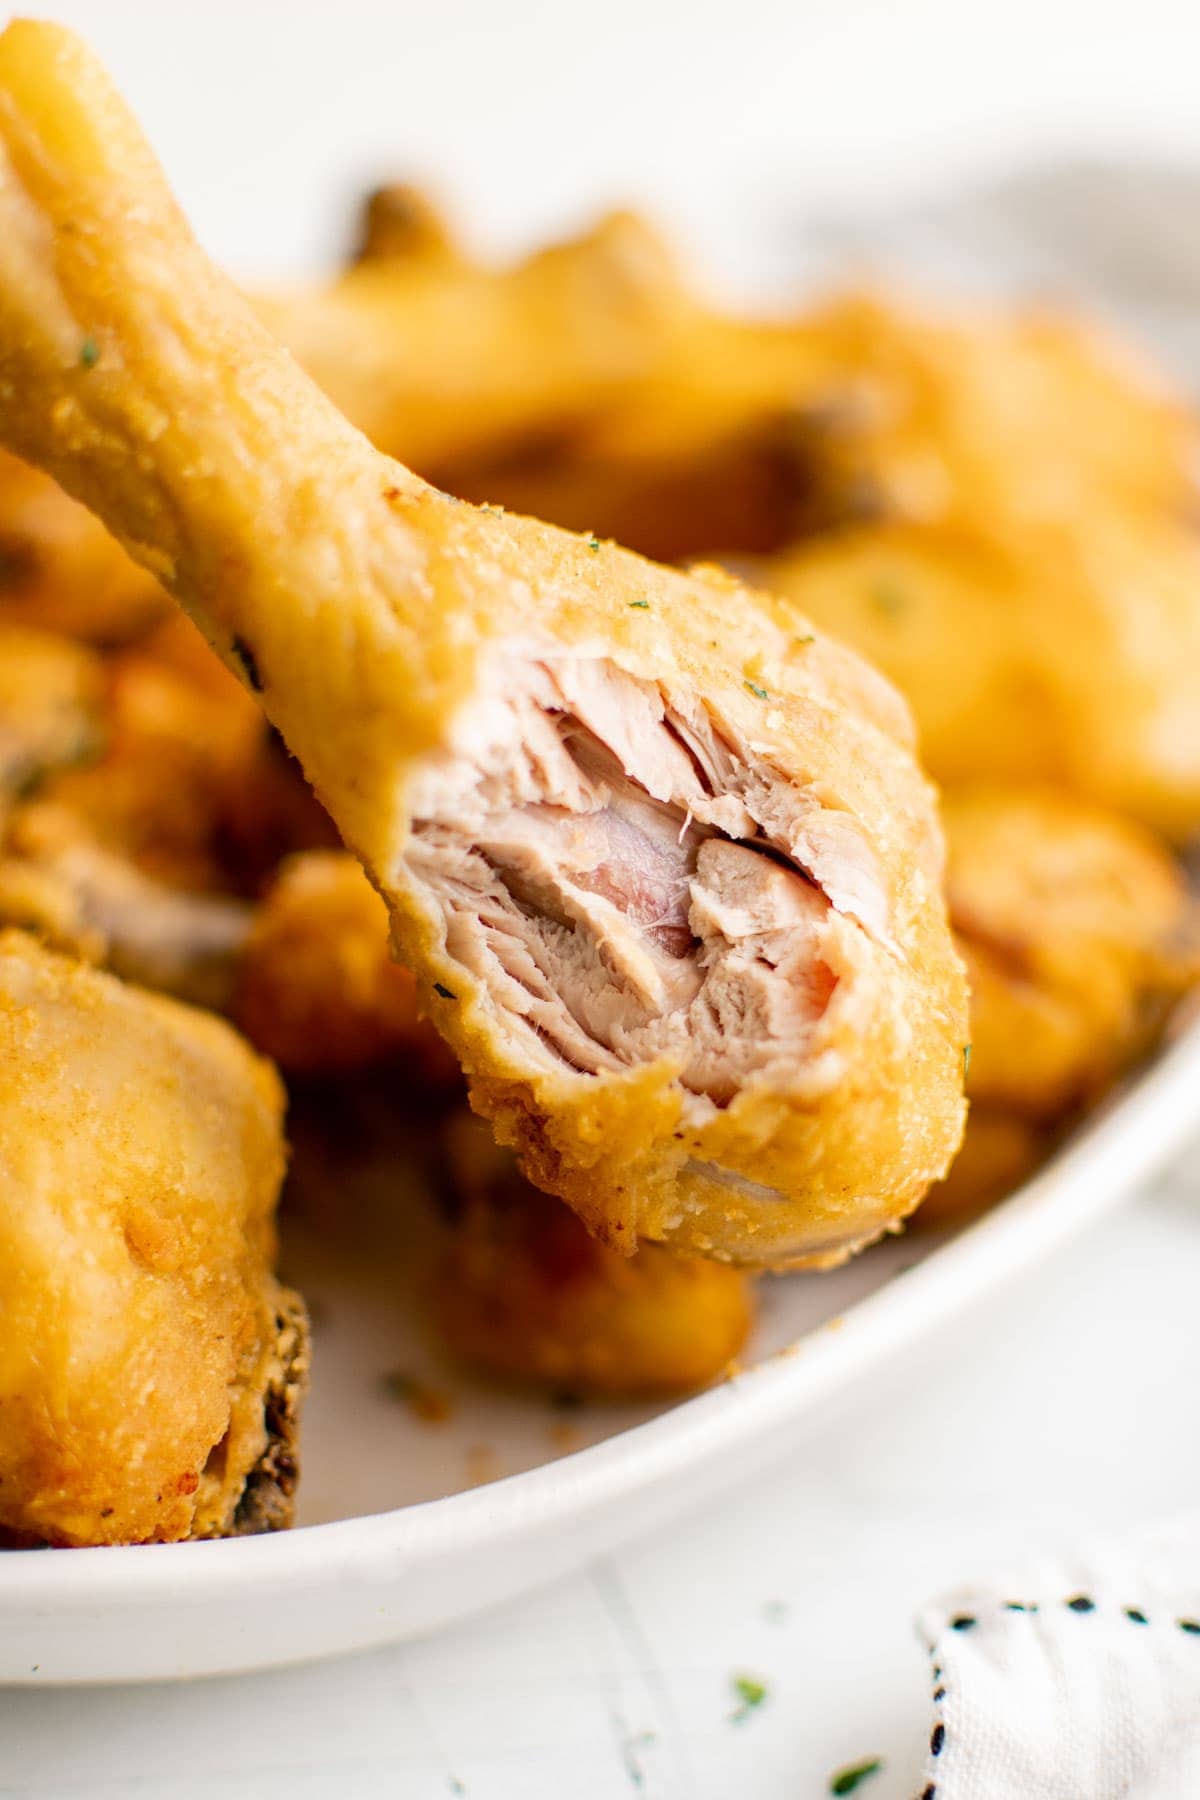
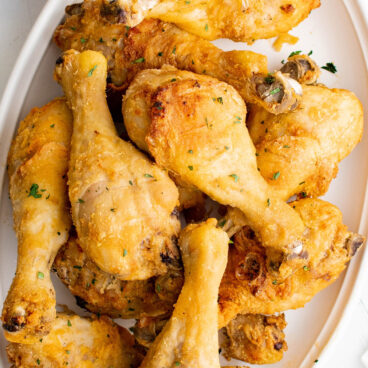
These Crispy Oven Baked Chicken Drumsticks come out juicy on the inside with perfectly crispy skin. No frying needed. A simple flour and baking powder coating does the work, and dinner is on the table in under an hour.
Love easy baked chicken? Try my Crispy Baked BBQ Chicken Wings, Crispy Baked Chicken Thighs, or classic Baked Chicken Breasts.
3 Tips That Really Matter For This Recipe
A few simple steps make the difference between soggy skin and a genuinely crispy drumstick. Keep these in mind before you start.
- Pat the chicken completely dry. The less moisture on the skin, the crispier it will get. For the best results, refrigerate the patted-dry drumsticks uncovered for a few hours or overnight.
- Don’t skip the baking powder. It reacts with the fats in the skin to create tiny bubbles that dry it out and produce that satisfying crunch. I use this same technique for my Crispy Baked Chicken Wings.
- Shake off the excess coating. Too much flour on the surface leaves a starchy, pale layer instead of a golden crust.
recipe walk-through
How to Make Crispy Oven Baked Chicken Drumsticks
Three steps and you’re done. Here’s exactly how to get perfectly crispy drumsticks every time.
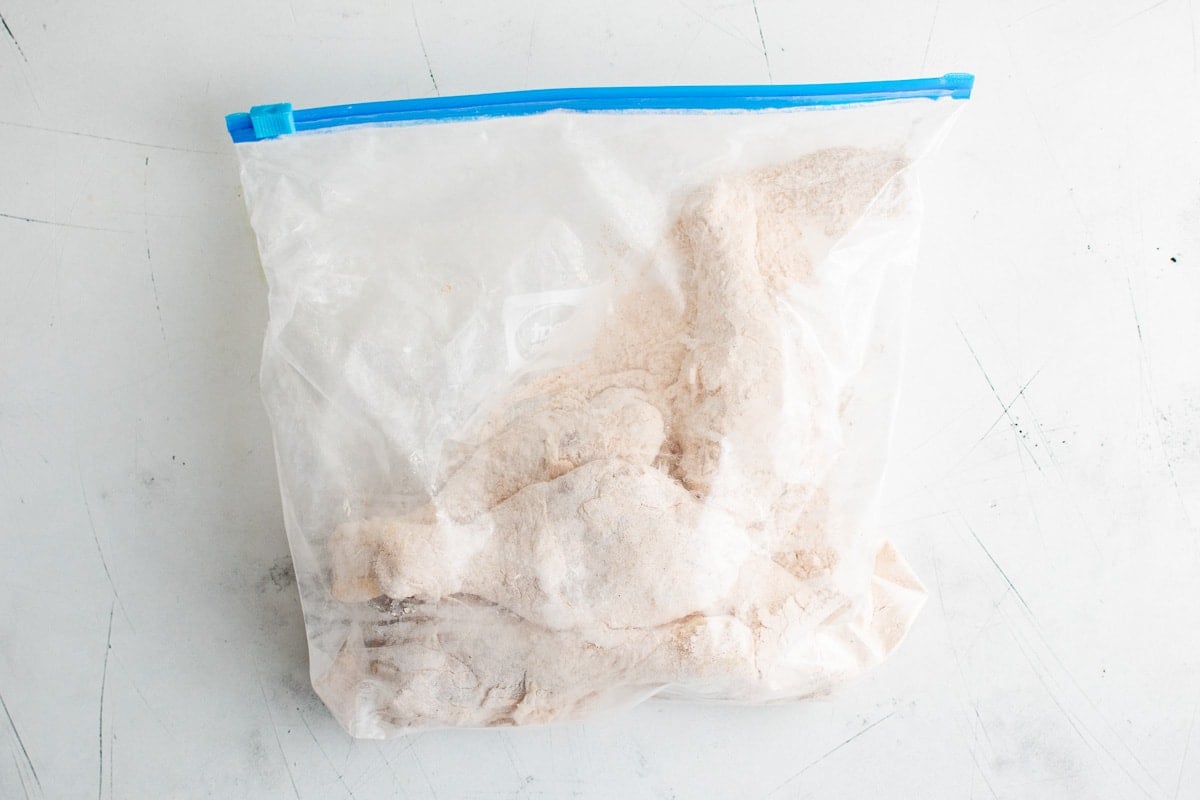
Step 1: Pat Dry and Coat
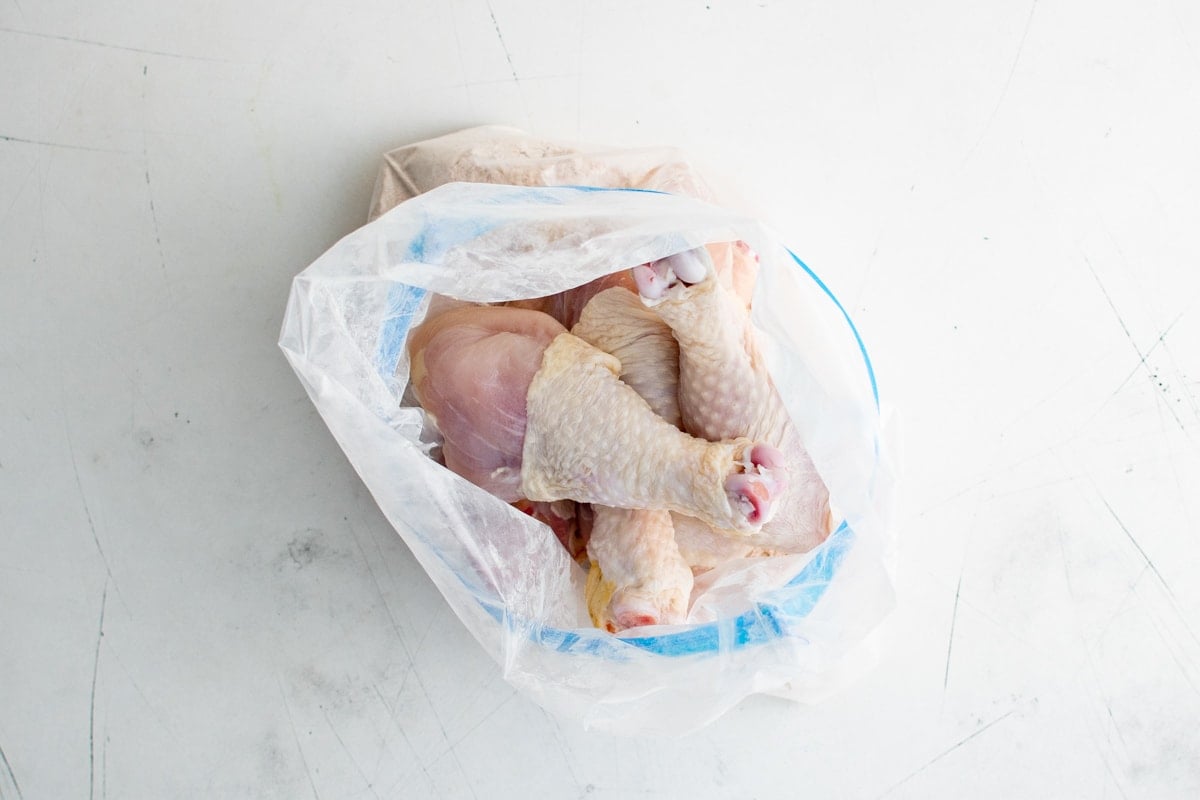
Pat the chicken as dry as possible with paper towels. This step is the foundation of crispy skin.
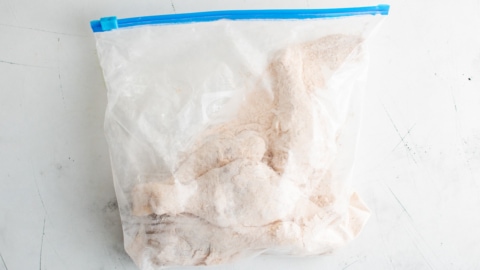
Place the drumsticks in a large zip-top bag a few at a time. Add the flour, baking powder, salt, garlic powder, paprika, and black pepper to the bag and shake well to coat. Give each piece a firm shake to knock off any excess before moving on.
Feel free to swap the seasoning blend for your favorite all-purpose chicken seasoning, or add a tablespoon of dry ranch mix, a pinch of cayenne for heat, or smoked paprika in place of regular paprika. The coating works with almost any spice combination.
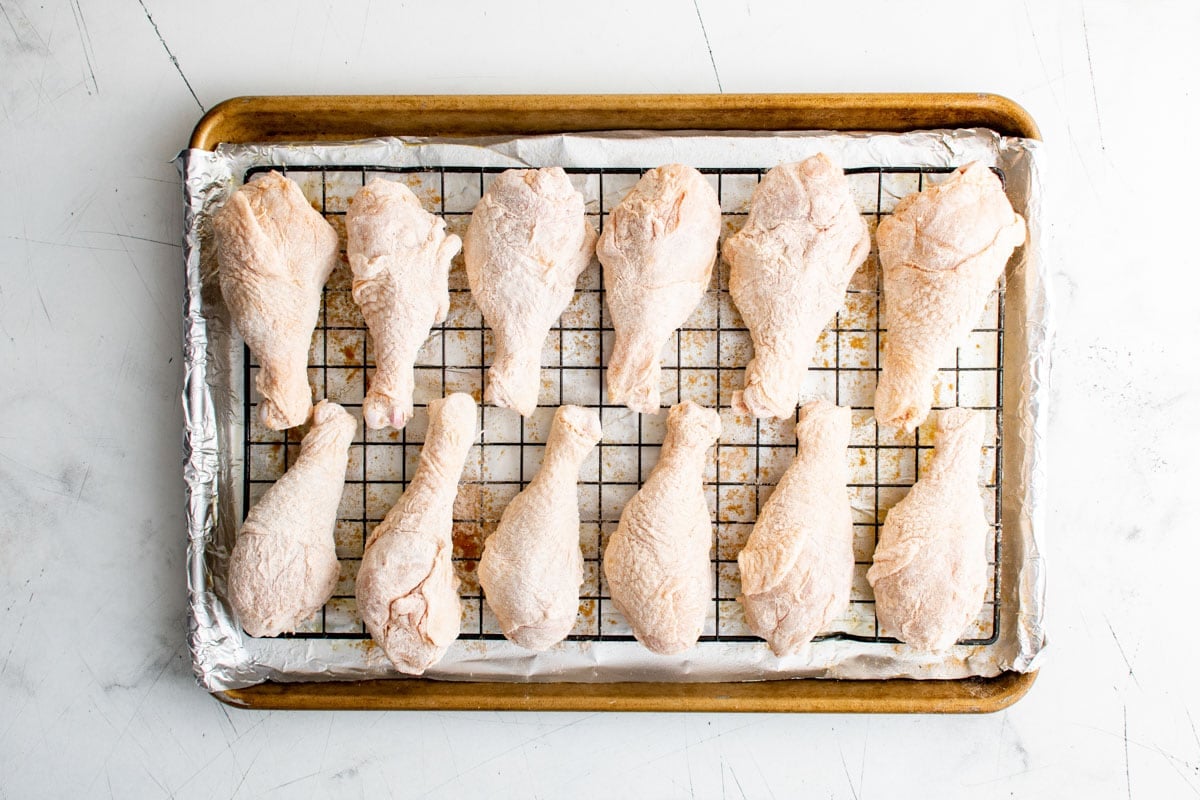
Step 2: Arrange on a Rack
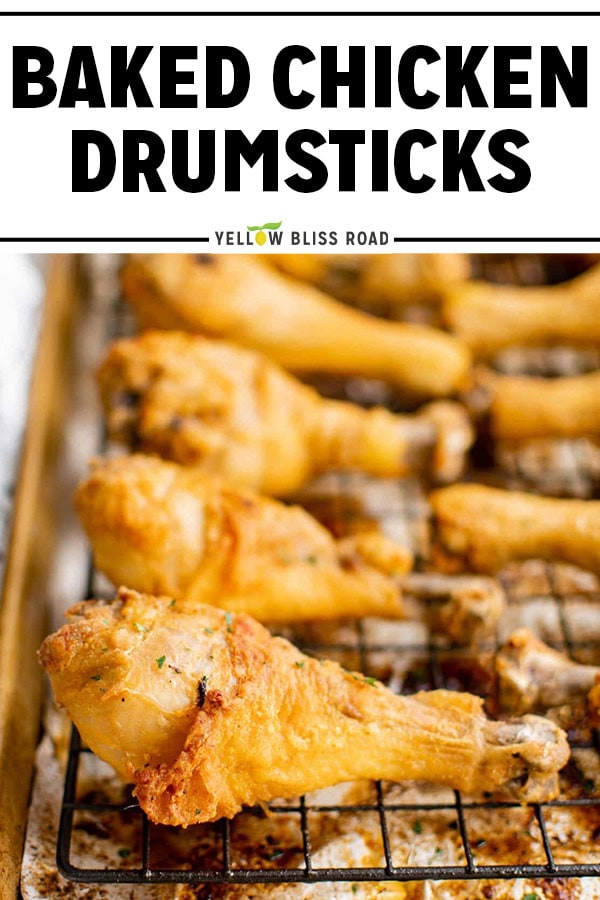
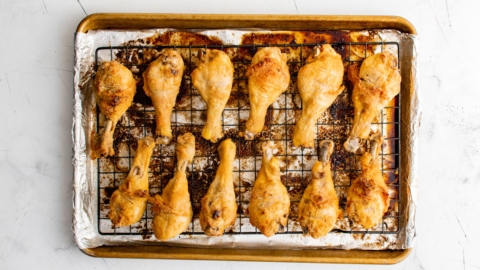
Set the coated drumsticks skin side down on a wire baking rack placed over a rimmed, foil-lined baking sheet. The rack lets hot air circulate all the way around each piece for even browning.
If you don’t have a rack, spray the foil generously with nonstick cooking spray and place the chicken directly on it. Pieces can be close together but should not be touching, with the larger pieces toward the outside of the pan.
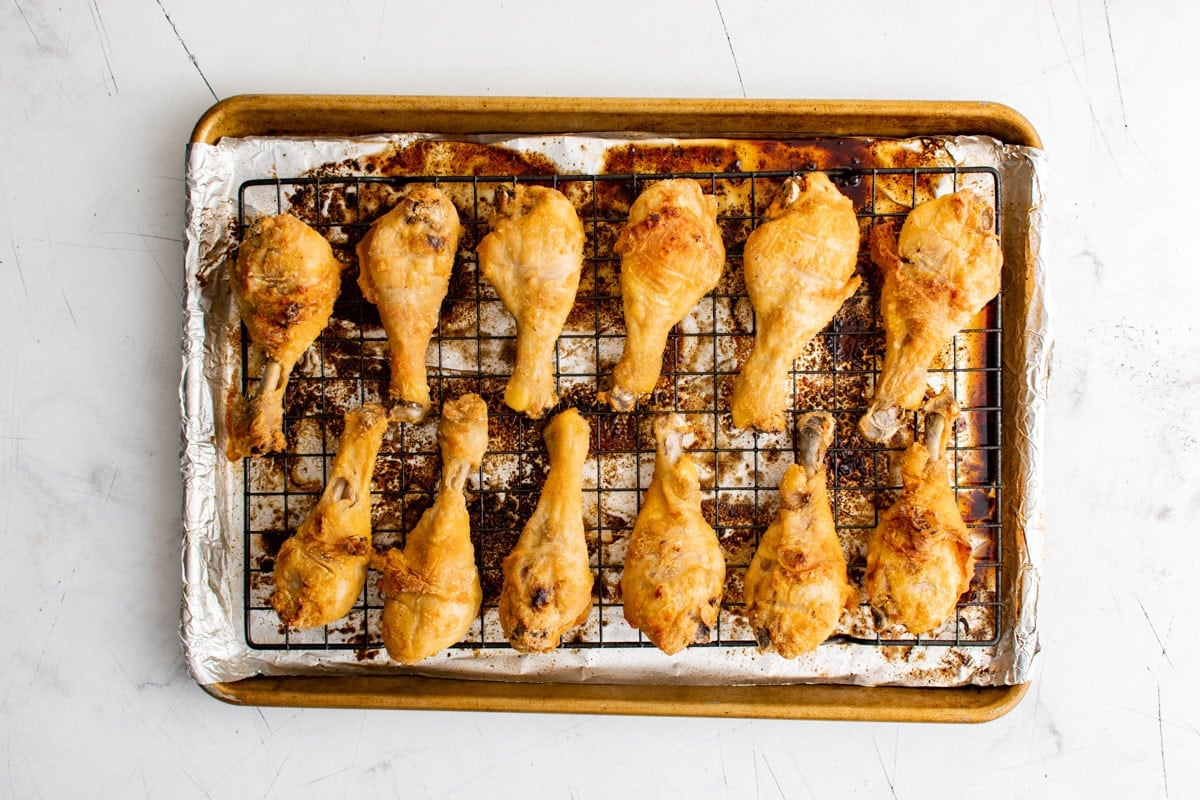
Step 3: Bake and Flip
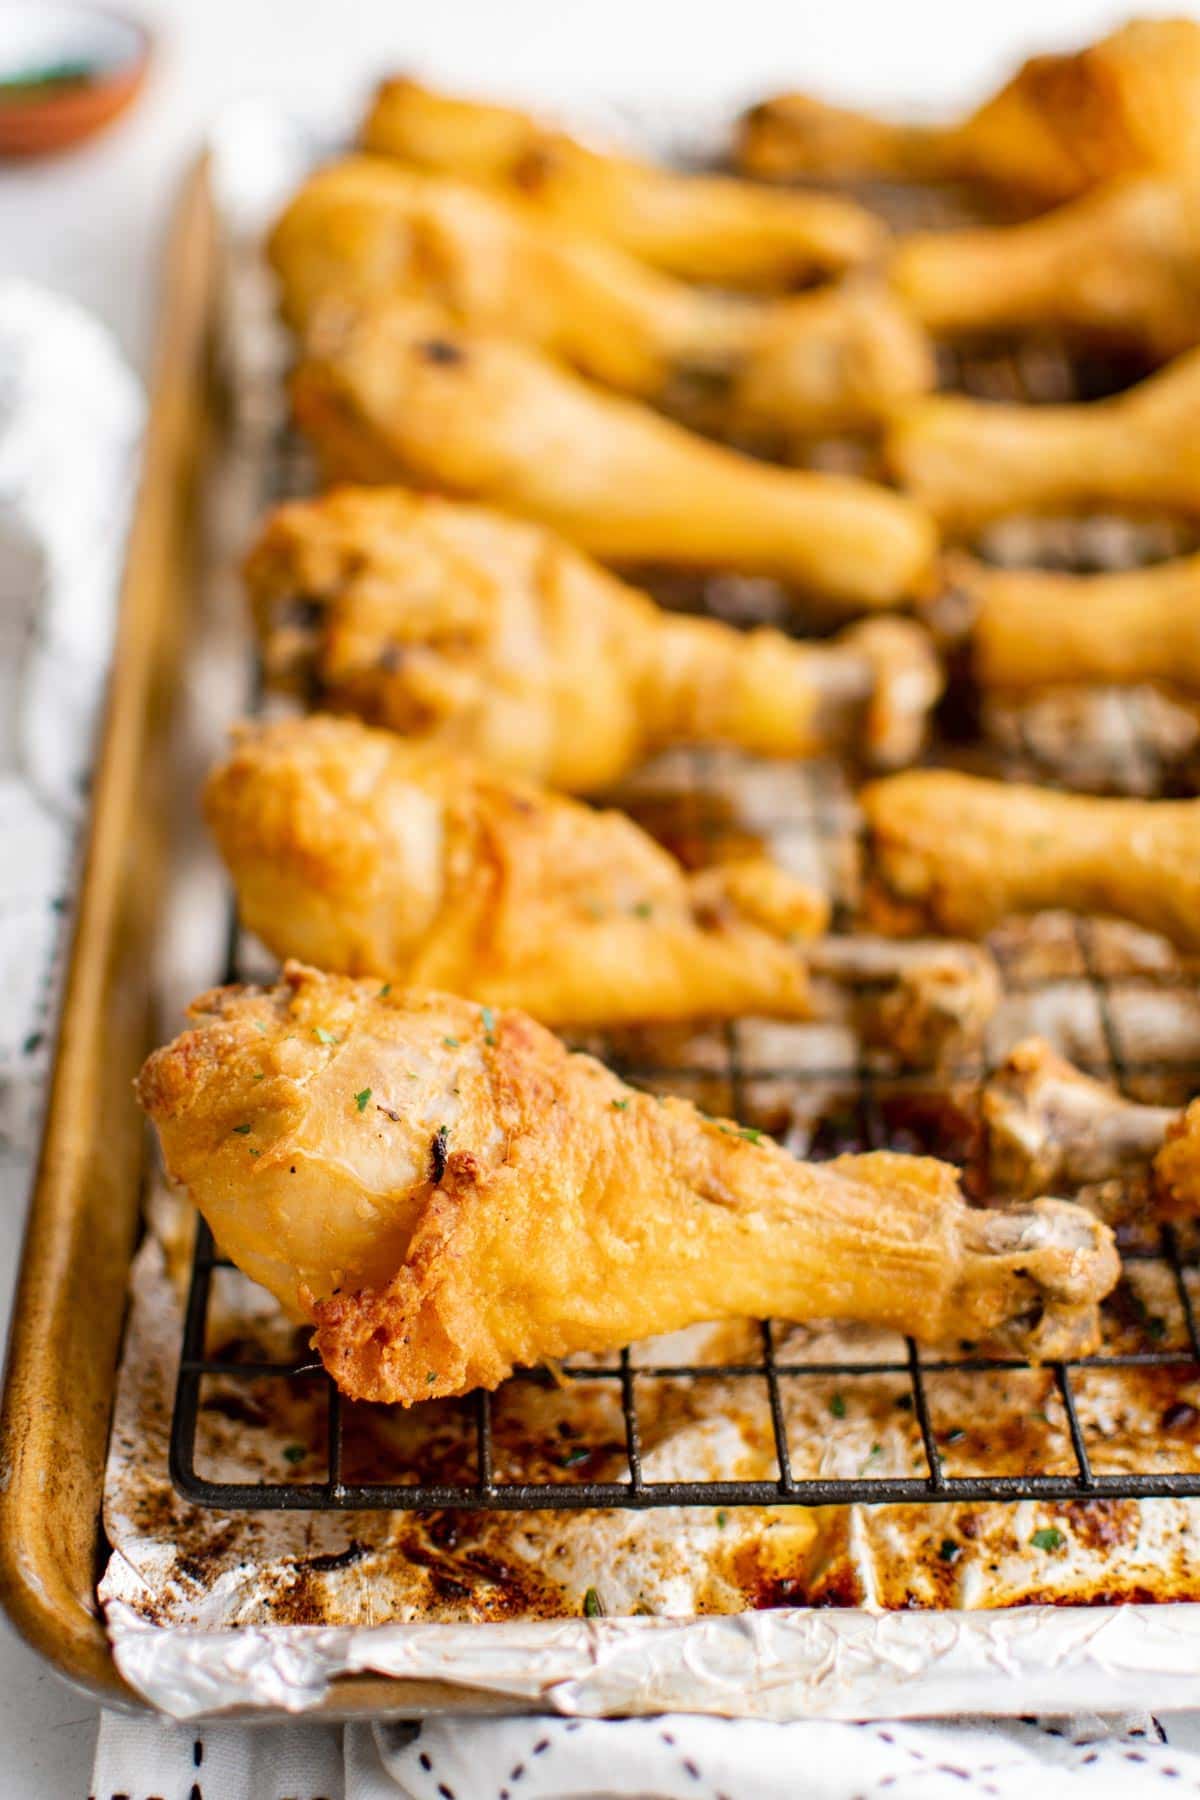
Bake at 425°F for 40 to 45 minutes, flipping the drumsticks after about 30 minutes. You’ll know they’re done when the skin is deep golden brown, the juices run clear, and a meat thermometer inserted near the bone registers 165°F.
For extra color, spray lightly with olive oil cooking spray and broil for 2 to 3 minutes at the end, watching closely.
Let the chicken rest for 5 minutes before serving.
Need more easy dinner ideas for busy nights? See all of my favorite easy weeknight meals in one collection.
What to Serve With Chicken Drumsticks
These drumsticks use an all-purpose seasoning that pairs well with just about any side. Here are some of our favorites:
- Crock Pot Mashed Potatoes: creamy and hands-off while the chicken bakes
- Baked Macaroni and Cheese: classic comfort food that’s great for feeding a crowd
- Cheesy Garlic Bread: easy to throw together with a loaf from the freezer
- Seasoned Rice with Herbs and Garlic: a simple, flavorful base that complements the chicken nicely
- Honey Roasted Carrots: a little sweetness to round out the plate
Storage Tips
Storage and Reheating
Store leftovers in an airtight container in the fridge for up to 3 to 4 days. Sometimes I cook extra just to have them on hand. The meat pulls off the bone beautifully for sandwiches and salads.
Reheat in the oven at 350°F for 5 to 10 minutes or pop them in the air fryer to keep the skin crispy. The microwave works in a pinch (60 to 90 seconds), but the skin won’t be crispy. Honestly, they’re also pretty great cold straight from the fridge.
Freeze by placing cooled drumsticks in an airtight freezer-safe container for up to 6 months. Thaw completely in the fridge before reheating.
Frequently Asked Questions
Should you bake chicken drumsticks covered or uncovered?
Uncovered, always. Covering the pan traps steam, which makes the skin soft and prevents browning. Baking uncovered at high heat is what gives you that golden, crispy exterior.
How do you keep chicken drumsticks from drying out in the oven?
Two things help the most: don’t overcook them, and don’t skip the flour coating. The coating seals in moisture while the skin crisps up. Pull the drumsticks when a thermometer near the bone reads 165°F. The juices should run clear, not pink. Cooking past that point is where they start to dry out.
Do you need to flip drumsticks in the oven?
Yes, and it’s worth doing. Flip them after about 30 minutes so both sides get evenly browned and crispy. If you’re using a wire rack, the airflow does some of that work for you, but flipping still gives you the best result.
Can you bake chicken legs from frozen?
It’s not recommended with this recipe. The drumsticks need to be completely thawed and patted dry before coating. Frozen chicken releases too much moisture as it thaws in the oven, which works against the crispy skin you’re going for. Thaw them in the fridge overnight for best results.
More Chicken Drumstick and Wing Recipes
- Crispy Baked Chicken Wings
- Baked Honey Mustard Chicken Drumsticks
- Lemon Garlic Baked Chicken Drumsticks
- Slow Cooker BBQ Chicken Drumsticks
- Slow Cooker Asian Chicken Drumsticks
Crispy Oven Baked Chicken Drumsticks
Ingredients
- 4 pounds chicken drumsticks bone-in, skin-on
- 2/3 cup all-purpose flour
- 2 tablespoons baking powder
- 2 teaspoon kosher salt
- 3 teaspoons paprika
- 2 teaspoons garlic powder
- 3/4 teaspoon black pepper
Instructions
- Preheat oven to 425°F. Line a large rimmed baking sheet with foil and place a wire baking rack on top. If you don't have a rack, spray the foil generously with nonstick cooking spray.
- Pat the chicken drumsticks completely dry with paper towels. The drier the skin, the crispier it will get.
- Combine the flour, baking powder, salt, paprika, garlic powder, and black pepper in a large zip-top bag. Add the drumsticks a few at a time and shake to coat evenly. Give each piece a firm shake to remove excess coating before setting it on the rack.

- Arrange the drumsticks skin side down on the rack in a single layer, with larger pieces toward the outside. Pieces can be close together but should not touch.
- Bake for 40 to 45 minutes, flipping the drumsticks after 30 minutes. They're done when the skin is deep golden brown and a thermometer inserted near the bone reads 165°F with juices running clear. For extra color, spray with olive oil cooking spray and broil for 2 to 3 minutes, watching closely.
- Let rest 5 minutes before serving.

Notes
- Pat completely dry. The less moisture on the skin, the crispier it gets. For extra-crispy results, refrigerate the patted-dry drumsticks uncovered on a baking sheet for a few hours or overnight before coating.
- Don’t skip the baking powder. It reacts with the skin’s fats to create crunch. You can use a little less, but don’t omit it.
- Shake off excess coating. Too much flour on the surface can result in a pale, starchy crust instead of a golden one.
- No wire rack? Spray foil-lined pan generously with nonstick cooking spray and place chicken directly on it. The rack gives better airflow, but the chicken will still crisp up without one.
- Seasoning swaps: The spice blend is flexible. Try your favorite all-purpose chicken seasoning, add a tablespoon of dry ranch mix, or use smoked paprika for a smokier flavor.
- Storage: Refrigerate leftovers in an airtight container for up to 3 to 4 days.
- Freeze: Cool completely, then freeze in an airtight container for up to 6 months. Thaw in the fridge before reheating.
- Reheat: Best results in the oven at 350°F for 5 to 10 minutes or in the air fryer. Microwave works in a pinch but won’t keep the skin crispy.
Nutrition
Nutritional Disclaimer Kristin Maxwell of “Yellow Bliss Road” is not a dietician or nutritionist, and any nutritional information shared is an estimate. For accurate calorie counts and other nutritional values, we recommend running the ingredients through your preferred online nutritional calculator. Calories and other nutritional values can vary depending on which brands were used.

I tried adding instant mashed potatoes to this. Really came out good!
…. Thank You for Sharing to this old .. (er) guy.
You are so welcome Mack! Thanks for stopping by.