This post may contain affiliate links. Please read our disclosure policy.
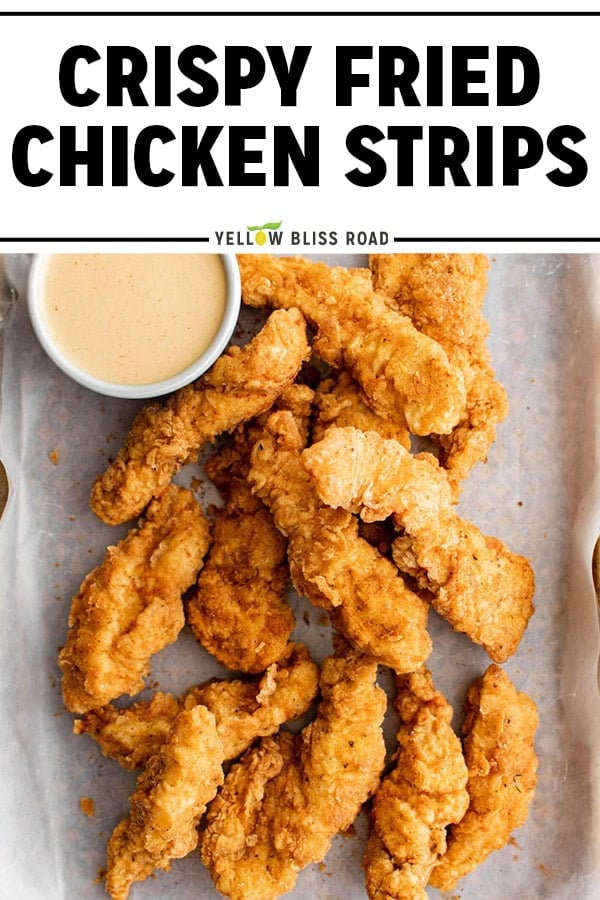
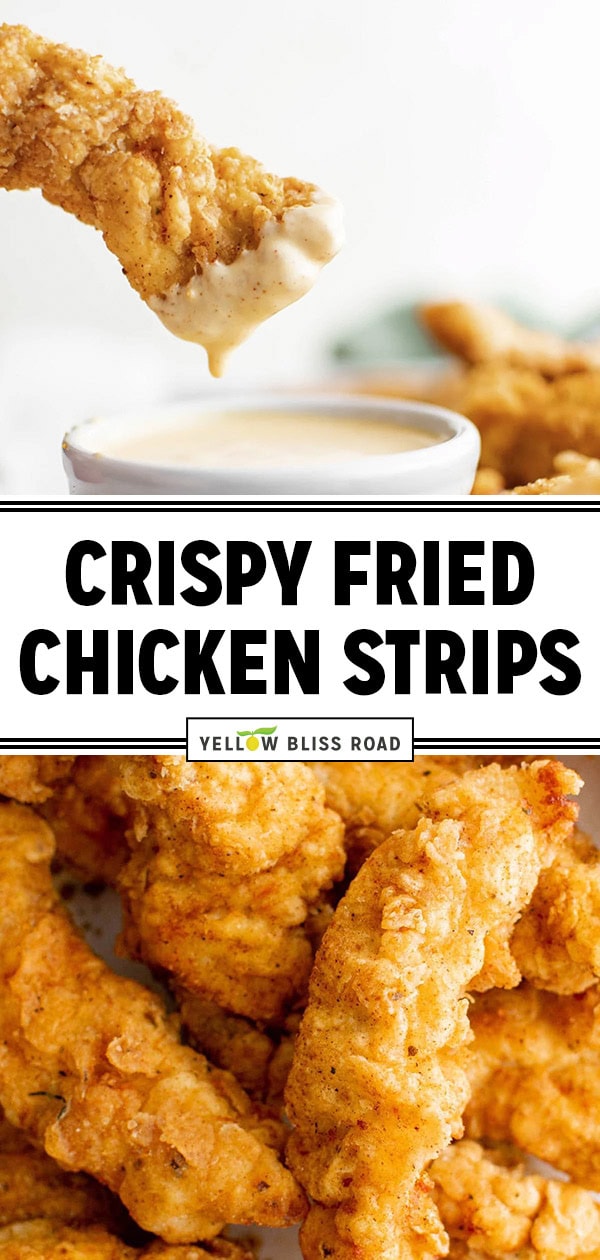
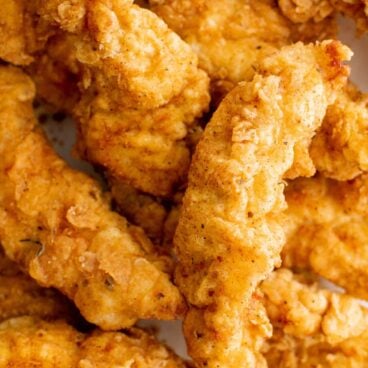
These crispy fried chicken strips are golden, juicy, and ready in about 30 minutes. A simple seasoned flour coating gives them that satisfying crunch, and you can customize the spice level however you want. They’re way better than anything from a drive-thru and perfect for busy weeknight dinners.
If you love chicken tenders, try Baked Chicken Tenders for an oven-baked version, Air Fryer Chicken Tenders for a quicker option, or these tangy Copycat Cracker Barrel Chicken Tenders.
3 Tips That Make or Break This Recipe
A few things to know before you start that will make a big difference in how these turn out.
- Dry the chicken thoroughly before breading. This is the number one reason breading falls off during frying. Pat each piece well with paper towels so the flour sticks and stays put.
- Keep your oil at 375°F. If the oil isn’t hot enough, the coating soaks up grease instead of crisping. A deep-fry thermometer takes the guesswork out, especially if you’re newer to frying.
- Fry in small batches, 3 to 4 pieces at a time. Adding too many pieces at once drops the oil temperature fast, which leads to soggy, unevenly cooked chicken. Give each piece space in the pan.
RECIPE WALK-THROUGH
How to Make Crispy Chicken Strips
See the recipe card below for full, detailed instructions
This recipe uses a simple flour-egg-flour dredge that gives you a golden, crunchy coating without a heavy batter. The key is working through each step with dry hands and keeping your setup organized.
Step 1: Cut and Prep the Chicken
Start with boneless, skinless chicken breasts and cut them lengthwise into strips about 1 inch thick.
Skip the actual chicken tenderloins at the grocery store if you can. They have a tough tendon running through the center that’s difficult to chew. If you do use tenderloins, trim that tendon out with a sharp knife or kitchen shears before breading.
Pat the strips dry with paper towels and set aside.
Step 2: Set Up the Dredging Station
Mix together the flour, cajun seasoning, onion powder, and garlic powder in a large shallow bowl or dish. In a second bowl, whisk the eggs with a tablespoon of water.
Taste your seasoning blend first. Some store-bought cajun seasonings are very salty. Start with 2 tablespoons and add more if you want it stronger. For a milder, kid-friendly version, skip the cajun seasoning and use garlic powder, onion powder, paprika, salt, and pepper instead, or try this all-purpose Chicken Seasoning.
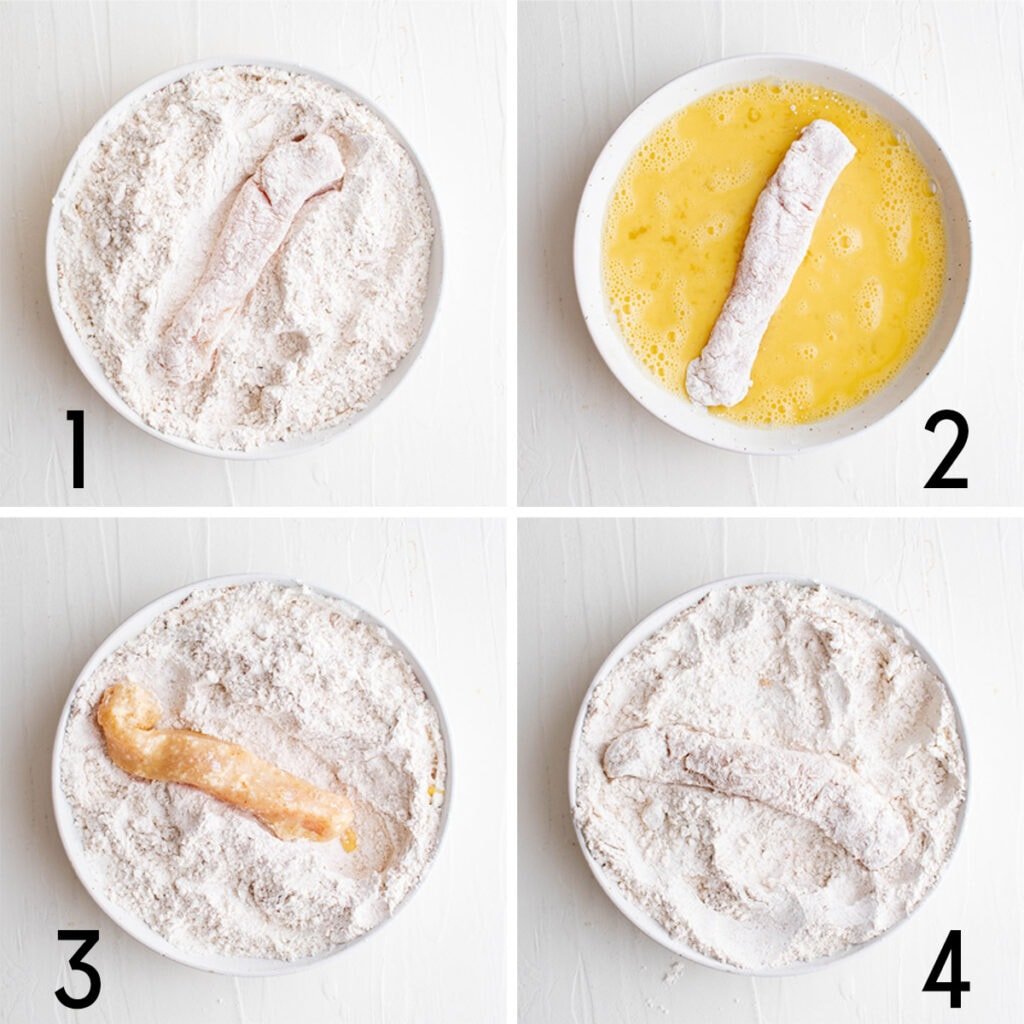
Step 3: Bread the Chicken Strips
Working one piece at a time, dip the chicken into the flour mixture, then the egg, then back into the flour. Press the flour firmly onto each piece so the coating sticks well.
Set breaded strips on a wire rack while you work through the rest.
Use one hand for dry ingredients and one for wet. This keeps your fingers from turning into a clumpy mess and makes the process much faster.
Step 4: Heat the Oil
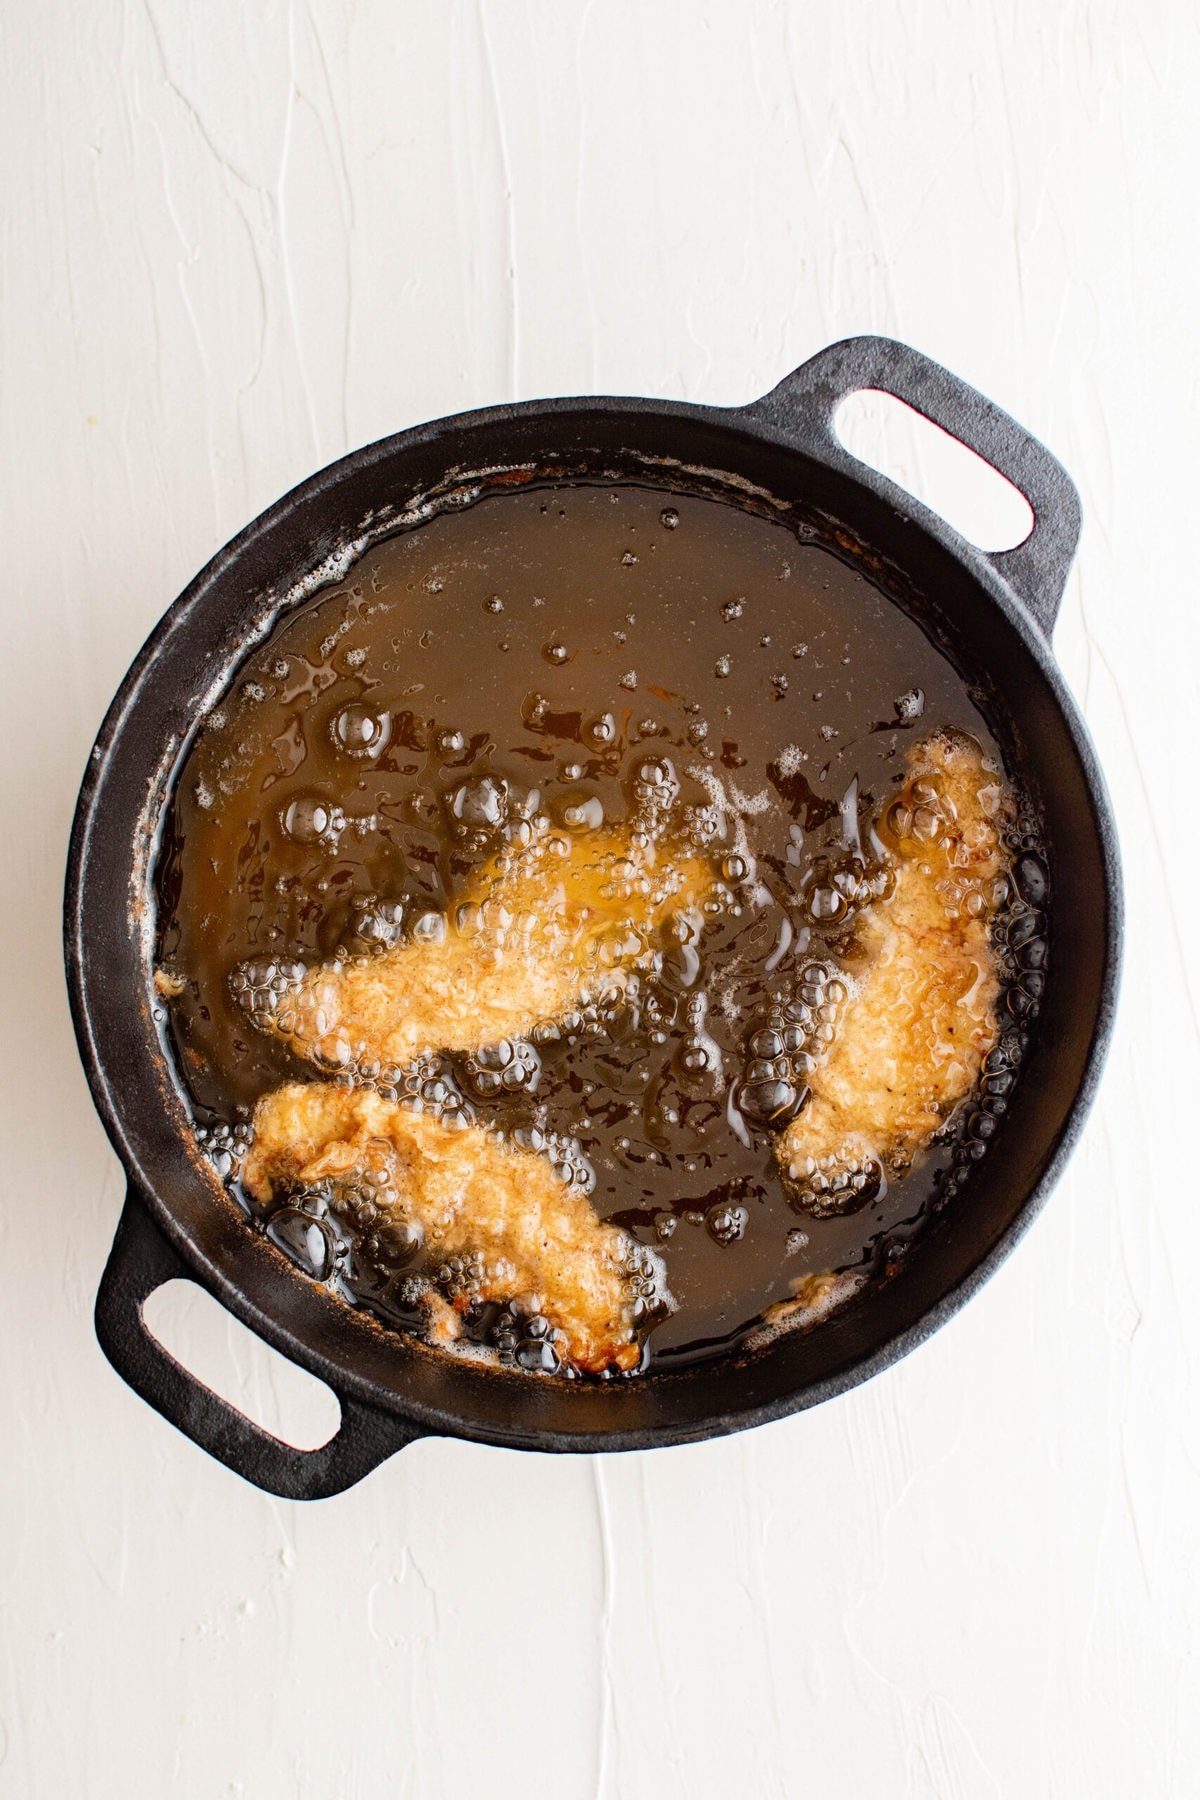
Pour oil to a depth of about 2 inches in a large cast iron skillet, dutch oven, or deep heavy-bottomed pot. Heat over medium-high until the oil reaches 375°F. Stick with a high smoke point oil like canola, vegetable, peanut, or avocado oil.
New to frying? A temperature-regulated electric skillet or deep fryer can make things easier since it holds a steady temperature for you. A cast iron skillet works great too, just keep your thermometer handy and adjust the heat as needed.
Step 5: Fry Until Golden and Crispy
Carefully add 3 to 4 chicken strips to the hot oil, one at a time. Let them fry without moving for about 5 minutes until golden on the first side, then flip and cook another 6 to 7 minutes until the second side is golden brown.
The internal temperature should reach 165°F on a meat thermometer.
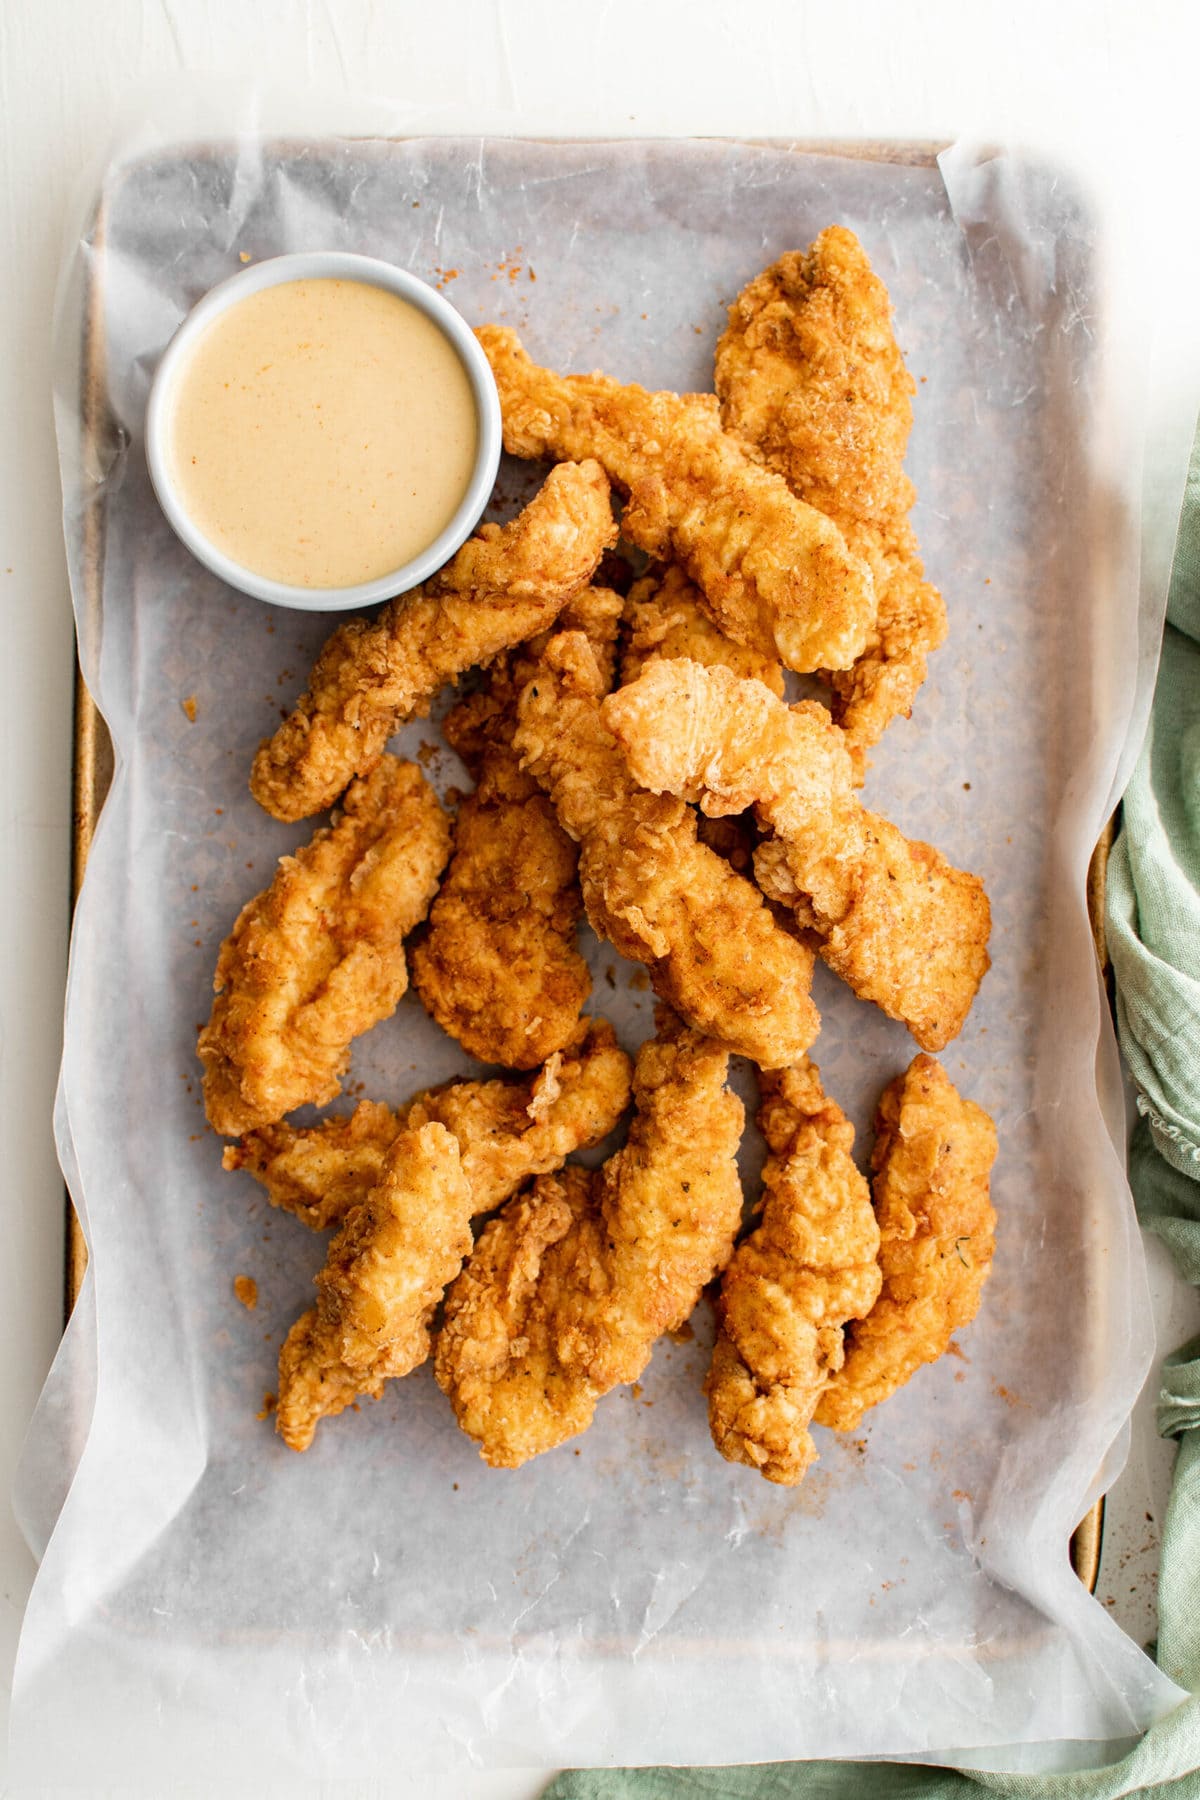
Transfer finished strips to a wire rack set over a baking sheet to drain. Repeat with the remaining chicken, returning the oil to 375°F between batches. You’ll end up frying 2 to 3 batches total.
If your oil starts smoking, pull the skillet off the burner for a minute and reduce the heat. If the coating seems soggy or is falling off, the oil likely isn’t hot enough, so turn the heat up slightly.
Browned but not fully cooked? If the outside looks done but the chicken hasn’t hit 165°F, transfer to a baking sheet and finish in a 400°F oven until it reaches a safe temperature. This happens sometimes with thicker pieces.
Serving Suggestions
Fried chicken strips are versatile and work for dinner, lunch, snacks, or even breakfast. Since frying is a hands-on process, simple sides are the way to go.
Classic sides:
- Slow Cooker Mac and Cheese
- Homemade French Fries
- Air Fryer Tater Tots
- Sweet Potato Wedges
- Garlic Green Beans
- Sour Cream Cornbread
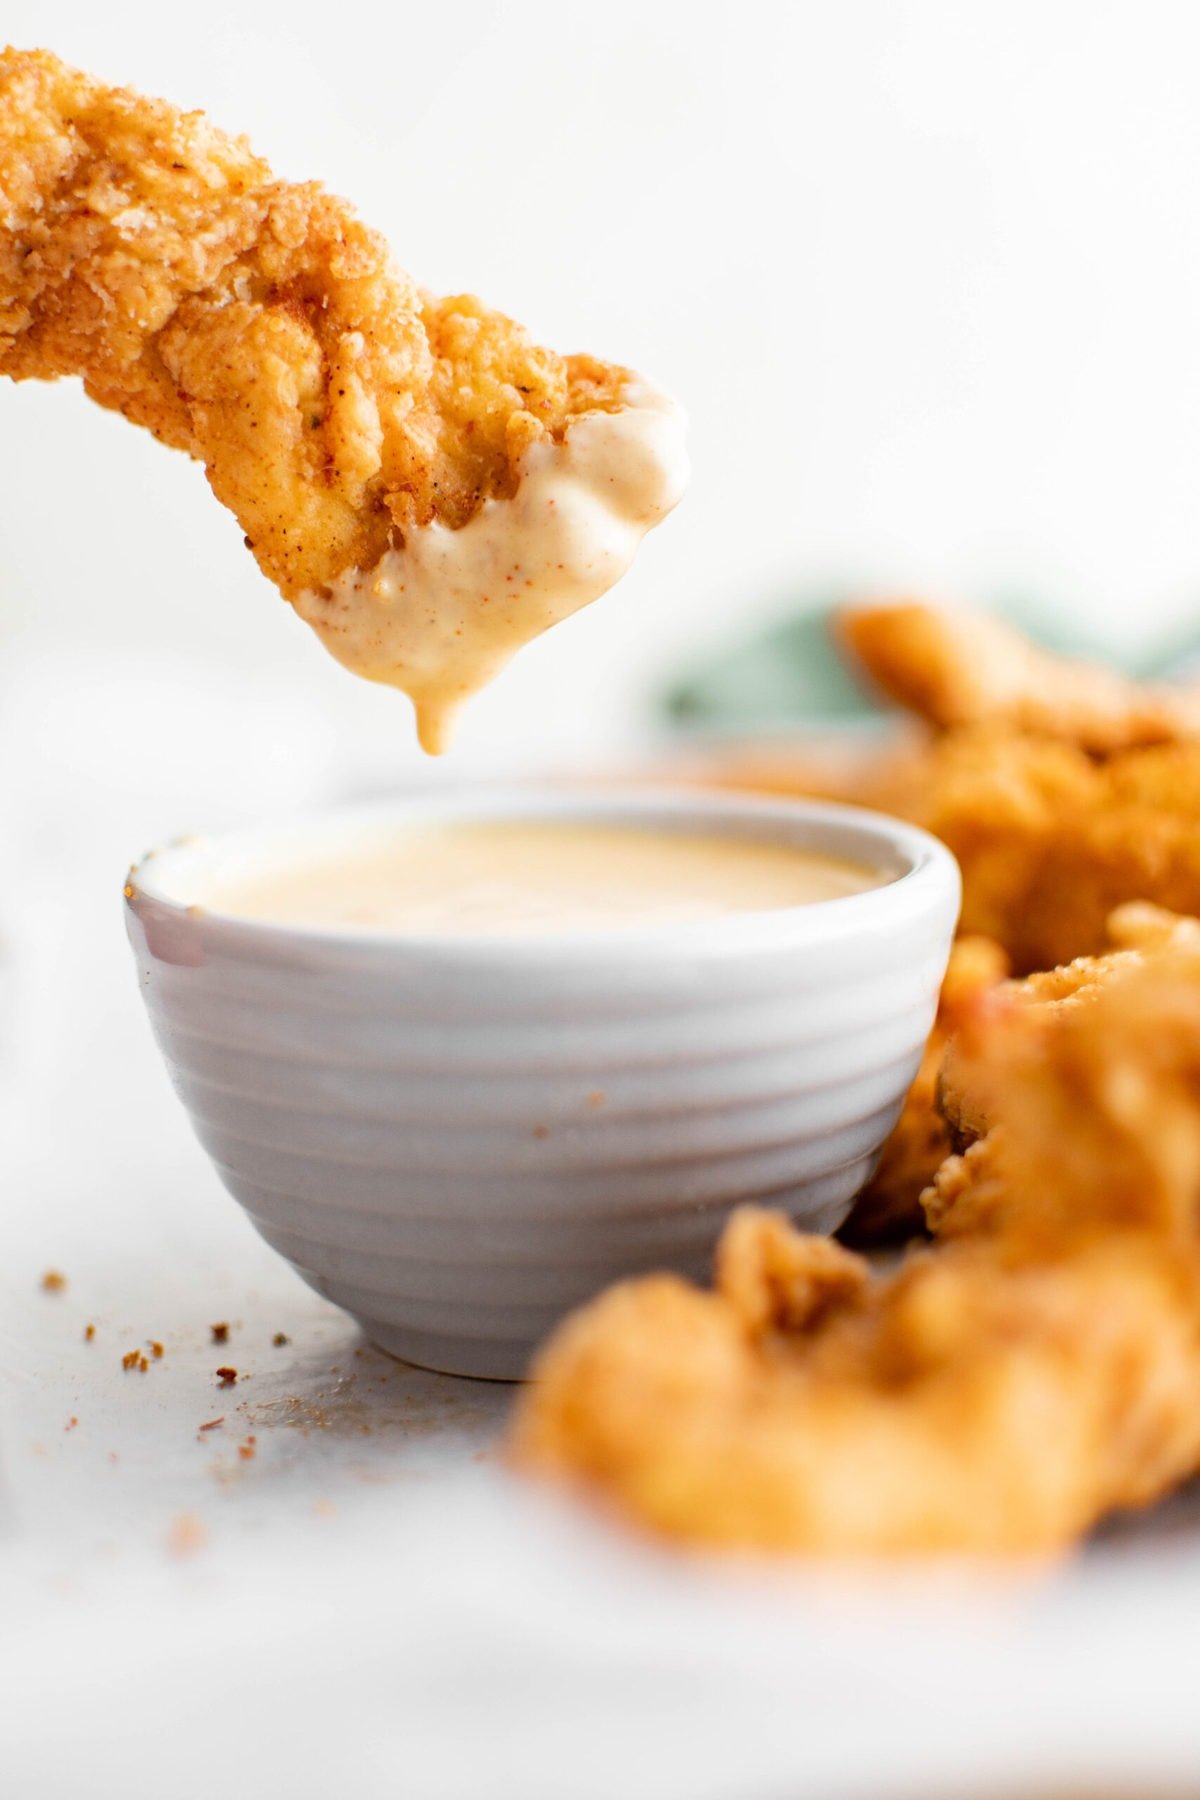
Dipping sauces:
For a fun twist, serve the chicken strips on Homemade Biscuits for a chicken biscuit sandwich, or alongside Homemade Waffles for chicken and waffles.
You can also dice them up and toss into a Crispy Chicken Salad, or pack them in lunchboxes for school.
For cookouts, pair them with Southern Potato Salad and Slow Cooker Baked Beans.
Storage Tips
Storage, Freezing, and Reheating
Storage: Let the chicken strips cool completely, then store in an airtight container in the fridge for up to 4 days.
Freezing: Place cooled strips in a single layer on a baking sheet and freeze until firm, then transfer to freezer-safe bags or containers. They’ll keep for up to 4 months. This is a great recipe to double for easy freezer meals.
Make Ahead: You can bread the chicken strips up to 24 hours before frying. Layer parchment paper between the breaded pieces and store in an airtight container in the fridge. Let them sit at room temperature for 15 to 20 minutes before frying.
Reheating: Reheat thawed strips on a baking sheet in a 350°F oven for about 10 minutes, or until crispy and warmed through. The air fryer works great too, about 5 to 10 minutes at 380°F. From frozen, bake on a sheet pan at 375°F for about 30 minutes.
Frequently Asked Questions
How do I get the breading to stick to chicken strips?
The most important step is drying the chicken really well with paper towels before you start dredging. Moisture on the surface prevents the flour from sticking, which causes the whole coating to slide off during frying. When you dip each piece in flour, press it firmly so it adheres. Letting the breaded strips rest on a wire rack for a few minutes before frying also helps the coating set.
Can I use chicken breast instead of chicken tenderloins?
Yes, and it’s actually recommended. Chicken breasts cut into strips give you more control over the size and don’t have the tough tendon that runs through actual chicken tenderloins. Cut boneless, skinless breasts lengthwise into strips about 1 inch thick for the best results.
What oil is best for frying chicken?
Use a neutral oil with a high smoke point. Canola, vegetable, peanut, and avocado oil all work well. Avoid olive oil or butter, as they’ll burn at the temperatures needed for frying. Whatever oil you choose, make sure there’s about 2 inches of depth in the pan.
Can I bake these chicken strips instead of frying?
You can, but the texture will be different. For a baked version with a crispy coating, try these Baked Chicken Tenders or Crispy Cheesy Baked Chicken Tenders, which are specifically developed for the oven.

More Crispy Chicken Recipes
- Crispy Chicken Cutlets
- Fried Chicken Thighs
- Crispy Cheesy Baked Chicken Tenders
- Crispy Dill Chicken Sandwich
- Air Fryer Chicken Tenders
Crispy Fried Chicken Strips
Ingredients
Seasoned Flour Coating:
- 1 ½ cups all-purpose flour
- 2 tablespoons cajun seasoning (can increase up to 4 tablespoons for stronger flavor)
- 1/2 teaspoon onion powder
- 1/2 teaspoon garlic powder
Egg Wash:
- 2 eggs
- 1 tablespoon water
Chicken and Oil:
- 2 pounds boneless, skinless chicken breast trimmed and cut lengthwise into 1-inch thick strips
- Canola, vegetable, or peanut oil for frying (enough for about 2 inches of depth in your pan)
Instructions
- Prep the workspace. Line a baking sheet with paper towels and place a wire rack on top if you have one. This is for draining the fried chicken.
- Mix the seasoned flour. In a large, shallow bowl or dish with sides, whisk together the flour, cajun seasoning, onion powder, and garlic powder.
- Make the egg wash. In a second shallow bowl, beat the eggs and water together.
- Bread the chicken. Pat the chicken strips very dry with paper towels. Working one piece at a time, dip into the flour mixture, then into the egg wash, then back into the flour, pressing to coat well. Place breaded chicken on the wire rack or baking sheet.
- Repeat with remaining chicken strips and let them rest while you heat the oil.
- Heat the oil. Pour oil to a depth of 2 inches in a large cast iron skillet or deep, heavy-bottomed pot. Heat over medium-high to 375°F. Use a deep-fry thermometer to check.
- Fry the chicken. Carefully add 3 to 4 breaded strips to the hot oil one at a time. Fry until golden brown on the first side, about 5 minutes, then flip and cook until golden on the second side, about 6 to 7 minutes more. The internal temperature should reach 165°F.
- Drain and repeat. Transfer fried strips to the wire rack to drain. Return oil to 375°F, then fry the next batch. You'll have 2 to 3 batches total.
- Serve warm with your favorite dipping sauce.
Notes
- Cajun seasoning: This is our family’s favorite blend, but feel free to use any seasoning you like. For a milder version, use garlic powder, onion powder, paprika, salt, and pepper, or try this all-purpose Chicken Seasoning.
- Seasoning saltiness: Taste your cajun seasoning before adding it. Some brands are very salty. Start with 2 tablespoons and increase to taste.
- Chicken cut: Sliced chicken breast is recommended over actual chicken tenderloins, which have a tough tendon running through the center. If using tenderloins, trim the tendon out first.
- Dry the chicken well. This is the most important step for getting the breading to stick. Moisture on the surface will prevent the flour from adhering.
- Oil temperature matters. Keep the oil at 375°F throughout cooking. Too cool and the coating absorbs oil and gets soggy. Too hot and the outside browns before the inside cooks through.
- Don’t overcrowd the pan. Fry 3 to 4 pieces at a time with space between them. Overcrowding drops the oil temperature.
- Browned but not cooked through? Transfer to a baking sheet and finish in a 400°F oven until the chicken reaches 165°F internally.
- Egg-free option: If you need to skip the eggs, buttermilk works as a binder for the flour coating. Dip in buttermilk instead of the egg wash.
- Make ahead: Bread the chicken up to 24 hours in advance. Layer parchment between pieces, store in the fridge, and bring to room temperature for 15 to 20 minutes before frying.
- Storage: Store cooled strips in an airtight container in the fridge for up to 4 days. Freeze in a single layer, then transfer to freezer bags for up to 4 months.
- Reheating: Reheat thawed strips at 350°F for about 10 minutes or air fry at 380°F for 5 to 10 minutes. From frozen, bake at 375°F for about 30 minutes.
Nutrition
Nutritional Disclaimer Kristin Maxwell of “Yellow Bliss Road” is not a dietician or nutritionist, and any nutritional information shared is an estimate. For accurate calorie counts and other nutritional values, we recommend running the ingredients through your preferred online nutritional calculator. Calories and other nutritional values can vary depending on which brands were used.
When we want chicken tenders, this is my go to recipe. SO good! Everyone in our house really like it. Much better than deli chicken tenders. For the Cajun seasoning, I use diy Emeril Lagasse’s Bayou Blast recipe, with a bit more ground cayenne pepper. There was more than enough seasoned flour and enough egg. With some recipes, I’ve run out in the process, and that’s a pain. Thank you!
So glad you enjoy the recipe! Thanks for stopping by.
Great tasting and easy! The whole family loves these! Thank you!
You are so welcome Shannon! Thanks for stopping by.
Thank you so much because I am craving Chicken today 🙂 But Could you give me some ideas for dipping sauce to eat with this recipe but is not ketchup and chili sauce like KFC. Thank you so much!